|
Saturday, March 26, 2005 - Well, I spent
the day today in the shop getting some more work done on getting
the cab's floorpans cleaned up. In my last update from last
weekend, I mentioned that I'd gotten started on that, but
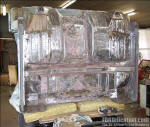
neglected to take any pictures. So before I got started today, I
took a shot of what I'd accomplished last weekend (Fig. 1).
I
made a trip to the hardware store prior to getting started and
picked up a good supply of sandpaper, sandpaper discs and
wire-wheel attachments for the angle grinder and drill....and
then got started. It was a LONG day of sanding, sanding, and
more sanding. As mentioned on the previous page, I'm planning on
using roll-on Herculiner bedliner to coat the floorpans, and
since I don't want to EVER have to do this again in the future,
I'm doing my best to make sure that it stays put once it's
applied...and that means proper prep work is crucial. While it
wasn't necessary to take it down to bare metal, I decided to do
that anyway as much as possible.
I'd
only been using the grinder for about an hour when all of a
sudden it just stopped, like it had been shut off....no noises,
no funny smells....it just turned off. I tinkered with it for a
few minutes without any luck, so I decided to just go get
another. The one I was using was an inexpensive model that had
REALLY been put through it's paces over the past couple years,
so I guess it was just it's time. I almost bought a nice Makita,
but decided to get another cheapie...considering how hard I tend
to use these. The one pictured in Fig. 2 is what I got for $35
at the local farm supply store....and it seems to be an exact
copy of the old one, except for a different brand name. Within 5
minutes of getting it back to the shop, it was plugged in and
getting a workout.
I
was amazed at how relatively easy the composite stripper wheel
(pictured in Fig. 2) cut through the paint, primer and
especially the rust! I was very impressed. So much so that I
decided to go back and get a few more, but apparently I grabbed
the last one they had, so after it was used up I had to make do
with the other tools and supplies. However, I DO intend to get a
bunch of these by the time I'm ready to start stripping the
firewall and inner floorpans. The wire wheel attachments for the
angle grinder were able to handle of majority of the cleaning,
but of course there were nooks and crannies that nothing could
reach, so I spent a great deal of time with sandpaper and my
fingers, doing my best to hit every single area I could reach.
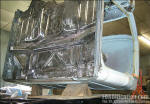
Because the cab was setting on some old couch cushions, the
leading edge of the work area was pushed down into the cushions,
so I had to block it up to gain access to that edge (Fig. 3).
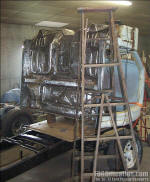
After that area was completed, I had to dig out the step ladder
to reach the cab mount areas and lower firewall. I stripped up
to the lower firewall lip, which is as high as the Herculiner
will go. From that lower edge upwards it will be painted.
I
had to call it a day about 6PM since my wife had to work
tonight. I have roughly another afternoon's worth of work yet to
do, with some last minute sanding touch-ups here and there and
then I plan to hit the whole floorpan area one last time with
some very aggressive-grit sandpaper, to give the Herculiner
something to bite into permanently. I should be able to finish
the sanding and prep next weekend, and the following weekend
will be able to finally apply the Herculiner....and maybe even
get the cab bolted back down! Stay tuned for updates! |

Fig. 1 - Here's a quick shot showing the progress I
made last weekend.

Fig. 2 - Here's a shot of all the supplies I used today.
The blue composite stripper wheel was the quickest by far....but
it gets used up quickly.

Fig. 3 - I had to prop the cab up on a couple blocks of
wood to get access to the lower portion.

Fig. 4 - After cleaning everything I could reach
from the ground, I had to use the stepladder to reach the upper
portions.

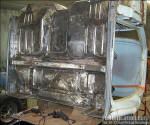
Fig. 5 - Here's the last good shot I took close to the
end of the day. I did do a little more work, but the pic that
was supposed to be the final shot didn't turn out. |