FORDification.com
   (powered by Google)


  HOME

  Technical Articles

  Factory Literature

  Discussion Forums

  Photo Galleries


  Service Bulletins (TSBs)

  Decoding Your VIN

  Diagrams & Schematics

  Links & Resources

  In the Movies

  Downloads
  Member Meet & Greets

  In the Media

  Site Index

 MISC / PERSONAL

  My Truck Projects

  My Heinz 57 '67

  I've Been Censored!

  Contact


You are here: Home My Truck Projects The '67 Day 1 - Pictured as Received
Back to My '67 Project Index
Day 1 - Pictured as Received


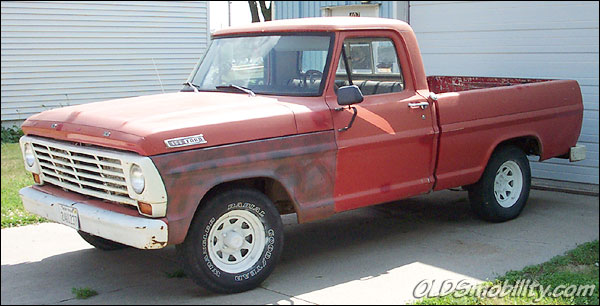
Fig. 1 - Passenger side


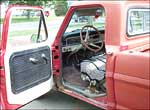
Fig. 2 - Interior
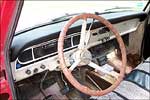

Fig. 3 - Interior
Much of this interior will be salvaged and installed into a replacement cab
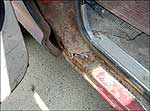

Fig 4 - Left-side rocker


June 24, 2003
- I've been keeping my eyes open for an older Ford pickup to use as a daily driver and yesterday saw this one in a local front yard with a For Sale sign in it. The seller was asking $800 for it, I offered $600...we settled on $700. I drove it to the shop (about 6 blocks away) a few minutes later.

This truck is equipped with a 240cid inline 6-cylinder, with a column-shift manual 3-speed. This is about as basic as a pickup can get, with manual steering and manual drum brakes. While at first glance it appears to be pretty solid, let me assure you that it's gonna take a little work. While the box is in pretty good shape, the cab is probably going to need to be replaced. The floorpans are virtually non-existent, the cab corners are toast and have been gooped up with fiberglass patches by a previous owner, the cab supports are rusted away at both sides, and the right front cab mounting point is completely gone! There's a piece of 1x4 lumber between the frame and cab on the passenger side holding it up. The white spoke wheels are (were) rusted and pitted, and the previous owner shot them with a white rattle-can paint job...you can see the overspray on the tires. The 6-banger runs great, however...although the clutch definitely needs some adjustment, as the vibration you get when you put it into gear and let out on the clutch will rattle the teeth out of your head!

Basically, I thought it was worth the money paid. I believe I can get a good cab from somebody who owes me a favor, so it's just going to take a couple weekends worth of work to replace it and a few other things here and there, like the rusted-away rear bumper. (The front bumper is in great shape!)

 
Fig. 5 - Tailgate and bumper
Both of these will get replaced

Fig. 6 - Passenger door


Fig. 7 - Front grille
and bumper

In perfect condition!


Fig. 8 - Engine    


     Fig. 9 - Engine

The engine is a 240cid inline 6 and runs well.


Fig. 10 - The box
Other than the obligatory small dents and two small rust holes, it's in very good shape


Fig. 11 - The flasher switch
Just hanging by wires in the glove box

Fig. 12 - Dash
This will need to be doctored up to fix some previous owner's hack job to install a stereo


Fig. 13 - Dash
Some minor imperfections, but this will suffice for a daily driver.


Fig. 14 - Instrument panel
This is in remarkably good shape, barely requiring a cleanup

Fig. 15 - Headliner
Good enough for a driver...I wonder what somebody had mounted to the roof, though.


Fig. 16 - Fuel tank
The one thing I hate about early Ford trucks is the in-cab fuel tank.


Fig. 17

    Fig. 18

This hand lever was installed on the transmission hump. It connected to a steel cable which ran through a small pipe attached to the length of the frame, exiting by the rear bumper where the cable was looped. What the heck was THIS used for, I wonder???

The Rust


Fig. 19 - Passenger side hood hinge area
(inside view)


Fig. 20 - Passenger side hood hinge area
(outside view)


Fig. 21 - Driver's side
hood hinge area


Fig. 22 - The bed
Other than this small rust hole in the rear of the bed and another identical hole on the opposite side, it's in pretty good shape.


Fig. 23
The passenger floorboard doesn't look TOO bad with the dual rubber mats...


Fig. 24
...until you lift the mats and
see that there really isn't a
whole hell of a lot
down there!...


Fig. 25
...and it doesn't get any better looking at it from the bottom side. The frame bracket for the cab mount is there, but the cab mount itself is completely gone...and an industrious previous owner has propped up this side of the cab with a 1x4.


Fig. 26 - Driver's side
rear cab corner


Fig. 27 - Another view of the driver's side rear cab corner and floorboard


Fig. 28 - Driver's side front cab corner
At least it's THERE...unlike that for the passenger side!


Fig. 29 - Driver's side
radiator support


Fig. 30 - Passenger side radiator support
Not as bad as the driver's side, but still bad enough.


Fig. 31 - Passenger side radiator support
This is a view from inside the right front wheelwell.


Fig. 32 - Left rear spring - The previous owner was actually driving it like this!

 
This is where I sit at the moment, a day after purchasing this truck. Tentatively, my plans are to simply replace the cab (and possibly the front sheetmetal) with solid used parts. Other things will get fixed immediately, like the broken rear spring, the clutch adjustment and the rear bumper. Then I'll start driving this on a daily basis, while continuing to do minor repairs and upgrades as time and money allow. I have a friend with several pickups parked in a field which he said I could strip for parts, so the next step is to get started there.
 

first  previous

next   last


Home  |  Back to My '67 Project Index  |

You are here: Home My Truck Projects The '67 Day 1 - Pictured as Received


Want to link to this site? Please save this banner to your hard drive to place on your webpage.
The correct link to use is http://www.fordification.com


Copyright library© 1999-2019 FORDification.com unless otherwise noted. All rights reserved.
All brand names and product names used on this website are trade names, service marks or registered trademarks of their respective holders.  
No portion or content of this site may be reproduced or otherwise used without explicit permission.
To report problems or provide comments or suggestions, please click here.