|
Sunday,
April
03, 2005 - I took Friday off work and spent the
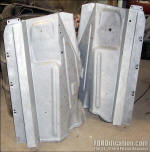
whole day sandblasting the inner fenderwells (Fig. 1). It
literally took me all day long to do it...well, actually about 5
hours. It took about 4 tankfulls of silica sand on each side of
each panel, so it's definitely a time-consuming process. These
panels are on a list of parts to be send off for powdercoating.
The R/S piece has a couple very small pinholes right under where
the battery tray will sit, but once the tray is mounted these
holes will be completely covered. Otherwise, both of these
pieces are in excellent shape. There are some small drilled
holes in the L/S piece too, for sheetmetal screws which a
previous owner drilled to mount an external engine block heater.
If I was going to be really anal about this project I'd have
welded them up, but I decided to just let them go. They're down
at the bottom of the panel and you'd have to look pretty hard to
even see them.
Then I spent
today getting the fuel tank finished up. It took the whole
morning with the angle grinder with a wire wheel attachment and
a 3M rust/paint stripper wheel to get it cleaned up. Once that
phase was completed, I wiped the tank down with some acetone and
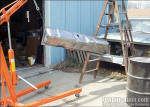
then hung it from a ladder and an engine hoist (Fig. 3), so I'd
have quick and easy access to all sides of it without having to
touch it. I then applied the MetalReady, following the
instructions by keeping the metal damp for about 20 minutes, and
then rinsing it off.
Back on
Page 36 when I was cleaning and
sealing the interior of this tank I noticed that there were some
pinholes along the bottom side. I'm hoping the POR-15 gas tank
sealer did the trick, but for a little added insurance, I got a
tube of Liquid Metal, which is basically a metal-based filler
material...and then put a thin coating anywhere there was
evidence of a pinhole on the bottom of the tank.
Then using some
sponge brushes, I got started applying the POR-15. I found I was
getting the typical brush marks, which normally wouldn't have
really mattered, considering that the tank was going to be
completely hidden from view up under the truck, concealed by the
tank's skidplate, but I discovered that the sponge brush also
gave me the chance to give the finish a slightly textured
surface, by simply patting the wet POR-15 with the side of the
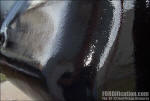
brush (Fig. 4). Now that I know about this little trick, I wish
I'd done this to the skidplate when it was coated...oh well.
I let each
application get very tacky before applying another coat. In all,
the top side of the tank got three coats and the bottom got
five. After the final coat of POR-15, while it was still tacky,
I gave the tank another 3 coats of Krylon semi-flat paint. In
Fig. 5 you can see the tank ready to be installed. This was the
last piece to be installed on the rolling chassis to have it
(basically) completely done. Hopefully I'll be doing that this
coming weekend. Stay tuned! |

Fig. 1 - A view of the freshly-sandblasted inner
fenderwells.

Fig. 2 - Getting started on cleaning the exterior of the
fuel tank.

Fig. 3 - Once the exterior was cleaned, it was hung to coat
with MetalReady and for a final rinse before applying the
POR-15.

Fig. 4 - Here you can see the textured finish I was able to
give the wet POR-15 by patting the surface with the sponge
brush.

Fig. 5 - And here's the finished product. I thought it
really turned out nice. |