FORDification.com
   (powered by Google)


  HOME

  Technical Articles

  Factory Literature

  Discussion Forums

  Photo Galleries


  Service Bulletins (TSBs)

  Decoding Your VIN

  Diagrams & Schematics

  Links & Resources

  In the Movies

  Downloads
  Member Meet & Greets

  In the Media

  Site Index

 MISC / PERSONAL

  My Truck Projects

  My Heinz 57 '67

  I've Been Censored!

  Contact


You are here: Home My Truck Projects The '67 Page 41
Back to My '67 Project Index
Stripping and Moving the F250 Cab

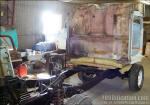
Sunday, March 6, 2005 - Getting the cab stripped down. It really didn't take that long...seeing as how many of these I've done over the past couple years, I'm getting pretty good at it. About the only things not removed were the underdash wiring harness and the seatbelts. The wiring harness will get left in while the cab is refurbished, though the belts will come out beforehand. Shown at left is the stripped-down cab, ready to be removed, and pictured below are a few more pictures taken during the day's activities:


Fig. 1


Fig. 2 - After removing the instrument panel, I saw this gold-colored box on the steering column brace....

Fig. 3 - ...and here's another shot of it from underneath. I believe this is part of the Camper Special wiring package.

Fig. 4 - Needless to say, this light switch is DOA.

Fig. 5 - One of the three cage nuts which holds the inner fender bracket is missing, so I'll have to just insert the bolt and use a nut and washer on the back side.

Fig. 6 - Here's another '67-only feature I found out today: the headliner trim on '67s is held on with these clips, in addition to the screws, which are the only means of attachment for '68-up trucks.

Fig. 7 - When removing the headliner, I found these small chunks of plywood wedged in between the inner cab wall the the roof. They each had a hole drilled in them and were held in place by the headliner screws.

Sunday, March 13, 2005 - Well, I spent the day at the shop today, and with the help of my father-in-law, we got the cab pulled from the F250 and set down onto my F100 chassis. His boom truck make short work of the task, which was a good thing, as just as we were getting started, a few snowflakes started coming down, which fortunately was the extent of the blizzard.

After lifting the cab off the F250 chassis, we rolled it out into the yard, then rolled the F100 chassis under the cab and lowered it down. Then we rolled the F100 and cab out a little further into the driveway so the F250 chassis could be put back into the shop. With a little creative rearranging, I was able to push it up against a wall so it'll be mostly out of the way until I decided what I'm going to do with it.

The F100 chassis was then rolled back into the shop and prepared for the next phase. I laid an old piece of carpet onto the back half of the frame, then laid down a couple sheets of plywood, and then a bunch of old couch cushions....and then rolled the cab onto it's back, giving me access to the bottom side. Next on the list of things to do will be to clean up the bottom and get it coated. I've decided to use Herculiner roll-on bedliner to coat both sides of the floorpans, for protection and rustproofing.


Fig. 11

Fig. 12
- I had to rearrange things a little in the shop to give me room to push the F250 chassis back against the wall to be out of the way for the time being.

Fig. 13
- Once the cab was rolled back onto the cushions, it was a little wobbly, so I secured it to the chassis with a ratcheting tie-down.


Fig. 8 - Using a boom truck we lifted the cab off the F250 chassis...


Fig. 9
- ...and set it down onto the F100 chassis.


Fig. 10 - The old cab that I'd been working on was hauled out back to the scrap iron pile.

Sunday, March 20, 2005 - I spent a good portion of afternoon today getting the bottom side of the cab cleaned up, mostly with the wire brush attachment and sandpaper discs on the angle grinder. I got everything cleaned up that could be reached with the angle grinder, all that's left now are all the nooks and crannies that can only be reached by hand with sandpaper. I didn't have my camera with me today to show the progress made, but I'll get something posted next time. Stay tuned!


first  previous

next   last


Home  |  Back to My '67 Project Index  |

You are here: Home My Truck Projects The '67 Page 41


Want to link to this site? Please save this banner to your hard drive to place on your webpage.
The correct link to use is http://www.fordification.com


Copyright library© 1999-2019 FORDification.com unless otherwise noted. All rights reserved.
All brand names and product names used on this website are trade names, service marks or registered trademarks of their respective holders.  
No portion or content of this site may be reproduced or otherwise used without explicit permission.
To report problems or provide comments or suggestions, please click here.