|

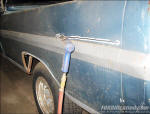
Fig. 1 - Here's a view of the '68 LWB parts truck in the
shop. Notice how the R/S bedsides appear fairly solid? Well,
first glances can be VERY deceiving.

Fig. 2 - WTH??? This body filler is about 1/4" thick!

Fig. 3 - Getting started cutting the bedsides with the air
chisel...a very time-saving tool to have.

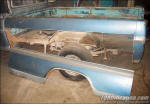
Fig. 4 - Here's a view of the left/rear section of the box,
showing my cuts to save the inner bed wall...

Fig. 5 - ...and this shows the diamond-plate steel lip
welded to the front of the box.

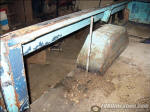
Fig. 6 - A view of the removed bedside....

Fig. 7 - ...and here's the inside.

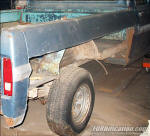
Fig. 8 - Despite the obvious body damage to the right side,
I removed it thinking I could still get by. |
First of all, let
me get you up-to-date with the soap opera here...
The original SWB box on my project
truck had some rust issues in the lower bedsides and rear
mounts, and was (in my opinion) too far gone to try to save. So
I started keeping my eyes open for another box to use. I found a
'72 SWB on E-bay and the seller told me the box was good...so I
bought it and got it home, only to find out it wasn't, except
for the floor (read Page 52). The
bedsides on this one weren't in useable condition either. Oh
well, it was disappointing, to say the least...but I figured it
was still workable. The floor was useable, and the upper
bedsides of my original bed were still good....I could make this
work by just cutting the lower bedsides off my '68 LWB parts
truck and then trimming them down to fit the SWB box. With that
thought in mind, I've been cleaning the floor and getting it
ready to start welding in.
On Sunday, a
friend and I got the '72 SWB chassis pushed outside to make room
for the '68 parts truck, and man-handled it inside...which was a
trick, considering there was no steering column or steering box!
Once it was inside, I was walking around the truck and noticed
that the passenger-side bump had a crack in it. Uh-oh! Well, I
stuck a screwdriver into the crack and pried out....and found
something that made me wanna cry! (Fig. 2) Apparently the bump
down the side was crushed in at some point during it's previous
life, and the owner decided to drill a bunch of holes right down
the ridge, in an attempt to use a dent puller to pull it back
out. However, when the dent puller didn't get the job done, he
simply decided to rebuild the area with body filler!
At this point I
was starting to get a little depressed...but kept telling myself
that I could fix this too, and everything would be OK.
I got started
cutting the driver's-side bedside off first (Fig. 3). Since I
was going to have to trim some material off each end to fit the
SWB box, I didn't have to be super-careful about the lengths.
However, I still only left 3/4"-1" of bedside at each end. The
inside bedwall also appeared to be in good useable shape, so I
cut that section out with the lower bedsides (Fig. 4)....well,
at least from the back up to the front of the wheelwell. Turns
out that the previous owner who welded diamond-plate steel into
this box also welded in a 3"-4" high footer around the front of
the box (Fig. 5). Since I really didn't want to mess with that,
I just cut a few inches higher up front, which would just mean
another flat patch panel, nothing serious. Didn't take too long
and I had the left-side bedside removed (Figs. 6 and 7).
...and then I
got started on the right side. Although there did appear to be
body damage, I was thinking I might be able to still make it
work. After all, I guess I really didn't haven much choice,
since these bedsides are all I have to work with. On both
bedsides I was able to use the air chisel for most of the
cutting, but some areas required the use of the cutting wheel. I
ended up using three 4-1/2" discs on each side.
Upon removing
the right-side bedside (Fig. 8) I decided to give it a thorough
going-over, by chipping out the body filler to see just how much
of it was on this panel....and I was NOT happy about what I
found. Basically the entire bump on the bedside from the middle
of the wheelwell area back to the rear was nothing but Bondo,
most of it nearly 1/4" thick.
I then got
started chipping out the body filler in the lower-rear section
of the R/S bedside, and was even MORE flabbergasted, if that's
possible. Although the damage wasn't readily apparent from the
outside, the entire lower rear section was almost completely
rusted away, and was just filled in with filler. It appeared
that whoever did this tried to do a little welding beforehand,
as there was evidence of welds and brazing under the filler.
However, this whole panel is complete garbage....it's totally
unusable.
As mentioned
above, I'm actually typing this page up a week later, after
discovering the damage here, and trying to spend some time
figuring out what to do about it. The left-side is useable, but
I have nothing to use on the right side. After spending several
days giving it much thought, I've come to the decision that for
the time being, I'm planning on just putting away all the bed
pieces I have, and will concentrate on the rest of the truck for
now and forget about the box. Maybe sometime later this coming
summer I will start keeping my eyes open for a good rust-free
box to use, even though it'll mean I'll probably end up paying a
premium price for it and/or will have to take a drive down to
the deserts of Arizona or New Mexico to find one. |