|

Fig. 6 - Here you can see the difference
in how the two fenders line up to the cowl panel. The '67 fender
sets flush, like it's supposed to, while the '71 fender
protrudes almost 1/4"! Both fenders are completely bolted down
in this picture.

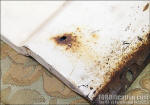
Fig. 7 - Here's the rust hole in the R/S of the '67
fender that will need to be repaired.

Fig. 8 - Here's a shot taken after
rinsing off the MetalReady from the interior floorpans.

Fig. 9 - In this shot you can also see
the other sandblasted swaybar pieces and battery tray hanging
from the stepladder.

Fig. 10 - The 'before' shot, prior to
cutting out part of the fender brace with the air cut-off tool.

Fig. 11 - These dirt clods, trapped
behind the brace, are what caused the rust hole in this fender.
The '71 fender I WAS going to use had even more garbage than
this, just not as much rust.

Fig. 12 - Here's the 'after' shot, which
was taken immediately after sandblasting. The metal doesn't feel
thin, but it IS pitted pretty badly.
|
Saturday, Sept. 3, 2005 (Labor Day weekend) -
Well, even though we have a three-day weekend, I only get one
day for the shop, due to my wife's work schedule....and today
was the day. All week long I've been planning on getting the
interior floorpans coated with POR-15, as well as the other
parts I sandblasted last weekend. However, I ran into a slight
snag today.
I
took Thursday afternoon off work to spend time in the shop,
getting things prepared for today. One of the things that needed
to be done was a trial fitting of all the front-end sheetmetal.
Once I got the fenders mounted and lined up, I could then
tighten down the cab and radiator support. Of course, I'd still
have to remove the fenders for the MetalReady and POR-15. I
ended up drilling a couple holes in the '79 radiator support to
line up with holes in the '67 inner fenderwells. However, the
support was already dimpled where I needed to drill, so it was a
no-brainer. Once I got the inner fenderwells lined up and bolted
down, I started on the fenders.
Just
for the record, I was planning on using a '67 L/S fender and a
'71 R/S fender, since both were rust-free. I got the driver's
side bolted in and got everything adjusted, and it lined up
great. However, once I got started bolting in the L/S fender,
there was something wrong. When the fender was bolted completely
in, it wasn't setting flush with the cowl panel (see Fig. 6). It
actually stuck out almost 1/4"! I removed and reinstalled
several times, trying different things to get it to line up
correctly. However, I wasn't able to figure out why the heck the
'71 fender was protruding. The R/S '67 fender has a rust hole in
it (Fig. 7), so I wasn't going to use it....however, I grabbed
it and trial-fitted that one, and it lined up perfectly! WTH????????
Anyway, at that point on Thursday I had to leave.
So I
came back today, figuring I'd find whatever was keeping the '71
fender from lining up and then just continue with the day's
plans. I spent almost an hour but could NOT get that fender to
fit! Finally, I decided to just bite the bullet and use the '67
fender, although it does have the rust hole. Using it also meant
I was going to have to take the couple hours to cut a portion of
the fender brace away to gain access to the backside, in
addition to getting it cleaned up and sandblasted...which in
turn meant I wasn't going to have time to get everything coated
with POR-15 today....dammit. Oh well....
So I
went ahead and rolled the truck outside and coated the interior
floorpans with MetalReady. While it was soaking, I set the
stepladder outside in the driveway and hung all the swaybar
pieces and battery tray from it and coated them with MetalReady,
and set the L/S fender outside and sprayed it as well. Then back
to the truck, to rinse the floorpans out really well with a
high-pressure nozzle (Fig. 8)....and then I spent a good 30-45
minutes off and on blowing the floorpans dry with an air nozzle,
paying special attention to the seams, since they tend to hold
water. In between breaks to allow the air compressor to catch
up, I rinsed off all the other pieces (Fig. 9). Then back to the
truck to blow-dry it some more. (I guess I was manually drying
it trying to speed things up, thinking that MAYBE I'd have time
to apply the POR-15.) I then decided it was time to tackle the
R/S fender.
I
first had to cut the access hole in the fender brace with the
cutoff tool. (I had the camera with me this time, so I took
'before' and 'after' shots.) I marked the fender brace where I
needed to make the cut with the cut-off tool (Fig. 10), and then
went to work. It took about 20 minutes to do the job. Upon
finishing it up and removing the chunk I'd cut out, I found a
collection of large dirt clods trapped behind the brace, which
is what caused the rust in the first place (Fig. 11).
Then
the fender went back to the sandblast booth. It took several
hours for this task. I initially tried to just sandblast all the
factory paint off the backside of the fender, but that stuff was
baked on too well, and was taking too long. I found it was
actually a lot faster to use the composite stripper disc in the
angle grinder to clean most of it up first, and then use the
sandblaster for the nooks and crannies. The area behind the
brace was pretty badly pitted, as can be seen in Fig. 12.
However, I picked up a tube of POR-Patch with my last POR-15
order, which is basically a thicker POR-15 in a tube, to be used
as a filler material. It dries rock-hard, and I decided this
would be a great time to give this stuff a try. After soaking
the fender in MetalReady for 15-20 minutes, I rinsed it off,
blew it dry with the air hose and then got started on the rust
repair. I taped some plastic (something the POR-Patch wouldn't
stick to) on the front side of this hole, then taped some thin
cardboard over it for support (Fig. 14)...and then coated this
pitted area liberally with the POR-Patch (Fig. 15). It's about
1/8" thick, and should give me something to work with when
applying filler to the front side down the road.

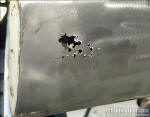
Fig. 13 - Here's the front side. I
lightly tapped the sharp edges down and bent them to the inside,
to give the POR-Patch something to hold onto. |

Fig. 14 - The front side of the fender,
prior to using the POR-Patch. I covered the rust hole with
plastic...something the POR-Patch wouldn't stick to...and then
taped a thin piece of cardboard over it for support. |
|