|
July 3, 2005 - I decided to take advantage of the
3-day holiday weekend to do something I've been needing to do
for some time....finish up with the bottom of the cab so I could
go ahead and get it bolted down for the last time. I figured I'd
need two consecutive days to do this....one to prep the cab
floor with MetalReady (in anticipation of the final application
of POR-15) and getting it rinsed off. I figured with all the
nooks and crannies in the floor, I'd better let it set overnight
to completely dry off. Since having two days in a row to myself
to spend in the shop is pretty rare around here, I haven't done
anything on the truck for a while now.
I
hit the shop a little after 10AM this morning ready to get
started. I started off by getting a tarp laid down under the
cab, to protect the frame and chassis components from the
cleaning debris. I then rolled it out into the driveway, where I
could hose it down later. In the past, when applying MetalReady,
I simply used a foam brush. However, this got kind of tedious,
so I decided to use a spray-bottle instead. According to the
directions, I had to keep the metal wet for 15 minutes, but
since the temperatures here were in the mid-90's, and
considering the large area I needed to treat, it would have just
dried out too fast. The spray bottle definitely made this go a
lot faster and easier. After letting it set and do it's thing, I
rinsed the MetalReady off with the hose and left to dry.
I
then got to work on the inner fenderwells. They were already
completely sandblasted and ready to go. I was originally
intending on getting these powdercoated, and was told by them
last Fall that their commercial sandblaster would probably warp
these, so I had to do them myself. Then when I talked to the
powdercoaters about 2 weeks ago to set up an appointment to drop
these off, I was told that they were swamped for most of the
summer and wouldn't be able to get me in until late Fall. Since
I didn't want to wait that long, I decided to just POR-15 them
instead.
Since the fenderwells would dry much faster than the
cab bottom, I figured I'd go ahead and get them completely
finished off today. Several weeks ago I'd ordered some supplies
from POR-15 and from Eastwood. One of the Eastwood items was an
aerosol can of their 'Rust Encapsulator', which is their own
version of POR-15. I wanted to do a little comparison. The can
said it would cover 10 square feet. It was just barely enough to
spray the top side of both inner fenderwells with a single thin
coat. Since I wanted a little more protection on there, and
wasn't going to wait for another can, the second, third and
fourth top coats were with the Krylon semi-flat.
I
then went back to check on the cab bottom. Because of the high
temps, it was already almost dry, except for the nooks and
crannies still holding some moisture. I used compressed air to
blow these areas out to speed up the drying process, and then
spent some time tinkering on a few other things while I was
waiting. I checked back in about an hour to find that the cab
was 100% dry....and since it was only mid-afternoon at this
point, I decided to bite and bullet and get started applying the
POR-15.
It's
recommended that this stuff be applied in several thin coats.
However, because of the square footage I had to cover, and due
to the fact that it was very humid today which speeds up the
drying process, I found that it was drying too fast. I wouldn't
be able to completely finish one coat before it was completely
dry, meaning I wouldn't be able to apply a second coat, since
additional coats need to be applied while the first is still
tacky. Therefore, I ended up going with a single
slightly-thicker coat. I just hope the surface prep will be
adequate...I think it'll be OK.
I
also found out that although I ordered the semi-gloss POR-15 (or
so I thought), I was sent 2 quarts of the gloss. I didn't
realize this until later, since the semi-gloss is glossy when
applied but then dulls as it's drying. However, I noticed this
time it didn't seem to be dulling....but obviously by this time
I was almost done, and it was too late to do anything about it.
Therefore, the bottom of the cab is definitely gonna be very
shiny!
I
then went ahead and coated the bottom side of each inner fender
and the firewall mounting brackets with the POR-15. One idea
that I came up with after I was almost done today was to try
attempting applying the POR-15 with a squirt bottle. It's
actually thin enough that this might be a quicker application
method. However, I only had one squirt bottle and wasn't curious
enough to make a special trip to the store for another. However,
I AM going to be picking up a few more, just so I can try it out
and see how that works.
|
 |
|
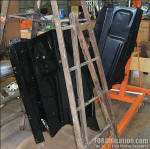
Fig. 8 - Here's a view of the finished
inner fenderwells. The one in the foreground is
showing the glossy POR-15 bottom side, the one
in the background is showing the top side with
the semi-flat Krylon. |
|
|
 |
|
Fig. 9 - ...and one more view of the
finished product. Yes, this picture was taken
when the POR-15 was completely dry. I pushed the
chassis back into the shop to let it finish
curing overnight, and I'll be headed back in the
morning to get started getting the cab bolted
down for the final time. Then I'll be getting
started on the interior floorpans. |
|
 |
|
Fig. 10 - I was getting some bugs stuck in the fresh
POR-15 and attempted to take a close-up picture of one. When
reviewing the pictures on the digital camera, I saw it
didn't turn out, but I notice there was a heck of a
reflection, so I snapped this pic for the heck of it. (See
that image in the upper right corner? Is that the Virgin
Mary or the Grim Reaper???) |
|
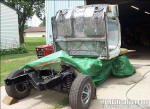
Fig. 1 - The cab is ready to go.
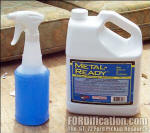
Fig. 2 - Here's the MetalReady and the spray bottle used to
apply it.
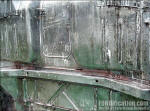
Fig. 3 - This shows the MetalReady soaking the bare
sheetmetal. Gotta keep it wet for 15 minutes and then rinse it
off.
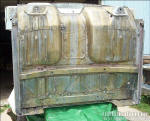
Fig. 4 - Here's a shot of the flash rust that appeared
almost immediately after rinsing.
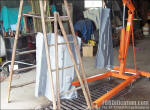
Fig. 5 - Here are the two inner fenderwells soaking in
MetalReady.
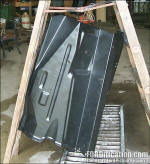
Fig. 6 - Here is the top of the R/S inner fenderwell with a
coat of Eastwood's Rust Encapsulator. It went on smooth and
dries to a semi-gloss finish.
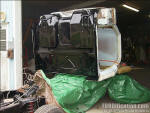
Fig. 7 - ...and here's the finished cab bottom. Looks pretty
good...except that it's not the semi-gloss I wanted. |