|
August
4, 2012 - When the decision was made to get the '67
out of storage, I had several important decisions to
make. Now that I had my '75 F250 I had a very nice vintage
Ford truck to drive, so the original plan for the '67 of
making it a very good restoration wasn't as important. Plus
with my growing family and my Olds 442 project, money to
spend on my car/truck projects was not only getting harder
to come by, but was simply irresponsible of me to try to
get at this time.
Therefore, I decided that
if I were going to keep this truck, I would have to
essentially try to make do with what I had...that is, do my
best to assemble it with the parts I'd saved in storage. The
focus would be to now just turn this truck into a decent
daily cruiser / shop truck. This will be my work truck...one
I'm not worried about leaving out in the weather or getting
dirty or dented. I still wanted it to look presentable, but
I figured I could clean up the used parts I already had and
scrounge up whatever else I needed from the junkyard.
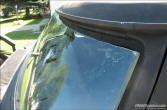
Fig. 01 - In this shot,
you can see the gap left at the top of the
cut-down windshield when set in place on the
choptop cab. The width was correct, but the
person who chopped the cab neglected to consider
the compound curves on this glass. The most
important thing to consider when chopping a
vehicle is ALWAYS cut the glass first, and then
fit the sheetmetal to the glass, not the other
way around. |
OK...so...now which cab do
I use? I mean, I have a very nice '67 cab which just needs
the bodywork finished and then painted, and I also have the
choptop cab. At first I was REALLY leaning towards the
choptop cab, since it would just be so freakin' cool to
drive! However, after spending nearly two weeks running the
pros and cons around in my mind, I decided to use the good
'67 cab. The deciding factor was the lack of front glass in
the choptop. When I purchased it, the owner told me he'd
chopped it "right", meaning that I simply had to cut down a
stock windshield to fit. However, after trying this, I found
that he was wrong...a chopped-down windshield wouldn't
fit (Fig. 01)...meaning I'd have to either go with a custom windshield
(VERY expensive!), or cut a Lexan windshield (which would be
easy, but it's not street-legal and Lexan tends to scratch
easily) or completely rework the cab to accept a cut-down
stock windshield (which isn't an option since our one-car
garage doesn't have a 220V hookup for the welder, and would
seriously add to the time invested). Therefore, the stock
'67 cab won out. (The choptop cab will go into the storage
unit for now.)
The next major thing I had
to do was find an engine/transmission for this truck. At
first I was thinking that I really needed to find a 300 I6
and a manual 3-speed. I started scouring Craigslist about
two weeks ago...and last week found a listing for a
240/3-spd from a '66 F100. The seller stated it ran and was
only asking $150 for it. I went ahead and sent him an e-mail
asking a few questions, but never heard back. Several days
later I found another listing for a '76 F250 with a 390/C6.
He was asking $500 for the whole truck, and while it was a
little more than I wanted to pay, I figured that if it was
complete and running, it would be worth it. So I drove up
last weekend and after looking it over, I told him I'd take
it.
The story was that he was driving this truck back in the
late-'80s/early-'90s when he installed a crate motor in it,
and then after racking up about 30,000 miles on it, he drove
the truck into his garage in 1996 and decided to start
fixing up the body. He removed the doors and fenders and
gutted the interior, and started on rust repairs on them and
the cab. However, as projects often go, he got sidetracked
with other projects and never got back to this truck, and
finally lost interest in it. The only thing really worth
salvaging was the engine and transmission, since all the body
panels were rusted out. Since the truck hadn't been started
in at least 12 years, I decided I didn't want to mess with
trying to change all the fluids, pulling the distributor to
prime the engine, etc., so I took a chance that the engine
was still good and just bought it.
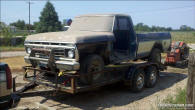
Fig. 02 - Here's a shot of
the engine donor truck after loading it onto the
trailer. The seller is removing a few items from
inside the cab, which is covered with 12 years
of garage dust. |
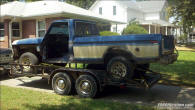
Fig. 03 - The dentside is
in the driveway after hitting the carwash. I did
powerwash the engine while in the truck, but
will visit the carwash again for another engine
cleaning after it's removed. |
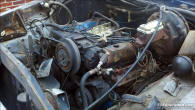
Fig. 04 - The 390 has been
disconnected and is ready to pull out. |
I went up with my trailer
on August 4th to get the truck. He'd driven it into his
garage 12 years earlier, and since it wasn't running, I had to back the trailer up into his driveway and
we had to winch the truck backwards up onto the trailer.
Since I didn't want to make the hour-long drive back home
with all the weight of the trailer at the back, we took it
to his shop on the other side of town, so we had room to
push it back off the trailer, flip the truck around and then
push it back up onto the trailer. Fig. 02 above was taken
right after pushing it back onto the trailer.
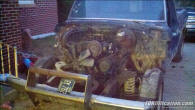
Fig. 05 - The front clip
is removed and the engine ready to pull. It was
on the ground 15 minutes later. |
However, I knew that once
I got home, I'd have to back the trailer into the driveway,
which would mean the truck would be backwards. Since I
wanted the front of the truck towards garage at the front of
the driveway, that meant once I got home, I had to flip the
truck back around. I drove out to a friends farm and
enlisted his help in getting the truck off the trailer,
flipping it around (again) and then pushed back onto the trailer
(thanks Ray!), and then drove home. My wife got a 'fun' ride
when unloading the truck...I knew the brakes still worked,
so she got to sit inside on the floorpan while I pushed the
truck off the trailer, and then she hit the brakes once the
truck was off the ramps. I then immediately got started
disconnecting the engine and transmission. I decided it
would be easier to remove the radiator support and inner
fenderwells than trying to lift the engine over the support,
so the front clip was removed (Fig. 05), and then engine and
transmission were on the ground by the end of the evening.
...and now I'm about ready to get the engine
cleaned up and my '67 out of storage!

August 5, 2012 - I got out of
bed this morning and hit the ground running, since I knew it
was going to be an extremely busy day. First on the agenda
was getting rid of the '76 donor truck. My friend Ray is into the dentside-era trucks as I am the bumpsides, so he said he'd
take the carcass. It did, after all, have four 16" wagon wheel
rims on it, which he needed. So I winched the truck up onto
the trailer and drove it back out to his house, where he
used his tractor to pull it off the trailer and push it into
place next to his barn. Then I headed back to town to load
my new engine/transmission onto the trailer, so I could take
it to the carwash for another good cleaning (Fig. 06).
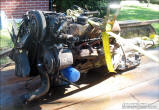
Fig. 06 - The engine and transmission are
back from the carwash looking much cleaner. |
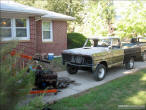
Fig. 07 - My truck is finally home...and
ready for a new engine. |
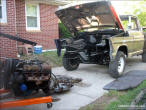
Fig. 08 - I decided to remove the radiator
support to install the engine. |
Once I got the engine home
and off-loaded into the driveway, I headed up to the storage
unit to retrieve my '67...and brought it home. Once the
truck was in the driveway, I was ready to install this
engine (Fig. 07). Since all the bolts holding the radiator
support were new and thus easy to remove, I decided to spend
a few minutes removing it, which would make engine
installation much easier, and probably prevent me from
scratching the new paint on the bottom of the cab too (Fig.
08).
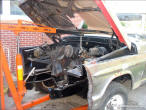
Fig. 09 - The engine is almost in. |
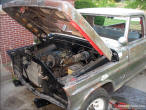
Fig. 10 - The engine and transmission are
now bolted up. I'll put off hooking everything
up for now...other things are more important. |
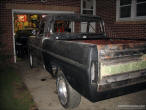
Fig. 11 - A final shot at the end of the
day. You can see the '67 Olds parked in the
garage. |
One thing I was pretty
surprised to find on this '76 donor truck was a one-piece
driveshaft. It's always been my understanding that all
long-wheelbase trucks had a two-piece driveshaft with a
carrier bearing between them. However, it doesn't appear as
if there were ever a carrier bearing on this '76. While I'm
surprised, I'm also very pleased, since it'll make
installing it into my truck much easier. I'll have to get it
shortened, but that's a task any competent machine shop can
handle. Anyway, I
did have to drill a couple holes in the frame for the
transmission crossmember, probably due to the fact that this
was a long-tailshaft transmission. Other than that, it
dropped right in.
I was kinda impressed with
myself and how much I'd been able to get done over the past
few days, between getting the truck that was 100 miles away,
getting it home, stripped and hauled off, the '67 hauled
home and the engine installed...all in about 48 hours.
I've decided to hold off hooking the engine
up for the time being, choosing to take advantage of the
warm weather and concentrate on getting the bodywork
finished up so that I can get the truck primed and painted,
and the glass installed. |