|


|

|
Dentside Parts Truck Pictures |
|
 |
|
NOTE:
This page is more of a 'dentside' photo reference
page than anything else, just for my own personal reference.
However, I decided to post these pictures, in case
someone else might be able to use them for any
reason.
Because of the number of
photos on this page, it may take a moment to
download...please be patient. Click on thumbnails to
enlarge. |

FYI - The '67-'72 truck on the left is a 'bumpside' and
the '73-'79 truck on the right is a 'dentside', both for obvious
reasons. |
|
|
January 07, 2007 - I didn't really know
for sure whether to post this in this section or in the choptop
progress section, but decided to just put it here.
For those of you who haven't been keeping track of my doing's on
the FORDification.com
forums, this update has been long overdue....in fact, almost
6 months overdue! Sorry about that, there's just been a lot
going on. I'm not going to give you all the details, but here's
the quick run-down:
In August I bought another project truck...a '68 F100 SWB 2WD,
with a 7" chop! It's an unfinished project truck. My family and
I drove out to Michigan in October to trailer it back. For more
information on this, CLICK HERE.
I haven't had a lot of shop time over the past few
months...life's just been too busy...and the few days I did get
off I felt I needed to get some website additions and
maintenance done. Right now my '67 is getting close to being
ready to paint...well, at least the cab and front sheetmetal is.
However, it's too cold out to do that right now, so I've decided
to make the choptop truck my wintertime project. It's going to
be my 'rat rod', more or less, and the goal is to thrash on it
and slap it together, and have it street-worthy by springtime. |
 |
|
When I first bought my '67 back in June 2003, I had a friend
named Ray who was really into the '73-'79 trucks but had a
couple bumpside parts trucks on his property too, and was told I
could take whatever I wanted from them for my project. I
stripped them down completely for parts and one of the carcasses
was hauled off, the other saved for a box trailer. (You can read
about these on Page 2,
Page 3 and
Page
4). He had a number of '73-'79 'dent-side' trucks out there
as well, but at the time I wasn't aware the parts interchanged,
so I didn't take anything from them except for the radiator
support from a '77 and the disc brake setup from a '78.
Fast forward 2-1/2 years....I ran into Ray a few months ago and
he mentioned that he wanted to get some junk parts trucks
cleaned off his property and was hoping to get it done before
winter. I told him I'd be interested in getting a few things
from them before he hauled them off and he agreed. Well, things
have been so busy that I haven't had a chance to get back out
there until today. This photo page is more than just a rundown
on the day's activities....since he's got so many dentsides, I
took the opportunity to take a lot of detail pictures of his
trucks, just as a reference source. I'm posting them all here as
such. |
|
Fig. 01 shows a small part of Ray's Ford collection. I was given
permission to get parts from the black/red '77 4x4 Ranger
(second from left) and the grey '78 Supercab (far right). The
carcass of the '70 Ranger that I parted out 3 years ago is still
here (far left)...Ray kept the box/frame/suspension to make a
box trailer. The red/white '76 or '77 Highboy (third from right)
belongs to Ray's dad, and I wasn't allowed to take anything from
it. (His dad is 90-something years old, lives in a nursing home
and has no driver's license...but he "might need it some day".
LOL Oh well....) |

Fig. 01 - Ray's Ford collection.
The main things I wanted today was
a dentside hood and inner fenderwell set. |
 |
|
1977 F150 4x4 Ranger XLT |
|
This '77 was pretty much in this condition when Ray got it
years ago. It had a 351M/400 that's been open to the
elements for so long it's no longer salvageable. He saved it
as a parts truck but really hasn't gotten anything from it,
so he decided to let it go. This truck donated it's radiator
support and inner fenders to me back on
Page 3. Later, deciding I didn't
need the inner fenders, they were tossed out. (The radiator
support is currently powder-coated and mounted on my '67.) I
came back today to get another set of inner fenders....which
are probably destined for the choptop truck for a future
installation tutorial.
I was able to get the following parts from this one
today: power brake booster and master cylinder, brake pedal
and mounting bracket, accelerator pedal and rod and the
rust-free/dent-free hood. This truck also has true factory
power steering (Fig. 04), but unfortunately he'd already
promised those parts to someone else. |
|

Fig. 02 |
|
|
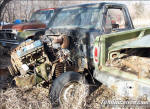
Fig. 03 |
|
|
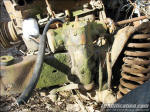
Fig. 04 |
|
|
1978
F150 2WD Supercab |
|
Back on Page 22, this '78 Supercab
supplied the complete front disc brake set-up that's currently
mounted on my '67, as well as the power brake booster. Today it
donated it's very nice inner fenders, as well as the hood latch,
accelerator pedal, brake pedal and mounting bracket, Saginaw
power steering box, steering column (automatic, non-tilt),
engine perches, and add-on cruise control components. (While it
is an add-on system, it appears to use the factory underdash
brain box, so I grabbed everything except the sensor for the
driveshaft.) |
|
 |
|
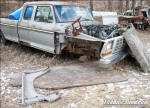
Fig. 05
- Ray is saving this '78 as a parts truck for his
other '79 Supercab...an F350 4x4 (shown farther
down on this page). The front sheetmetal is in very
good condition, though the cab and box are totally
rusted out. |
|
|
 |
|
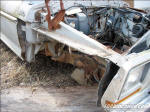
Fig. 06
- Removing the right-side outer fender to get to the
inner fender. This was in extremely nice shape...the
underside was nice and shiny. |
|
|
 |
|
Fig. 07
- Just another quick shot of the truck, after
pulling all the inner fender bolts, prior to pulling
it out. |
|
|

|
|
 |
|
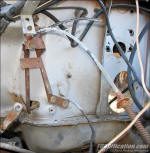
Fig. 08 - shows the cable-type
accelerator linkage. (I had removed the bolts to
salvage this before it dawned on me I should take a
picture.) |
|
|
 |
|
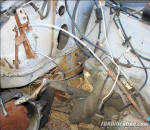
Fig. 09
- Another accelerator cable and brackets shot.
The silver L-bracket bolted to this is the mounting
bracket for the cruise control servo. You can also
see the Saginaw PS box prior to removal, but after I
removed the steering column. |
|
|
 |
|
Fig. 10
- Decal with A/C charging instructions, mounted on
the radiator support. |
| |
|
 |
|
Fig.
11 -
Radiator filling instructions, also affixed to the
radiator support. |
|
 |
|

Fig.12
(above) - Fig 13 (below)
 |
| These two shots
are simply close-ups of the inner fender mounting
bracket attachment point. |
|
|
 |
|
Fig.
14 - A
close-up of the hood latch and grille shell support
bracket. The support bracket won't be used when I
attempt to install this latch on my choptop truck. |
|
|
 |
|
Fig.
15 - A
close-up of the plastic gas pedal pivot bracket. I
was never aware that these were changed from
pot-metal to plastic in '78. |
|
 |
|
 |
|
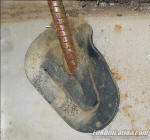
Fig.
16 - The
floorpan grommet for the e-brake cable. |
|
|
 |
|
Fig.
17 - A
lighter delete dash plug |
|
|
 |
|
Fig.
18 - A
view of the safety sticker mounted on the lower left
dash area. |
|
 |
|
 |
|
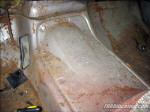
Fig.
19 - The
redesigned transmission tunnel included clearance
for big automatic transmissions, so a removable
tunnel cover was no longer required for these
applications. |
|
|
 |
|
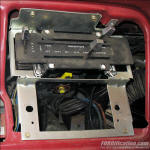
Fig.
20 - The
stock radio mounting and heater/AC mounts |
|
|
 |
|
Fig.
21 - A
view of the dash panel with the front bezels
removed. |
|
 |
|
|
 |
|
Misc. Pictures |
|

Fig.
25 |
|
Ray had this '78
front end sitting around, and I was able to get
the left-side inner fender, the radiator support
and hood hinges from it. |
|
|
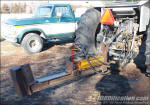
Fig. 26 |
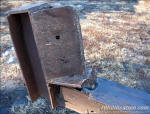
Fig. 27 |
|
Here's a couple
shots of Ray's heavy-duty hydraulic wood
splitter. He was splitting firewood while I was
there, and unfortunately some welds in the
splitter let go. He had to put in a call to the
local welder with the big guns. |
|
|
 |
|
1969 Ford Galaxie |
|
 Fig. 28
- Ray
has had this Galaxie for some time now, but has no use for
it. Being the Ford lover that he is, he's been hanging onto
this to give to someone who can use it for something other
than a demolition derby. In his words "I'd rather part it
out than for someone to derby it." Anyway, after hearing
some reports online that the Galaxies front frame spacing
was identical to our bumpside trucks, I decided to check it
out. Why? Well, this would make a great sub-frame donor, if
'someone' wanted to clip the front of his truck, not only
giving him coil springs and a true IFS, but would lower the
front end considerably as well. I measured the frame and was
pleasantly surprised to find it's exactly 34"...the same as
our trucks. I told Ray of my ideas, and he told me that if
he can't find someone to take it off his hands, we'll talk.
So I decided to take this pictures of the engine bay for
reference. It's currently set up for a 302, column-shift
3-speed transmission and manual steering. Fig. 28
- Ray
has had this Galaxie for some time now, but has no use for
it. Being the Ford lover that he is, he's been hanging onto
this to give to someone who can use it for something other
than a demolition derby. In his words "I'd rather part it
out than for someone to derby it." Anyway, after hearing
some reports online that the Galaxies front frame spacing
was identical to our bumpside trucks, I decided to check it
out. Why? Well, this would make a great sub-frame donor, if
'someone' wanted to clip the front of his truck, not only
giving him coil springs and a true IFS, but would lower the
front end considerably as well. I measured the frame and was
pleasantly surprised to find it's exactly 34"...the same as
our trucks. I told Ray of my ideas, and he told me that if
he can't find someone to take it off his hands, we'll talk.
So I decided to take this pictures of the engine bay for
reference. It's currently set up for a 302, column-shift
3-speed transmission and manual steering. |
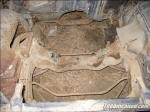
Fig. 29 |
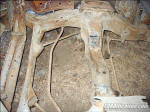
Fig.
30 |
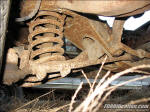
Fig. 31 |
 |
|
Since it's
kind of hard to visualize what the frame looks like with the
body still attached, I whipped up this quick diagram. The
black line shows you the route the frame takes. The red line
is where the rear part of the frame would be cut off. The
red arrow points to the transmission crossmember stub. It
sticks out from the front sub-frame about 12"-14" and would
need trimmed off as well. The sub-frame could then be butted
up to the rear section of Ford truck frame and welded on. |

Fig.
32 |
 |
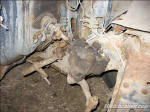
Fig. 33 |
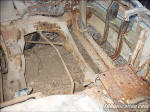
Fig.
34 |
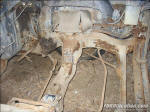
Fig.
35 |

|
Rear Suspension Components |
|
|
Rear Spring
Lift Block(s) |
Rear spring,
rear mount |
Rear spring,
front mount |
|
1977 F150 4x4 |
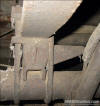
Fig.
36 -
3" blocks |

Fig.
37 |

Fig.
38 |
|
1977 F250 Highboy |

Fig.
40
- 4" blocks |

Fig.
41 |

Fig.
42 |

|
1979 F350 4x4 Ranger Lariat Supercab |
|
This '79 is a very well-optioned truck, and is Ray's project
truck. He hasn't worked on it for a while, but it's the
truck that he really wants to restore some day....and from
these pictures you'll be able to see why. First of all, as I
understand it, 1979 was the only year that Ford made an F350
4x4....and with all the options this truck has, it's
definitely a keeper. From the factory it was equipped with
power steering, power front disc brakes, A/C, AM/FM stereo
radio, an ultra-rare floor-shift tilt steering column,
front/rear sway bars, auxiliary in-frame fuel tank, dual
horns, dual batteries and a front Dana HD 60 differential. |
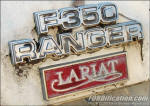
Fig.
43 |
|

Fig. 44 |
|
|

Fig. 45 |
|
|

Fig. 46 |
|
 |
|
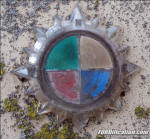
Fig. 47 - Camper shell emblem |
|
|

Fig. 48 |
|
This is a factory Ford Four-Seasons bed
topper. It definitely needs a good scrubbing to
remove the lichens and tree sap, but otherwise
it's in great shape. |
|
|
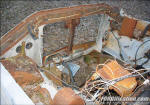
Fig. 49
- Notice the dual horns and auxiliary battery
tray |
|
 |
Here's a shot
of the engine bay. There are several things
to take notice of here: the angled front
frame crossmember (to clear the
power-steering box), the Saginaw steering
pump and of course the MUCH sought-after HD
Dana 60 front differential...the best of the
best.
|
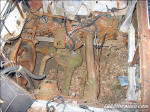
Fig. 50 |
|
 |
|
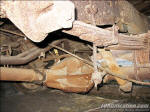
Fig. 51
- Rear
Dana 60 |
|
|
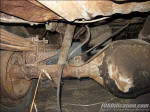
Fig.
52-
Rear Dana 60 |
|
|
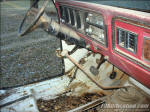
Fig.53
- 4-spd tilt column |
|
 |
|
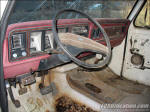
Fig.
54 |
|
|
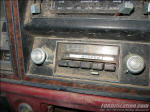
Fig.
55 |
|
|
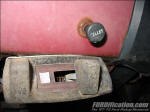
Fig.
56 |
|
 |
|
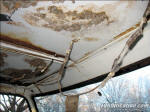
Fig. 57
- clearance light wiring |
|
|
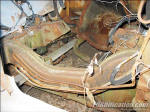
Fig. 58 |
|
|
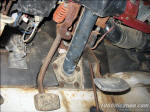
Fig. 59 |
|
 |
|

Fig. 60 - Front Dana 60 |
|
|
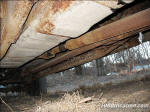
Fig.
61 |
|
|
 |
| So....here's what going to
happen....tentatively:
I
will be attempting to install the inner fenders, radiator
support and hood onto the choptop truck. I'll be taking
notes and pictures for a future installation tutorial. The
main reason I want to install the hood is to see if it's
possible...and if it does, I'll also be able to install a
remote hood release mechanism I have.
The steering column was obtained solely for another
tutorial...to get the installation down on paper...errr...on
a webpage, that is. Since the emergency flasher is mounted
on the column on the dentside trucks, there's a little bit
of wiring work necessary to mount these in a bumpside truck
that needs to be documented. I'm also curious about how
different the internal components are from the bumpside
columns, so after I document the column installation, it
will be removed and disassembled, and the parts will be
compared to the earlier bumpside columns.
The brake pedals and brackets were also obtained just to see
if they'd fit. Since some bumpside owners are wondering
about adding the wider brake pedal that came installed on
automatic-transmission trucks, I wanted to answer that
question once and for all.
And as for the engine perches...I just want to verify what
engine they fit, and if they ARE for the I6, if they'll also
still work on the FE engines like the pre-'78 versions. |
|
 |

Want to link to
this site? Please save this banner to your hard drive to place on your
webpage.
The correct link to use is
http://www.fordification.com
|