|


|

|
Working on the New Pickup Box |
|
 |
|
Friday, May
26, 2006 - It was a slow day at work today, so I
took the afternoon off to tinker around the shop a little. Since
it was a gorgeous day outside, I decided to get started
stripping the bed out in the driveway. |
|
Here's the
passenger side completely cleaned up. This side of the box is in
excellent shape, with only a couple minor dings and absolutely
no rust, aside from a tiny bit of pitting along the top bedrail.
This box does have trim holes for the lower trim panels (since
this came from a Ranger), and will need to be filled up. There
are also a few dings around the taillight, but I was able to pop
them out about 98%, and will use filler to finish them up. |
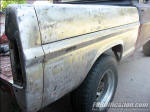
Fig. 1 |
|
The driver's
side is a different story. You can see a discolored patch along
the top....that's some rust pitting, and that area is also
indented a tiny bit. I should be able to push it back out from
inside the box. You can also see where a previous owner has
drilled holes for a side-mounted CB antenna, so these will need
to be welded up. |
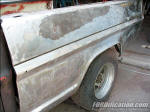
Fig. 2 |
|
The area behind
the left/rear tire will also need a little work. The panel was
apparently bashed in at some point, and the previous owner did
some amateur bodywork by drilling holes for a slide-hammer and
popping most of it out, but then slathering a thick layer of
body filler over the whole mess. I cleaned all the old filler
out and will have to spend some time with a hammer and dolly
attempting to finish what he didn't. |
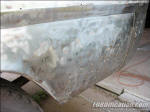
Fig. 3 |
|
Sunday,
May 28, 2006 - Although I had a shop today
planned for today, I really didn't know what I was going to do,
I just wanted to take advantage of a nice afternoon. I spent
some time evaluating the condition of the box, trying to figure
out if I was going to completely replace the floor panel or just
cut and weld some patch panels in. After much consideration, I
finally decided that the floor would be saved and I'd just use
patch panels for the few areas that needed attention. |
|
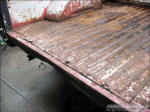
Fig. 4
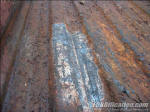
Fig 5
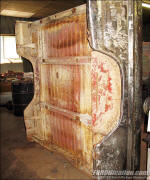
Fig. 6
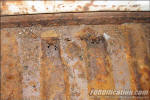
Fig. 7 |
Fig. 18 on the
previous page and Fig. 4 at left
shows the bed floor in all it's glory. A pile of garbage had
been in the box and it had been setting there for several years,
holding moisture and pitting the floor panel pretty good.
However, even with the pitting, the floor still appears to be
very solid. In Fig. 5 you can see where I took one of the 3M
composite stripping wheels and spent about 30 seconds stripping
a small test section of the floor, and after seeing that it was
only pitted a little underneath, it was decided to keep the
panel floor panel and just patch the two rusty areas as follows:
In Fig. 4 you
can see how the trailing edge of the floor panel is rusted out
in several spots. Also the left/rear flat section of the bed
floor was rusted a little where it attaches to the back of the
wheelwell. This, plus the fact that the rear of the bed support
was bent up, made me decide to use my parts truck bed to cut a
patch panel to replace all these areas. I would also need to
weld in a small patch panel at the very front of the bed floor,
around the left/front bed-mount bolt hole, where it was rusted
out (Fig. 7). Since I'm planning on coating the entire bed with
a roll-on bedliner, and since this truck will being fixed up as
a daily driver and not a show truck anyway, I wasn't overly
concerned with the appearance. By the time I got the patch
panels welded in and the welds ground down, and then covered
with the bedliner, they'd be virtually invisible anyway.
So anyway, I
decided that today's job would be to get the box inside the shop
and to get started cutting out the rusty area at the rear of the
box and to get a patch panel cut out and ready to weld in.
It was a full
day's worth of work. The pictures shown here detail the
progress, which took a grand total of 12 straight hours. There
was a great deal of time spent trimming the rear patch panel. I
had to attempt to install it, then remove and trim a bit, and
repeat as necessary, which was at least a ka-jillion times, if
not more. The time was well-spent though, as by the time I
called it a night the patch panel fit perfectly, and is ready to
weld into place. |
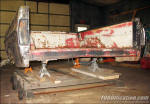
Fig. 8 - Although I had my doubts on whether it
would work, I tried setting the bed up onto some
jackstands on my roll-around cart. However, it was
WAY too unstable, so... |
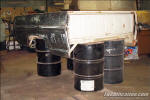
Fig. 9 - ...I lifted it it up onto a couple
pairs of 55-gallon steel drums. Not only is it more
stable now, but it's at a much more convenient
height for working on. |
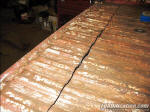
Fig. 10 - I
started out by using an air chisel to pop the rear
of the floor panel away from the rear support, and
then measuring 9" up from that support and making my
cut there. |
 |
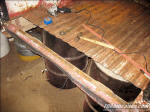
Fig. 11 - Here's that area removed. At first I
was going to just weld up the rusty area along the
front of that left/rear flat panel, which is why it
isn't trimmed out here, but I changed my mind later
and trimmed it out. |

Fig. 12 - About this time I noticed how bent
that rear support was. As you can see, it's bowed up
pretty good. I spent a few minutes trying to figure
out how the heck I was going to straighten it out,
and then came up with an ingenious plan...
|
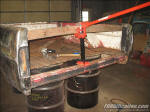
Fig. 13 - I nailed a couple 2x4's together,
trimmed it to the width of the box, and then used my
farmer's jack to push the lower support back into
place. Right about the point where the wood was
starting to crack, the bed support straightened out. |
 |
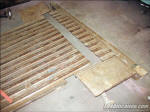
Fig. 14 - Here's the patch panel cut from the
'72 bed floor. This was the first rough cut, and I
spent quite a while carefully trimming it up to just
fit, leaving myself about 1/8" overlap on the
corrugated section for welding. |
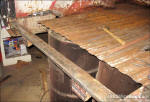
Fig. 15 - Since the rear part of the rear
support was bent up, I decided to use the donor
bedfloor's piece, so I had to trim the old one out,
leaving the rear bed mount areas intact. You can
also see where I finished trimming the left/rear
flat section, behind the wheelwell. |
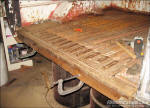
Fig. 16 - And here's the finished product, ready
to weld in. I just have it clamped into place here
for fitting purposes. It fits like a glove. However,
I want to clean up the bottom side of the bed and
paint it with POR-15 before welding the panel into
place. |
|
|
 |

Want to link to
this site? Please save this banner to your hard drive to place on your
webpage.
The correct link to use is
http://www.fordification.com
|