|


|

|
The Painting and Reassembly Has Begun! |
|
 |
|
Saturday, June 5,
2004
- I spent some time at the shop last night after work until about
10PM. I got started getting the spindles and front brake dust shields
cleaned up and sandblasted. I knew I was planning on coming back in the
morning to continue, so I didn't worry about painting them. However,
with a rainstorm last night, the humidity in the air was enough to cause
some flash rust on the cast-iron spindles (see Fig. 1). Interestingly
enough,
the steel dust shields had no flash rust at all....hmmm. Regardless, it
meant I had to give the spindles another pass under the sandblaster to
clean them back up. Each of the pieces was then hung with a clothes
hanger off the engine hoist boom for painting. The pieces I was able to
clean up, sandblast and paint today include:
- front spindles
- steering box w/Pitman arm and bolts
- coil spring pad w/radius arm
bolts/nuts
- disc brake dust shields w/bolts
- all steering linkage
All parts were blown
off with compressed air and then wiped down with a tack rag prior to
painting.
|

Fig. 1 - I sandblasted
the front spindles last night, and came back to this in the morning. I
should have at least sealed them up in a plastic bag overnight.

Fig. 2 - Got the spindles re-sandblasted and painted. The bad flash
makes the finish look glossier than it really is. This is actually close
to the factory semi-gloss and closely matches the powdercoated frame.
|
|
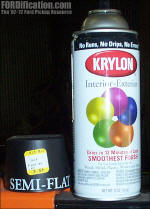 The
foreman of the powdercoating shop told me that Rustoleum Semi-Gloss
was a perfect match for the frame's powdercoating. However, I've had
several people tell me that Krylon is actually a slightly better
paint, in terms of durability, so I had the local hardware store
order me a couple cans of Krylon's Semi-Flat so I could see how the
finish compared. I'm very pleased with the finish match, so this is
what I'll be using for all the small pieces on this project. At
$3.69/can, it's also very affordable. I painted all the parts today
with these two cans, which each part receiving multiple coats, and I
still have about half a can left. The
foreman of the powdercoating shop told me that Rustoleum Semi-Gloss
was a perfect match for the frame's powdercoating. However, I've had
several people tell me that Krylon is actually a slightly better
paint, in terms of durability, so I had the local hardware store
order me a couple cans of Krylon's Semi-Flat so I could see how the
finish compared. I'm very pleased with the finish match, so this is
what I'll be using for all the small pieces on this project. At
$3.69/can, it's also very affordable. I painted all the parts today
with these two cans, which each part receiving multiple coats, and I
still have about half a can left.
What's going to be
interesting to compare is to compare the durability of the Krylon
and the freshly-sandblasted parts vs. parts treated with MetalReady.
I was intending to use the MetalReady on all the parts today, but it
completely slipped my mind. It's purpose is to provide a slight etch
to the metal, giving the paint something to grab and adhere
to...however, the sandblaster gives the parts a near-perfect surface
conducive to paint adhesion. Of course, using the MetalReady could
possibly help it a bit more, so the next batch of parts to be
blasted and painted will be treated, and after the truck is on the
road I'll be able to see if there is any noticeable difference in
how the paint adheres over time. |
|
|
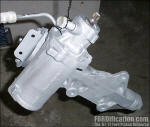
Fig. 4 - Here's the steering box
hanging from my engine hoist right after sandblasting. |
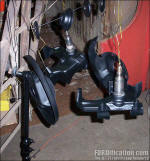
Fig. 5 - After getting painted, parts were sent to the drying
area...OK, so it's only the stepladder, but it works great. |
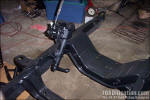
Fig. 6 - THE MOMENT OF TRUTH!! This is the first step of the
re-assembly process. As soon as I get my front suspension bushings, the
whole front-end can be reassembled. |
|
The steering box I
ended up using is one from the '75 F250. It was part of a 3/4-ton disc
brake setup that I saved for somebody, but after tearing the shop apart
and not finding the '74 F-100 box I thought I'd set aside to use, I
ended up grabbing it instead.
After bolting the
steering box on, I decided to trial-fit the frame-mounted '78 tube-type
power steering cooler. (I'd decided to use that to clean up the top of
the engine, getting away from the small fin-type cooler which the 390
currently uses.) However, it turns out that it won't fit, due to
interference with the front crossmember. The steel line which exits the
steering box and goes to the cooler isn't long enough to allow the
tube-type cooler to sit flat against the inside of the frame like it did
on the '74 F-100 that donated it. Looks like
I'll have to use the engine-mounted cooler after all. Just to stifle my
curiosity, I'll be going back to the truck I removed the
cooler from and take some measurements of the steering box placement in
relation to the front crossmember, so I can see what the difference between
the two frames is. I thought they were identical, but evidently there is
a minor difference with the front crossmember between the two frames...it's
either a difference in the years ('67 vs. '74) or something to do with
the F-100 vs. the F-250 frames.
|
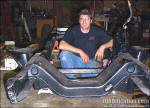
Fig. 7 - Since I'm usually the one
behind the camera, I had my wife snap one shot of me this evening,
to capture the moment that the '67's re-assembly began. |
I haven't ordered the
front suspension bushings yet, but that's next on the list. I am going
to call PST Suspension first thing Monday morning and see if it's
possible to buy their polygraphite bushings, which are included in their
front end kit, without actually purchasing the whole kit. Their
Ford pickup front-end kits (which aren't shown on their website yet but
are listed in their latest catalog) include radius arm bushings, I-beam pivot bushings,
kingpin set and all steering linkage. My kingpins are in great shape, so
I will have to find just the steel bushings. I AM determined to get the polygraphite bushings, however...so if I have to buy the whole front-end
kit to get them, so be it. It'll mean that I wasted several hours today
getting the steering linkage cleaned up and painted, but at least I'll
know everything is new. Tomorrow I'll be getting started stripping the
leaf springs off the Dana 60 and getting them and the rearend cleaned
up. Unfortunately, I only have until early afternoon to get things done
before I have to come home and watch my son while my wife goes to work,
so I don't know how far I'll actually get. I'll be happy if I can just
get the rearend completely stripped down and ready to sandblast.
...and I have to apologize for the picture
quality this time. I didn't have access to the good digital camera I
normally use, so I had to use the backup, which doesn't seem to work as
good in low-light situations. I'll probably have to use it again
tomorrow, if anything gets done enough to warrant even taking any.
However, I'm sure I'll take some of the rearend disassembly, just for
future reference. |

|
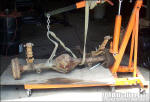
Fig. 8 - It actually took me several hours cleaning the shop and
rearranging stuff to allow me to get back to the Dana 60. Here's the
'before' shot.
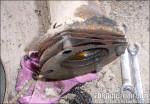
Fig. 9 - The passenger side has three steel shims between the axle
tube and the brake backing plate. I took this shot to remind me when
it's time to do the re-assembly.
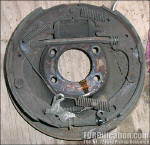
Fig. 10 - Ain't digital cameras the greatest? Remember the last time
you did a brake job and couldn't quite remember how the darn thing is
supposed to go back together? Well, that's a thing of the past. Now we
can just print out a copy of the pic and stick it in our shop manual.
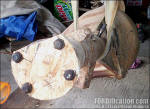
Fig. 11 - I whipped up these axle tube caps out of scrap lumber in
about 10 minutes.
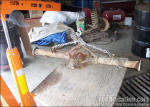
Fig. 12 - The Dana 60 is now stripped down and ready to be
sandblasted.
|
Sunday, June 6,
2004 - I finally made it to the shop about 10AM this
morning with a goal in mind...to dig out the Dana 60 buried at the back
of the shop and get it up to the front and stripped down, ready for
sandblasting. I ended up spending several hours doing some cleaning and
rearranging parts to allow me to get to it, and to create a small work
area right in front of the main overhead door. That way I'd have more
light, and it would be ready to roll outside to sandblast.
I started off by
removing the leaf springs. My 1/2" impact wrench wouldn't even budge the
U-bolt nuts, so out comes the breaker bar and a long pipe. After I got
them broke loose, the impact was able to finish up the job. These appear
to be in pretty good shape, so they'll also be sandblasted and painted.
Then I removed the rear brake line from the axle housing and brake
cylinders. I think this was the VERY first time ever that the tubing
wrench actually worked like it was supposed to...by loosening the line
nut without rounding it off. In fact, I believe this whole assembly
(line, line nuts and clips) is very serviceable, so these will also get
cleaned up and re-used. I just might have to polish the steel line and
hit it with a coat of clear, just to give the rearend a nice detail.
Next were the brake
shoe assemblies and axles. Since this was my first time disassembling a
Dana rearend, I had no idea how the axles came out, and after loosening
the brake shoes and popping the drums off, I was pleasantly surprised to
see that the axles are retained just like a Ford 9" rearend, with a
bearing flange. I was also hoping the axles didn't have some kind of
retainer up by the pumpkin, and again was pleased that when I attached
the slide-hammer to the axles and gave it a light tap, they both just
slid right out. I then took off the brake shoe assembly and backing plate
off and set them aside. When taking off the passenger-side backing plate
I noticed three steel shims between it and the axle tube. I took a shot
of this (Fig. 9) in case I forget where they go when it comes time to
re-assemble. I'm going to have to do a little research in their purpose,
just for general knowledge.
Since obviously I
didn't want any silica sand from the blaster getting into the rearend
assembly, I had to find some way of blocking off the axle tube ends. I
was just going to stuff a rag into each side, but noticed that the
bearing race which is pressed into the end of the axle tube would still
be exposed, and since the bearing looks to be in great shape, I didn't
want to ruin the race. I dug out a piece of particle board and cut some
end caps, using the steel shims as a template. I still stuffed a rag
into the end of each axle tube before putting the caps on, just to keep
residual 90-weight from seeping out while I'm trying to paint this.
The last thing that
needed done was to reattach the rearend assembly to the engine hoist
(Fig. 12). By hanging it from the rear shock mounts with an engine
sling, the sandblaster will have excellent access to all areas.
By this time it was
about time to head home, so I went ahead and just squirted some WD-40
around the shackle bolts and the taper-pin for the spring leaves to let
it soak it. I want
to completely disassemble the rear spring packs, to allow me to sandblast
and paint each leaf individually. It will also allow me to replace the
factory's anti-squeak strips placed between the leaves. In Fig. 13 you
can see some of that poking out between the bottom overload spring and
the leaf immediately above it. I'm seriously thinking about breaking out
the semi-gloss POR-15 for the springs, since I think that will be much
more durable than paint and should match the finish of the powdercoating
and Krylon. However, I'll probably mist a light coat of Krylon on the
tacky POR-15, just before it dries. Otherwise there will be no way of
future touchups, since paint will not stick to cured POR-15.
|
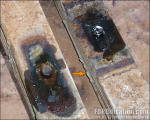
Fig. 13 - I squirted some penetrating oil on the taper pin holding
the leaves together. You can also see what's left of the factory
anti-squeak material. New Teflon strips are readily available in the
aftermarket. |

Fig. 14 - Both brake drums are grooved
and will need turned. I'll sandblast 'em first, get 'em machined and
then mask off the machined surface and paint inside and out. |
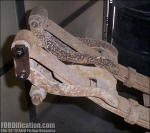
Fig. 15 - One last reference
shot, of the Flex-o-matic shackle assembly. |
|
|
So this is where things
are sitting, and probably will be for another week till I can get back
to work. Stay tuned! |
|
 |

Want to link to
this site? Please save this banner to your hard drive to place on your
webpage.
The correct link to use is
http://www.fordification.com
|