|
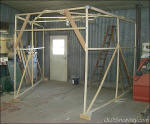
Fig. 1 - Here's the framework of the new indoor sandblasting booth.
Nothin' fancy, pure function. I'd already built most of this several
months ago...but it's intended use then was as a paint booth for some
car parts that never got done.
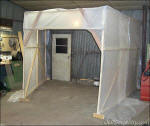
Fig. 3
- Here's a shot of the most of the heavy 6-mil plastic installed. You
can see I also wired in an overhead light for better visibility while in
the booth, though I might still have to bring some more auxiliary
lighting inside.

Fig. 5
- From this view you can see there should be plenty of room in here to
move around, even with some tools and equipment. I believe I might even
get the truck bed in here. |
11-28-03 - I haven't a lot of opportunity the past few
weekends to get any work done to the pickup project. Instead, I've had
to start weeding out some of my automotive projects. My wife Mary and I found out several weeks ago that we're expecting
another baby. Because of this, there are going to be some expenses
coming up that we'll need to deal with, so it was discussed and decided
upon to pare down my car collection. My '72 Pontiac Lemans (homemade
convertible) would have to go, as well as the '51 Studebaker pickup
project. I'm still keeping my '67 Olds 442 and this '67 Ford pickup.
Anyway, two weekends ago I spent parting out the Lemans and last weekend
I spent Saturday hauling the Lemans body shell and another parted-out
Ford pickup carcass to the recyclers and getting my 442 out of a second
garage I've been renting and into my current shop building. On Sunday I
spent the day rearranging the shop and getting everything put away and
situated for the winter. Now both of my remaining projects are in one
building, which will make things much easier...plus we don't have the
expense of the second garage rent.
I took a vacation day today (Friday) to give me a 3-day weekend. Mary
has to work all day both days this weekend, so I get to stay home and
play Mr. Mom...and today would have been the only chance to get anything
done in the shop. I'd say it was a fairly productive day. I'm planning
on spending all day next Saturday getting some more sandblasting done on
this cab, but Sunday I get to stay home and watch my son while mom
works.
The total cost on this sandblast booth was just the cost of the heavy
6-mil plastic. I got 3 rolls of this (10' x 25') for $13 each at the
local home improvement store. I could have paid a little less elsewhere,
but not in town today, and I wanted this done today. The
framework of 2x2 pine was left over from a previous project, and the
light I had laying around. I also used about a half roll of duct tape,
to seal the booth to the back wall. As you can see in Fig. 4 above, I cut a round
hole in one wall and stuck a floor fan up to it. When sandblasting, I
simply have to open the outside door to create enough airflow to
dissipate the sand dust. You can see that I left 12"-16" of plastic along
the bottom edge of each wall, which will simply be held down with spare
lumber, to seal it to the floor. Now, I'll be the first to admit that
this thing won't be 100% air-tight, but maybe 98%. I can deal with the
tiny bit that escapes...if it'll allow me to continue on this project
throughout the winter! |
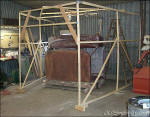
Fig. 2 - Before I got any more carried away I checked to make sure
the cab would fit.
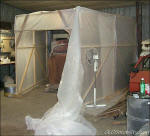
Fig. 4
- Here's the finished product. The plastic hanging down is attached all
along the near side, and will wrap around the front and attach on the
opposite side.
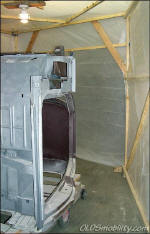
Fig. 6 -
Here's a view from the outside walkthrough door after the booth has been
completely enclosed. |