|


|

|
|
|
Polishing
Aluminum Trim |
by Glenn Edgemon
for FORDification.com |
|
 |
|
Given the number of questions and messages I've received in
response to a forum post on removing anodized aluminum, I
thought it might be useful to post a bit of a simplistic,
step-by-step tutorial on restoring anodized aluminum trim.
So, here goes...wish me luck - I'm no teacher!
Before starting, you should be aware that once you remove the
existing anodized coating and polish the trim, the trim will
oxidize to a dull gray color again unless some sort final
finishing treatment is added as a final step after polishing is
complete. The oxidation may take weeks or months depending on
the climate the truck is exposed to. To prevent this, either
clear coat, clear powdercoat, Zoop seal, or brite-dip anodizing
must be applied to make the shiny finish permanent. |
|
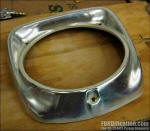
Fig.
1 |
1) We'll start with a stock piece of headlight trim from
my '66 F-250 project. As you'll see in Figs. 1 and 2, it's old,
road-rashed, oxidized, scratched, pitted and dented. You could
sand out all the pits and such by hand, but you'll have a bear
of a time getting through the hard anodized coating. So... |
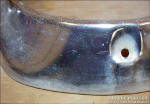
Fig. 2 |
 |
|
2) Get yourself some Red-Devil Lye. A simpler way to remove
the anodizing is to put 3 or 4 gallons of water in a 5-gallon
bucket and carefully mix in a can of Red-Devil Lye. (One can of
lye in 3 gallons of water will work if given time. 2 cans in 3
gallons is faster.) CAUTION:
Wear proper gloves, and more importantly, a face shield. I'm not
fooling around - BE CAREFUL - this solution will burn your skin
and blind your eyes if it gets on you. Immerse the part you're
working on in the bucket, or brush the solution on the part with
a paint brush. After about 10 minutes or so, your part will be
ruined. Actually, it's just temporarily ruined. It will be a
lovely, dull, brownish-color and the anodizing will be gone.
Within reason, the more concentrated the lye solution, the
faster the dissolution will go. After the lye bath be sure to
rinse the solution off the part(s) very well.
Here's the trim ring after it
came out of the lye bath (Fig. 3). |
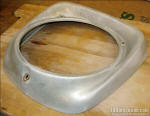
Fig. 3 |
 |
|
3) Next step is the time-consumer. You must pound out all
the obvious dents and polish out all the large pits, scratches
and gashes. I use a variety of sanding blocks, files, sand
paper, and most effectively, fine and medium Scotch-Brite pads
on a right-angle die grinder. Work to leave no rougher scratches
than 800-grit paper would leave. Keep working until all the
scratches are gone - but don't fool yourself: you won't be done
yet. The first stage of buffing with Tripoli compound will
reveal many more areas in need of attention. Trim piece after
first round of sanding is shown at right (Fig. 4). |
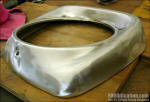
Fig. 4 |
 |
|
4) Next go over the part with Tripoli compound on a buffing
wheel and other mini-buffs, bobs, etc. to identify areas that
still need to be sanded smooth, pits that need to be removed,
dents that still need tapped out, etc. Fix those areas. Repeat
polish with Tripoli until smooth. Keep repeating this cycle
until the piece is as good as you can get it with Tripoli or you
reach your level of satisfaction/end of your patience. Figs. 5
and 6 (at right) shows me working out areas of pitting with a
Scotch-Brite pad after first round of Tripoli. This is also a
really good time to get the trim piece hung up in the buffing
wheel and sling it across the shop (or into your chest),
creating a few more dents and gouges to back up and work out. |
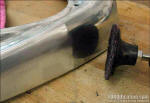
Fig. 5
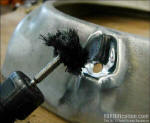
Fig. 6 |
 |
|
5) The last stage of buffing with White Rouge compound on a
loose cotton wheel is the easiest and most rewarding if you've
done the leg work to this point. The final product looks as
shiny as chrome plate and is ready for your level of finishing -
either put it on your truck and polish it every few months, or
seal it with a specialized sealer (paint or Zoop seal, etc.), or
get it clear powder coated, or (in my case) send it off to the
local anodizer and have it bright-dip anodized for a permanent
tough finish.
Hope
this is helpful...let
me know if you have questions.
PS: I didn't purchase pink shop towels. It's what you get if you
wash your red ones with your white ones... |
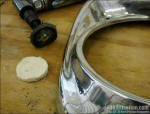
Fig. 7

Fig. 8 |
|
|
 |

Want to link to
this site? Please save this banner to your hard drive to place on your
webpage.
The correct link to use is
http://www.fordification.com
|