|


|

Page 09
Six Weeks Worth of Updates |
|
 |
|
Sunday,
May 06, 2007 - Yeah, it's been a while since
there's been a project update...sorry about that. It's not that
I haven't been picking away at it, it's just that I haven't
really gotten enough done to warrant a new page. So just to get
you back up to speed, here's a quick overview of what I've been
up to over the past 6 weeks: |
|
March 25, 2007 - Got to spend the whole day in the
shop, and actually got quite a bit done, though it's almost not
too obvious just by looking at it. The whole day was working on
the front and rear suspensions.
I got the rear suspension completely reassembled and it's
sitting back on the ground. I really wanted to leave the thick
bottom overload leaf off, but the center leaf-spring bolts I had
would have been too long, and since everything was closed today,
I decided to just use it for now and see how it looks once
everything was back together. I can always pull that leaf out at
a later date, once I get some shorter bolts.
I then dropped the front suspension off the donor truck (Fig.
01), intending to just swap it in as a complete unit. However,
upon disassembly, I found that it really wasn't in as good a
shape as what was already on the truck (Fig. 02), so I ended up
keeping what I had. However, I did have to almost completely
disassemble the choptop's front suspension...to swap the radius
arms side-to-side. The previous owner had the right-side arm on
the left and vice-versa, which put the shock mounts pointing up
instead of down. I then got the front springs cut down by 2 full
coils on each side, and then got the front suspension
reassembled. I couldn't measure the amount of drop since the
springs that were in the choptop when I got it weren't from a
Ford truck...I don't know what they were originally installed
on, but they didn't fit right (Fig. 03). The coils I cut were
from the donor truck which had a 302. However, it appears as if
the front was dropped several inches, and while the truck wasn't
sitting on flat level pavement when I got done (it's sitting
over the oil pit and the concrete is slightly slanted there), it
didn't appear to have adversely affected the camber.
Figs. 04 and 05 were taken towards the end of the day. That
front fender is just sitting there, to get the visual on the
amount of drop the front got. The radiator support isn't
completely cinched down, so the fender will drop down another
1/2" or so when that gets tightened up.
Since the two
coils I cut from the front springs doesn't appear to have
adversely affected the camber, I'm going to keep an eye on
things as I move the truck around over the next few weeks, to
allow things to move around and settle into place, and if it
doesn't appear to have changed much more, I might very well take
another coil off the springs and lower it a tad bit more. |

Fig. 01 - Removing the donor truck's front suspension.
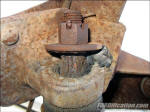
Fig. 02 - The donor truck's radius arms were totally shot
and not useable.
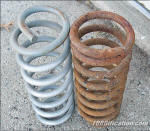
Fig. 03 - The spring on the left is what was on the
choptop truck when I bought it, compared to a factory spring on
the right.

Fig. 04
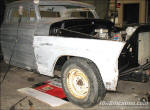
Fig. 05 |
 |
|
Friday, March 30, 2007 - I got to spend about
four hours in the shop today. Got the backside of the front
fenders painted with POR-15 and topcoated with Krylon. Then
I got started stripping paint in the cab interior, got about
1/3 done (the easy stuff). I'll have probably another full
day's worth of work finishing that task up.
Anyway,
I'll get the fenders mounted onto the truck for the final
time on Sunday and will get the minor imperfections filled
and sanded down. Hopefully by Sunday night the outside of
the fenders will be ready for paint. I'm also hoping to have
the upper and lower valance panels and front bumper stripped
and painted. |
 |
|
Sunday, April 01, 2007 - Well, I didn't get
quite as much done today as I'd have liked, but it was
still productive. I got the radiator support cinched
down, after modifying the front support bushings. Since
I didn't have any good used bushings, I had to modify a
pair of rear cab bushings. Those are about 1/4" too
tall, so I had to cut them down to fit. Then I got the
fenders mounted, though it took longer than I thought.
The driver's fender gave me a hard time trying to get it
to fit and line up. Ended up having to also realign the
driver's door as well as a little surgery with a BFH to
the door post to get the fender to fit smoothly....but
it eventually made it on and looks good. I also got the
the upper and lower valance panels stripped and got the
lower valance painted. Then I got the front painted
bumper stripped down, and got the backside painted.
Here's a picture of the truck as it sits now:
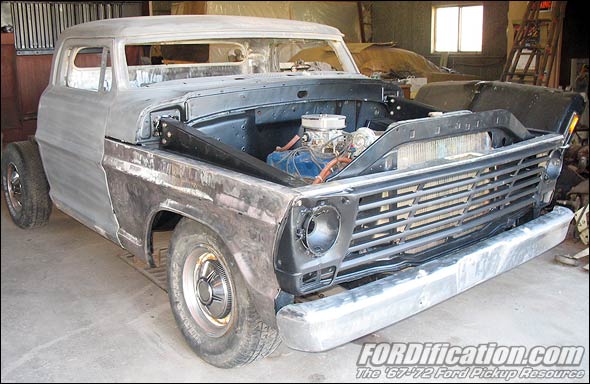
Fig. 06
As you can see, right now there's a larger-than-normal
gap between the fender and cowl. That's because it
appears as if I need to shim the front cab mounts to
life the front of the cab up, which will bring the
fenders up too. However, I'll wait to do that until I
have the bed mounted, so I can line everything up at
once. In this picture the grille and bare-metal upper
valance panel were just trial-fitted to ensure proper
fender alignment, they'll both come off one more time,
and the bare-metal front bumper was just sitting there
for the visual. The hood is also down to bare metal, and
I kinda wanted to throw it on to complete the picture of
the whole front clip being shiny, but it was buried at
the back of the shop and I wasn't feeling that
energetic. Too bad, as the hood I'm planning on using is
the one I previously modified for the shaker scoop
setup, and it would have been an awesome shot.
I also did a little spring cleaning in the shop, since I
had a full winter's worth of garbage and spare parts
laying around, so much so that it was getting really
hard to get around. It was a beautiful day today, so I
pushed the truck out into the driveway. Here's a
comparison shot...the first shot was taken the day I got
this truck, the second shot was taken this afternoon.
(click each to enlarge)
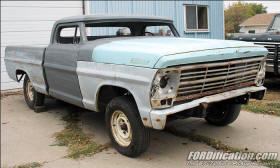
Fig.
07 |
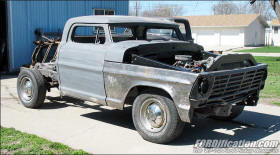
Fig. 08 |
Not lookin' too shabby, huh? I mean, it's still got a
ways to go, but there's some definitely progress being
made.
Incidentally, after moving the truck around a little bit
today, it became apparent that my trimming the front
coils did affect the camber. |
|
Sunday, April 08, 2007 - I did get to
spend another day in the shop today, most of it
doing bodywork. Man, that's a messy freakin' job! By
the time I got home I was covered with so much
sanding dust that I looked like a ghost!
Anyway, I got the lower valance mounted, got the
upper valance painted and ready to install, and got
the hood hinges cleaned up and ready to paint, and
got one of them painted. I'm doing the hinges like
everything else...getting it cleaned up with the
wire wheel and sandpaper, then giving it a coat of
POR-15 and then a couple coats of Semi-Flat Krylon.
However, I used up my last foam brush painting the
first hinge, and even though I had a case of them at
the house, I forgot to bring them to the shop, so
the second hinge will have to wait till next time. I
also got the front bumper painted and ready to
install. |
|
I then spent the rest of the day sanding and filling
and sanding and filling and.....well, you get the
idea. I'm about 80% done with the exterior bodywork
on the front-end sheetmetal, I've got probably one
more day's worth of finishing before it'll be ready
for paint. Most of the bodywork I'm doing is just
door dings, though I'm also filling a few trim holes
and finishing smoothing off the seam on the driver's
door where I welded in the lower door skin. Fig. 09
was taken late this afternoon. |
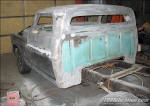
Fig. 09 - A shot of the day's progress doing
bodywork. |
|
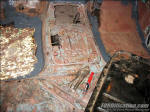
Fig. 10 - Marking the transmission tunnel, preparing to cut
it out for a removable cover.
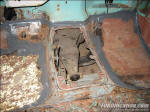
Fig. 11 - Taken after cutting out the tunnel and dressing it
up. I still need to drill the mounting holes. |
Sunday, April 29, 2007 - Spent another day in the
shop...as usual, I didn't get as much done as I was hoping. It
seems that it's always 'two steps forward, one step back' with
me.
Since I'm taking all next week off work (April 7-11) to finish
up the body and get it painted (knock on wood!), I decided not
to do any bodywork today. I decided I'd get the truck wired up.
I decided to use a '67 Camper Special harness, so there will be
some minor harness mods needed to hook it up to some of the
'68-up accessories (like the heater switch and brake-light
switch). Got the engine compartment wiring installed after doing
a few minor repairs and rewrapping it, and then got started with
the underdash harness. Got it about half done before it dawned
on me that I had to get the firewall cover installed first.
However, before I could install that I had to get the cab floor
and firewall painted, so I spent some time finishing up the prep
on the floor. Got some brush-on seam sealer over the top of the
floorpan's patch panels and is now ready to paint.
Then I got
started cutting out the butchered transmission tunnel, so that I
could install a removable cover. Figs. 10 and 11 show the before
and after pictures. You can also see the Hurst Indy floor
shifter (that was graciously donated by a FORDification forum
member) which I got trial-fitted, but it's very sloppy and will
need rebuilt. |

|
Sunday, May 06, 2007 - As I mentioned in
the April 29th update, I'm taking all this week off from work to
get the bodywork done and (hopefully) get the truck painted.
Therefore, I really didn't want to do any bodywork today, so I
decided to get started on the engine. However, unless you've
read up on my progress in the
FORDification
forums, you're not aware of a major change of plans I made
last week regarding the drivetrain, so let me get you up to
speed.
While
trial-fitting the floor shifter, it became apparent that not
only would the shifter have to be rebuilt, but I'd also have to
do some fabrication to the shifter rods and levers to get it to
function properly...something I really wasn't overly-excited
about. Plus, I got to thinking about how difficult working a
clutch pedal was going to be anyway, seeing as how I'll be
practically sitting on the floor when the interior is
reassembled! Therefore, after much thought, I've decided to
remove the 302/3-speed and replace it with the 390/C6 that I've
been saving for my '67 project. Besides, I've been stockpiling
all kinds of cool dress-up and performance goodies for the 390,
whereas the 302 would've been kinda boring to look at whenever
the hood got popped open...and since this truck is probably
going to attract some attention on the street, I decided that
I'd just simply be happier with the 390 in here. I've still got
the 460/C6 that WILL eventually get put into the choptop, but in
the meantime, at least until I need it back for my '67, the 390
will go into the choptop.
So anyway, on today's agenda was getting started
getting the 390 cleaned up. I needed to push the truck out into
the driveway to give me room to work on the engine, but I'd have
to install the steering box and linkage first. I spent about 90
minutes getting the steering box cleaned up and painted: |
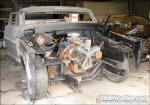
Fig. 12 - Well, here we go with another drivetrain swap. I
decided it would be easiest (and safest for my freshly-applied
engine compartment paint) to just remove the radiator support,
to prevent the hoist from having to drop the engine/tranny down
at an extreme angle.
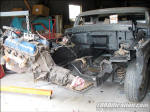
Fig. 13 - Getting the 302 and 3-speed tranny pulled from the
truck. I'll probably end up just selling these. |
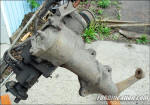
Fig. 14 - Before |
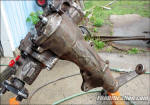
Fig. 15 - During |
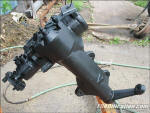
Fig. 16 - After |
|
|
After getting the steering components installed, the truck got
pushed out into the driveway, and I then set my sights on the
VERY greasy 390. This is the engine from a '75 F150 that was
featured in a
'67 project
update page during it's removal. Figs. 15 and 16 show the
'before' shots. Unfortunately, since I don't have access to a
pressure washer, I'm going to have to do this the old-fashioned
way....plenty of time and elbow grease (no pun intended).
Since I'm (probably) going to be painting this engine, I first
had to strip off all the peripherals to get it down to a basic
long-block. That included removing the A/C, alternator, power
steering pump, exhaust manifolds, water pump and pulleys, etc.
Unfortunately, when removing the exhaust manifolds I ended up
snapping off 3 of the bolts, so I'm going to have to do some
drilling to remove the stubs from the heads.
I then pushed the truck out into the driveway and got to work.
Beginning with the transmission, I spent a good 4-5 hours just
scraping grease off with a putty knife and wire brush. Once the
majority of the baked-on grease was off, I fired up the angle
grinder with a wire wheel and went to work. I got the
transmission 98% cleaned up and got started on the engine block
before having to call it a day. I'd estimate almost another full
day's worth of work is ahead of me getting the block cleaned up
enough to paint, but that'll come at a later date, since
starting tomorrow morning (Monday May 7th) I'm going to be
spending the whole week in the shop getting the bodywork on the
cab and front sheetmetal finished up and getting those areas
painted. |

Fig. 17 - One view of the choptop's new engine...

Fig. 18 - ...and here's another. I'll bet there's at least
10 lbs. of grease and grime on this thing!!
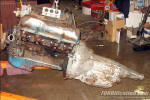
Fig. 19 - Here's a shot taken at the end of the day. It's
looking MUCH better, but still needs a lot of cleaning. |
|
 |

Want to link to
this site? Please save this banner to your hard drive to place on your
webpage.
The correct link to use is
http://www.fordification.com
|