I need to get some pics of the compressor setup and also the cab floor that is almost done.
Enjoy
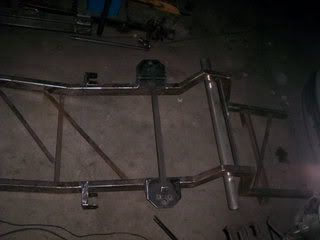
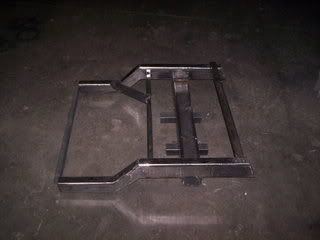
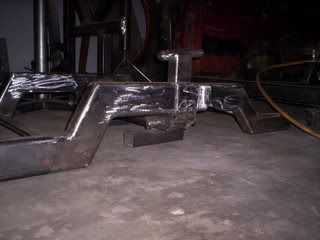
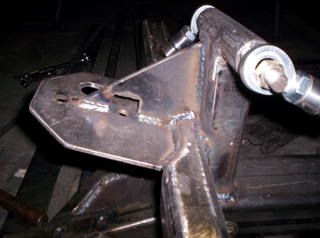
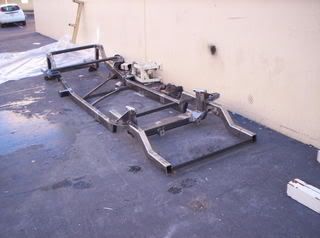
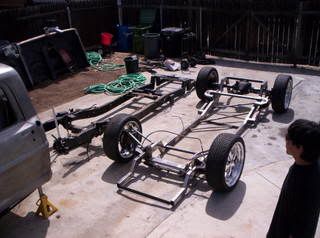
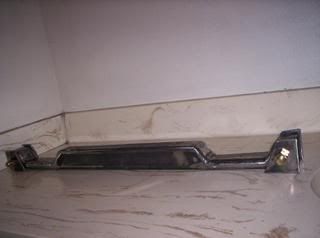
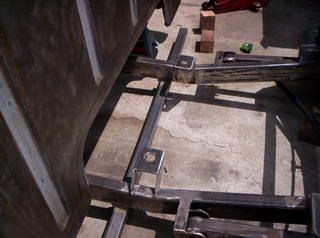
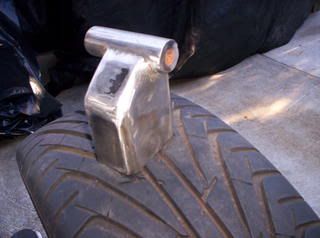
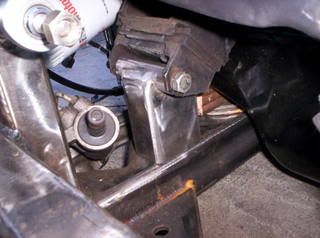
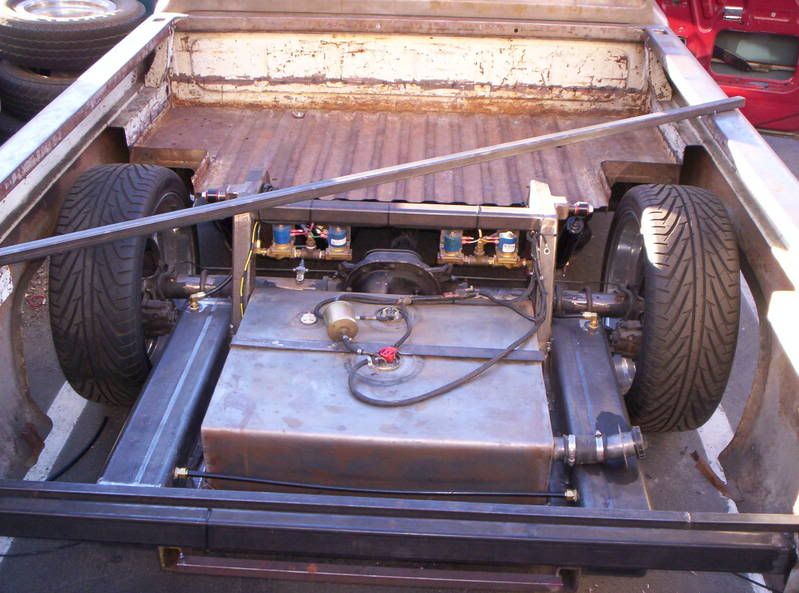
This is the back part of the frame,bag mount's and link bar mount's.
![Image](http://i66.photobucket.com/albums/h257/68f100/marz68/000_1743.jpg)
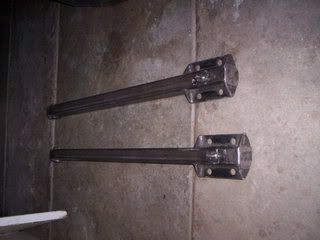
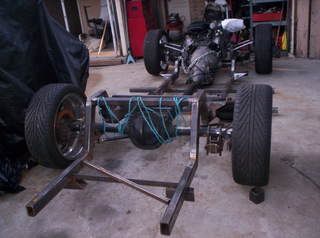
These are the link bars made out of 2x3x1/4 wall, they can be made to mount were our leafsprings go. All you need is some u bolt's and axle pads
and there ready to mount.
![Image](http://i66.photobucket.com/albums/h257/68f100/marz68/000_1406.jpg)
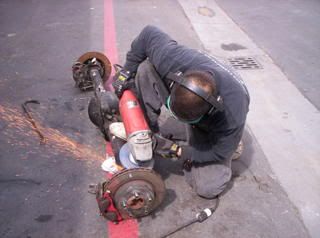
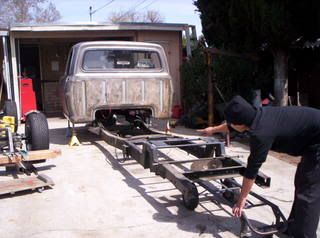
Here I am with a saws all cutting some scrap metal from under the rockers that is stopping me from laying my truck all the way down.
![Image](http://i66.photobucket.com/albums/h257/68f100/marz68/000_2402.jpg)
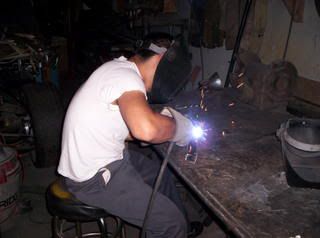
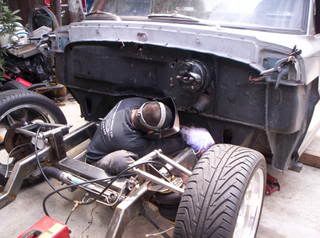
Here is my brother throwing down with his welding skills on my lower control arms.
![Cool 8)](./images/smilies/icon_cool.gif)
![Image](http://i66.photobucket.com/albums/h257/68f100/marz68/000_2406.jpg)
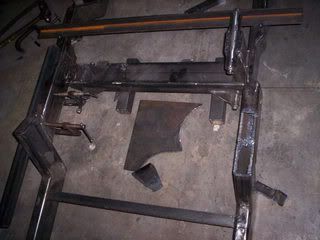
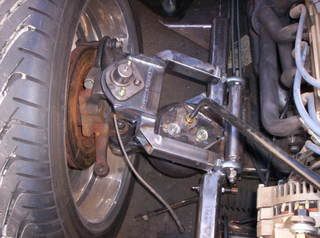
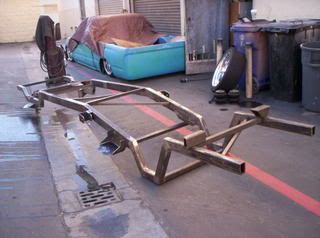
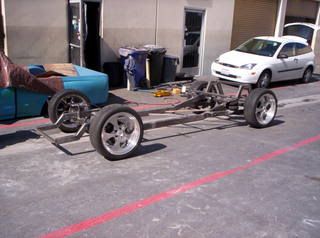
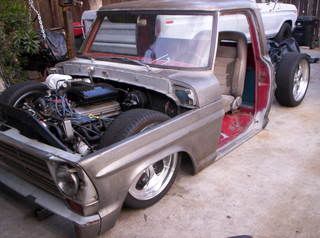
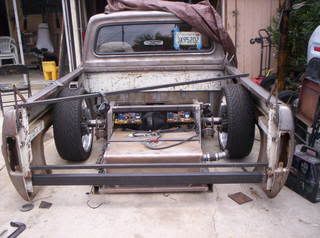
This is the front clip of my truck with some small changes from the stock specs of the mustang II setup. It worked out better than I thought it would.
![Image](http://i66.photobucket.com/albums/h257/68f100/marz68/000_2056.jpg)
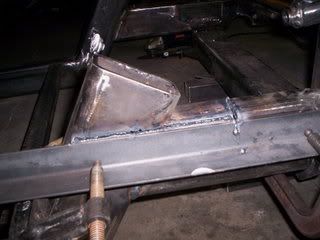
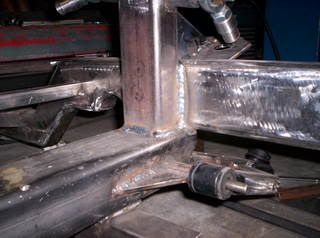
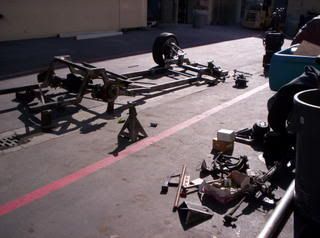
The next 4 pictures show were I am joining the frame together with the front clip, the horns from the frame are getting trimmed down and will be capped when it's all done.
![Image](http://i66.photobucket.com/albums/h257/68f100/marz68/000_2149.jpg)
![Image](http://i66.photobucket.com/albums/h257/68f100/marz68/000_2147.jpg)
![Image](http://i66.photobucket.com/albums/h257/68f100/marz68/000_2148.jpg)
![Image](http://i66.photobucket.com/albums/h257/68f100/marz68/000_2157.jpg)
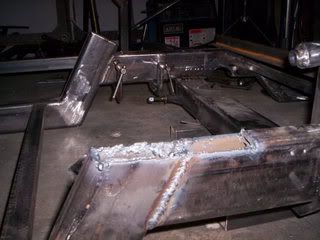
Some welding done on the upper and lower control arm mounts.
![Image](http://i66.photobucket.com/albums/h257/68f100/marz68/000_2189.jpg)
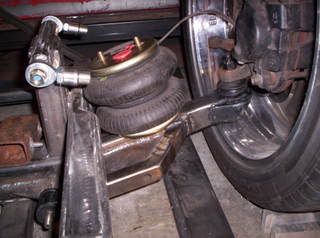
Checking for bag clearance. The bags are contitec 2600.
![Image](http://i66.photobucket.com/albums/h257/68f100/marz68/000_2185.jpg)
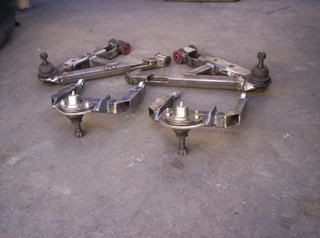
The next 3 pictures show the upper and lower control arms, it took 4 trys until I got them right what a pain in the a$$
![Mad :x](./images/smilies/icon_mad.gif)
There is a picture in here that shows some round tube control arms that were to long which was the first set I did. Those upper arm ball joint's are stock mustang II equipment and the lower ones are stock Mopar's.
![Image](http://i66.photobucket.com/albums/h257/68f100/marz68/000_2483.jpg)
![Image](http://i66.photobucket.com/albums/h257/68f100/marz68/000_2486.jpg)
![Image](http://i66.photobucket.com/albums/h257/68f100/marz68/000_2489.jpg)
![Image](http://i66.photobucket.com/albums/h257/68f100/marz68/000_2187.jpg)
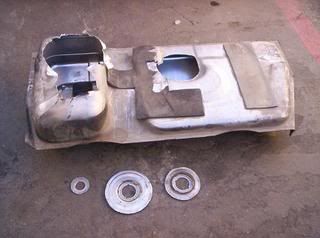
I pulled the stock 89 mustang tank and cut out what I needed to make the new tank work.
![Image](http://i66.photobucket.com/albums/h257/68f100/marz68/000_2490.jpg)
![Image](http://i66.photobucket.com/albums/h257/68f100/marz68/000_2476.jpg)
![Image](http://i66.photobucket.com/albums/h257/68f100/marz68/000_2261.jpg)
I flipped the frame over so that I can do some final welding to the underside.
![Image](http://i66.photobucket.com/albums/h257/68f100/marz68/000_2264.jpg)
![Image](http://i66.photobucket.com/albums/h257/68f100/marz68/000_2257.jpg)
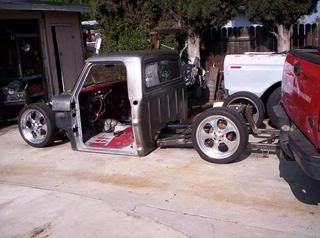
This part was fun cause I felt like a little kid building a big RC truck.
![Laughing :lol:](./images/smilies/icon_laughing01.gif)
![Image](http://i66.photobucket.com/albums/h257/68f100/marz68/000_2266.jpg)
![Image](http://i66.photobucket.com/albums/h257/68f100/marz68/000_2269.jpg)
![Image](http://i66.photobucket.com/albums/h257/68f100/marz68/000_2296.jpg)
![Image](http://i66.photobucket.com/albums/h257/68f100/marz68/000_2294.jpg)
![Image](http://i66.photobucket.com/albums/h257/68f100/marz68/000_2378.jpg)
![Image](http://i66.photobucket.com/albums/h257/68f100/marz68/000_2383.jpg)
![Image](http://i66.photobucket.com/albums/h257/68f100/marz68/000_2397-1.jpg)
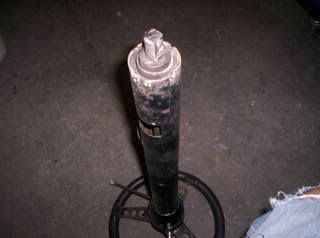
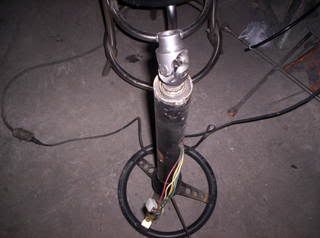
The stock steering column was modified by cutting some chunks out of the shaft to match the double D U joint that I got, I also shortened the column 4 to 5" cause I didn't like how the stock setup sits really close to the driver.
![Image](http://i66.photobucket.com/albums/h257/68f100/marz68/000_2441.jpg)
![Image](http://i66.photobucket.com/albums/h257/68f100/marz68/000_2442.jpg)
![Image](http://i66.photobucket.com/albums/h257/68f100/marz68/000_2326.jpg)
![Image](http://i66.photobucket.com/albums/h257/68f100/marz68/000_2363.jpg)
I built the trans mount out of 2x2x1/4 with some notches for my exhaust,
it includes 4 tabs that will be welded to the frame and 2 5/8 bolts. I did it this way so that it can be removed with no problems.
![Image](http://i66.photobucket.com/albums/h257/68f100/marz68/000_2370.jpg)
![Image](http://i66.photobucket.com/albums/h257/68f100/marz68/000_2377.jpg)
![Image](http://i66.photobucket.com/albums/h257/68f100/marz68/000_2364.jpg)
On this picture I am setting up the trans mount for welding, it is set 1/4 above the bottom of the frame.
![Image](http://i66.photobucket.com/albums/h257/68f100/marz68/000_2371.jpg)
Rear cab mounts.
![Image](http://i66.photobucket.com/albums/h257/68f100/marz68/000_2341.jpg)
![Image](http://i66.photobucket.com/albums/h257/68f100/marz68/000_2365.jpg)
![Image](http://i66.photobucket.com/albums/h257/68f100/marz68/000_2366.jpg)
![Image](http://i66.photobucket.com/albums/h257/68f100/marz68/000_2565.jpg)
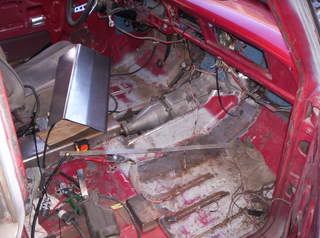
I notice that the floor on these trucks have more leg room on the driver side than the passenger side so what I did was narrow the hump 5" from the passenger side making both sides even.
![Image](http://i66.photobucket.com/albums/h257/68f100/marz68/000_2598.jpg)
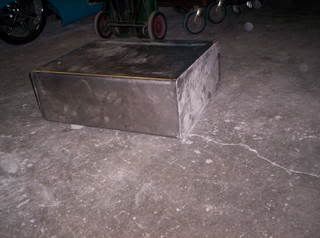
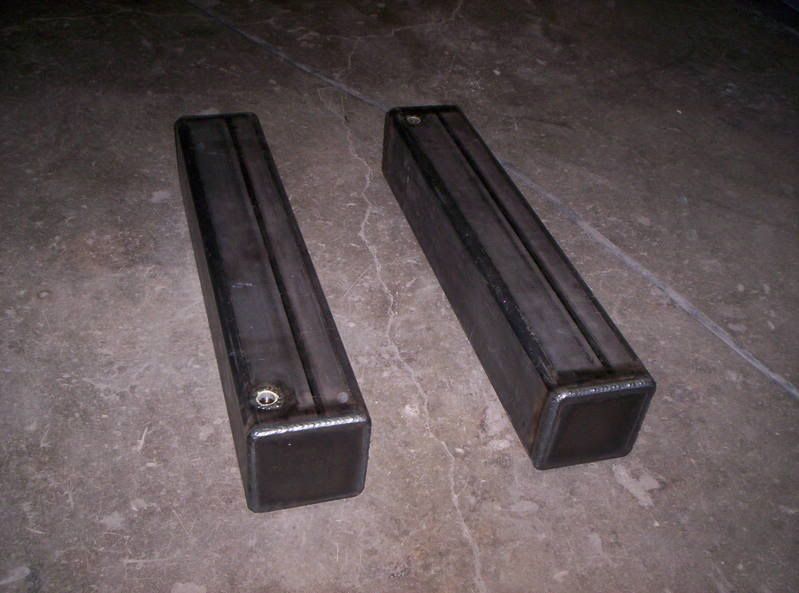
My air tanks are made from 6x6x1/4 steel, I did this for wheel clearance.
Every 7" of this material equal to 1Gallon of air space, each of my tanks hold 4.57 gallons.
![Image](http://i66.photobucket.com/albums/h257/68f100/marz68/000_2591.jpg)
![Image](http://i66.photobucket.com/albums/h257/68f100/marz68/000_2597.jpg)
![Image](http://i66.photobucket.com/albums/h257/68f100/marz68/000_2600.jpg)
![Image](http://i66.photobucket.com/albums/h257/68f100/marz68/000_2614.jpg)
![Image](http://i66.photobucket.com/albums/h257/68f100/marz68/000_2615.jpg)
![Image](http://i66.photobucket.com/albums/h257/68f100/marz68/000_2577.jpg)
I just added these pictures that I took this morning.
The next 4 pictures show the trany hump and the extra strip of sheet metal I used to expand the passenger side.
![Image](http://i66.photobucket.com/albums/h257/68f100/000_2649-1.jpg)
![Image](http://i66.photobucket.com/albums/h257/68f100/000_2647.jpg)
![Image](http://i66.photobucket.com/albums/h257/68f100/000_2648.jpg)
![Image](http://i66.photobucket.com/albums/h257/68f100/000_2652.jpg)
Here are the compressors that I am using as backup just incase my belt driven comp goose out. They are 3 fire stone comp and they do an ok job.
![Image](http://i66.photobucket.com/albums/h257/68f100/000_2646.jpg)
![Image](http://i66.photobucket.com/albums/h257/68f100/000_2645.jpg)
![Image](http://i66.photobucket.com/albums/h257/68f100/000_2644.jpg)