'67 F250 - This project is now for sale (EVERYTHING)
Moderator: FORDification
- theletup
- New Member
- Posts: 88
- Joined: Tue Jun 19, 2012 1:00 am
- Location: Post Falls, ID
Re: '67 F250
Okay so here's where I'm at on the crown vic install:
I got the inside of the frame rails all cleaned up by removed the remainder of the crossmember left over from cutting the middle section out with a sawzall. I did all of my cutting inside the frame rails using at 4 1/2" grinder, a jig saw with the base plate removed and a hammer.
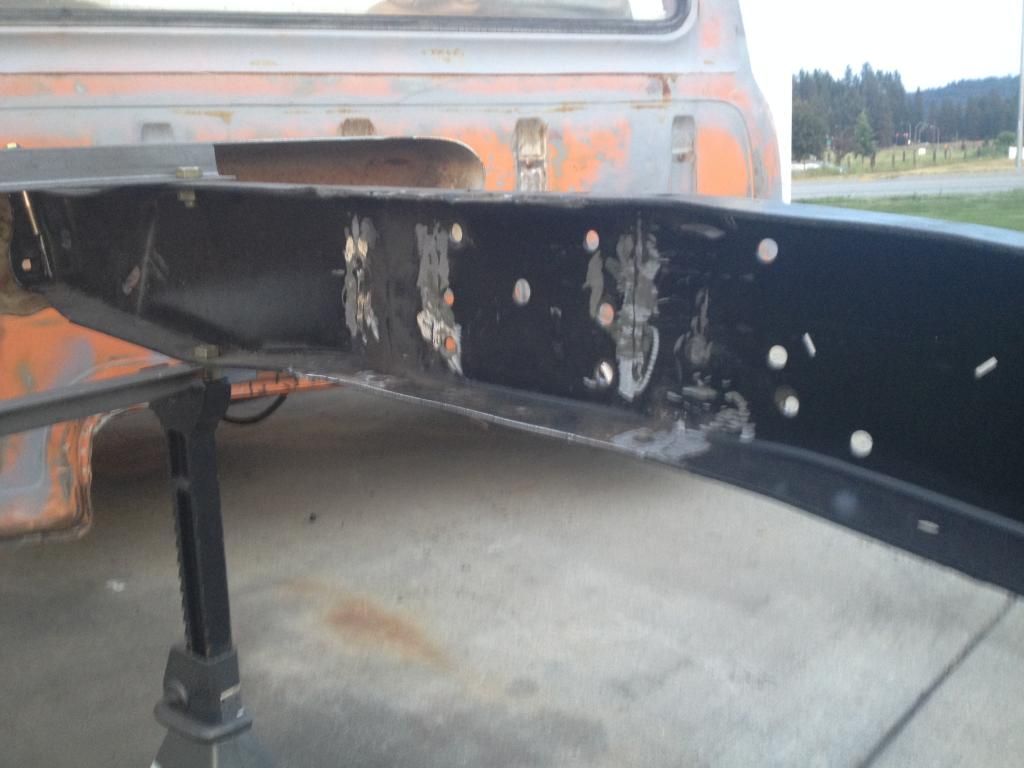
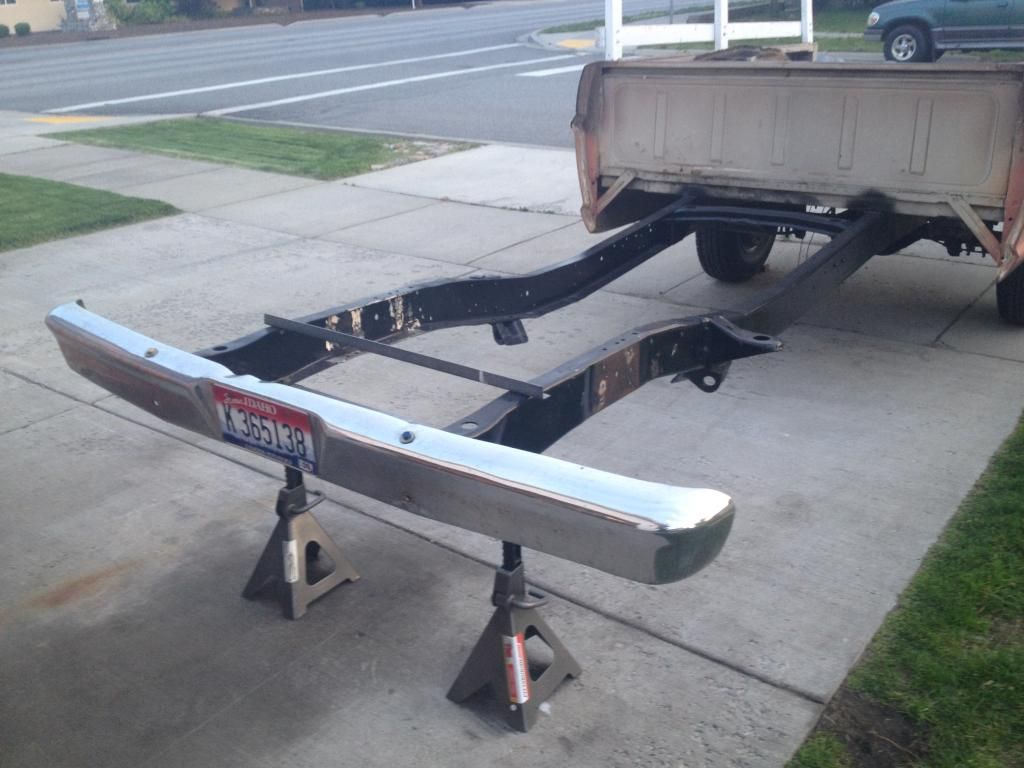
Then I bolted up my bumper just to make sure the frame hadn't moved at all (which it had not):
Then after re-measuring and double checking for my center line about 300 times I drilled out 3/4" holes on the bottom of the frame where my alignment pins were located on the crown vic k-frame, set the crown vic in place and drilled my 4 holes from the mounting bolts.
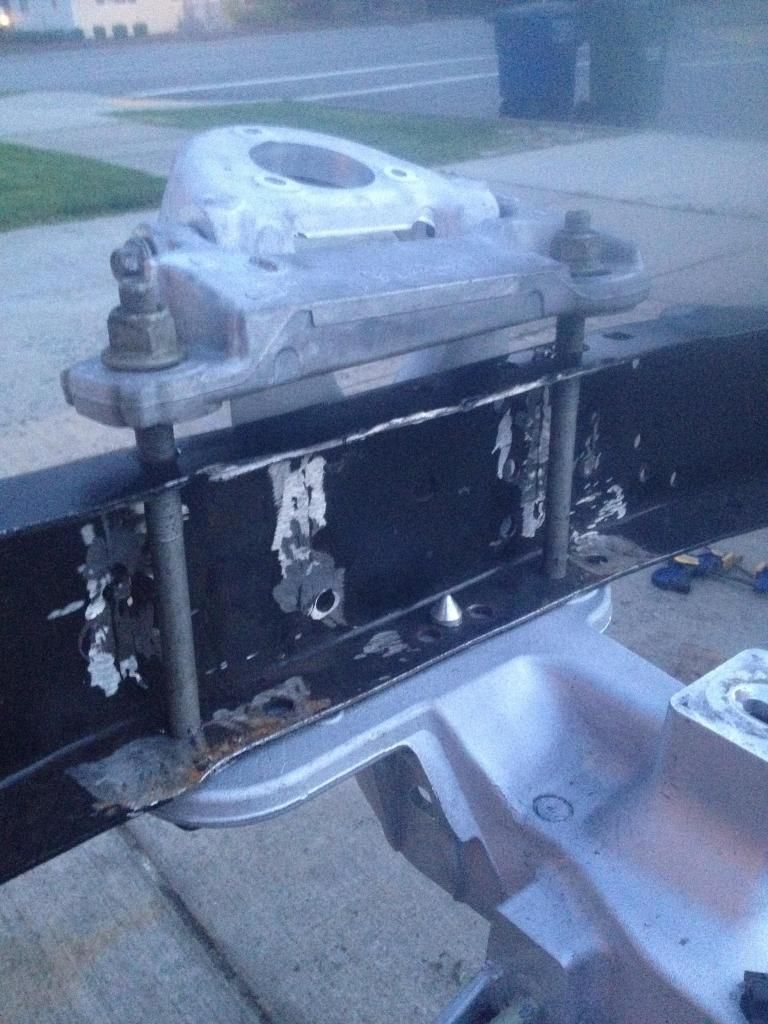
Tip: Double check your frame and make your own measurements but I found that my centerline on my frame was centered between two small holes on the bottom of my frame. Also I found that the center line was the center of the coil spring/shock towers. I measured this before removing the stock suspension parts from the frame. I used a square and laser to transfer my center line marks to the bottom of the frame and then realized all I had to do was measure between the two small holes on the bottom of the frame. Like I said you may want to double check but I thought I'd throw that out there since I hadn't read it anywhere while researching my install process. You can see the holes I'm talking about in the pic above ^
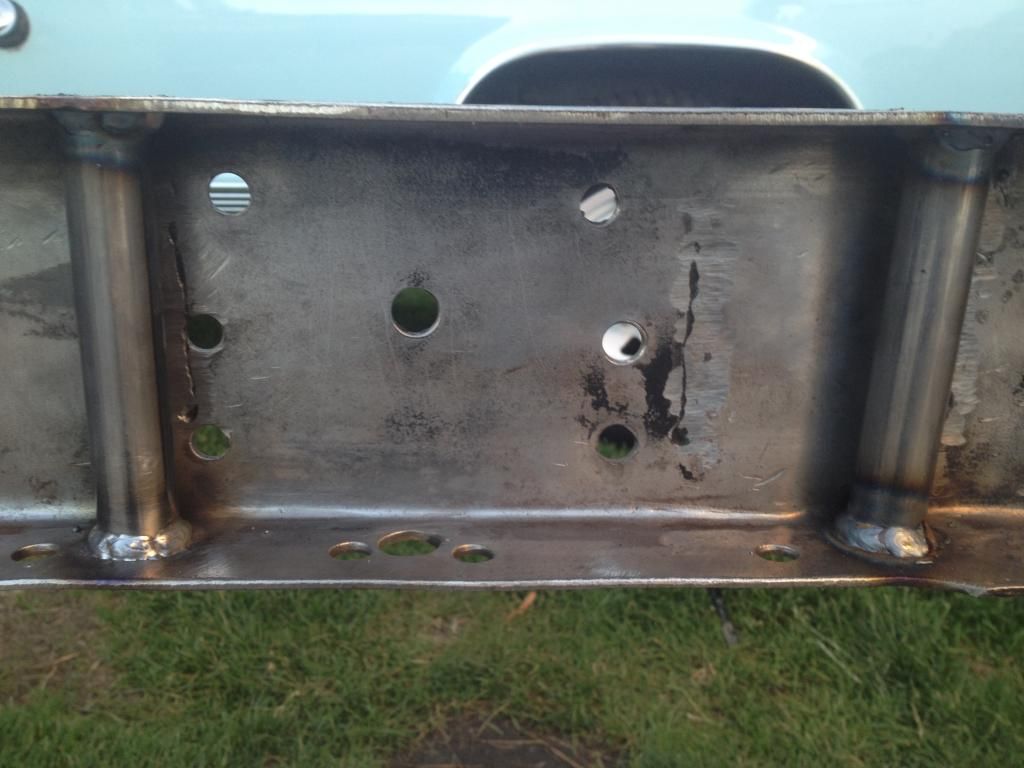
Next I removed the crown vic k-frame and welded in some 120 wall tubing to re-enforce the frame where the mounting bolts go through:
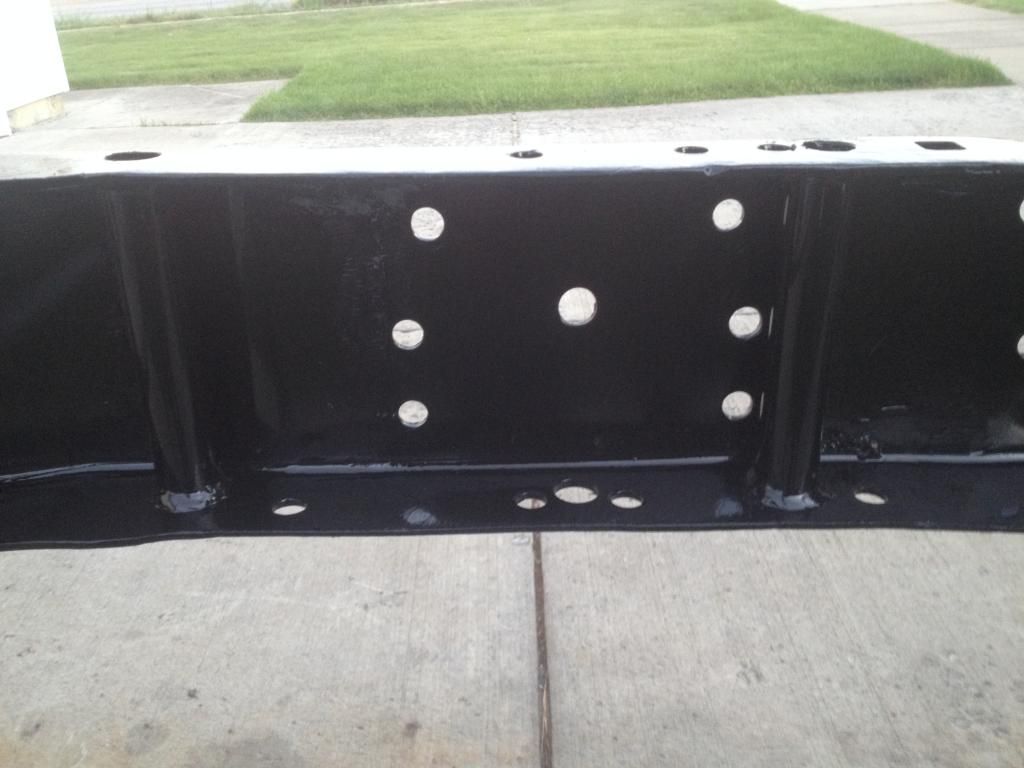
And painted the inside of the frame:
Here's an important step that I haven't seen anyone post about yet:
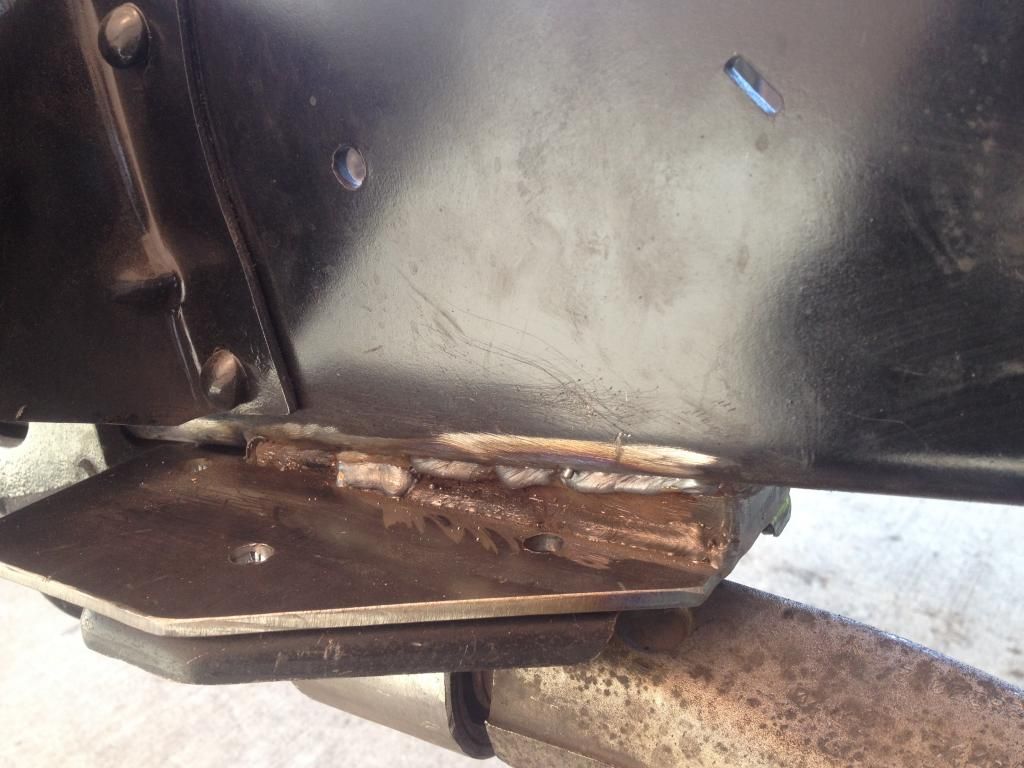
On the crown vic the lower control arm mounts to the frame at an angle. It doesn't sit parallel to the ground like our trucks once it's mounted. This is important because of the way the bushing is clocked on the plate. I cut the tubing/bushing off of the mounting plate and re-clocked if so that the slotted hole would be parallel to the ground when welded up to the frame. This way when I want to adjust my camber and caster the rear of the control arm is only moving side to side and not up and down in the mount. This will also keep the control arm in place instead of it trying to ride up and in from the weight of the vehicle:
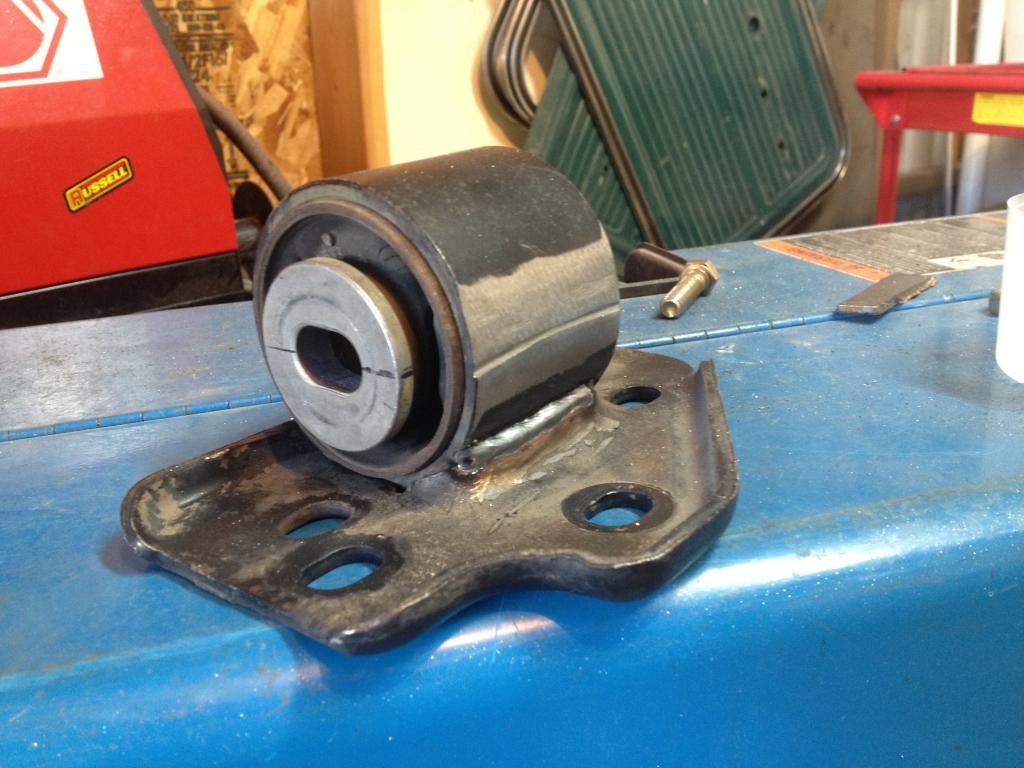
You can see the cut line in the tubing where it was welded to the plate before.
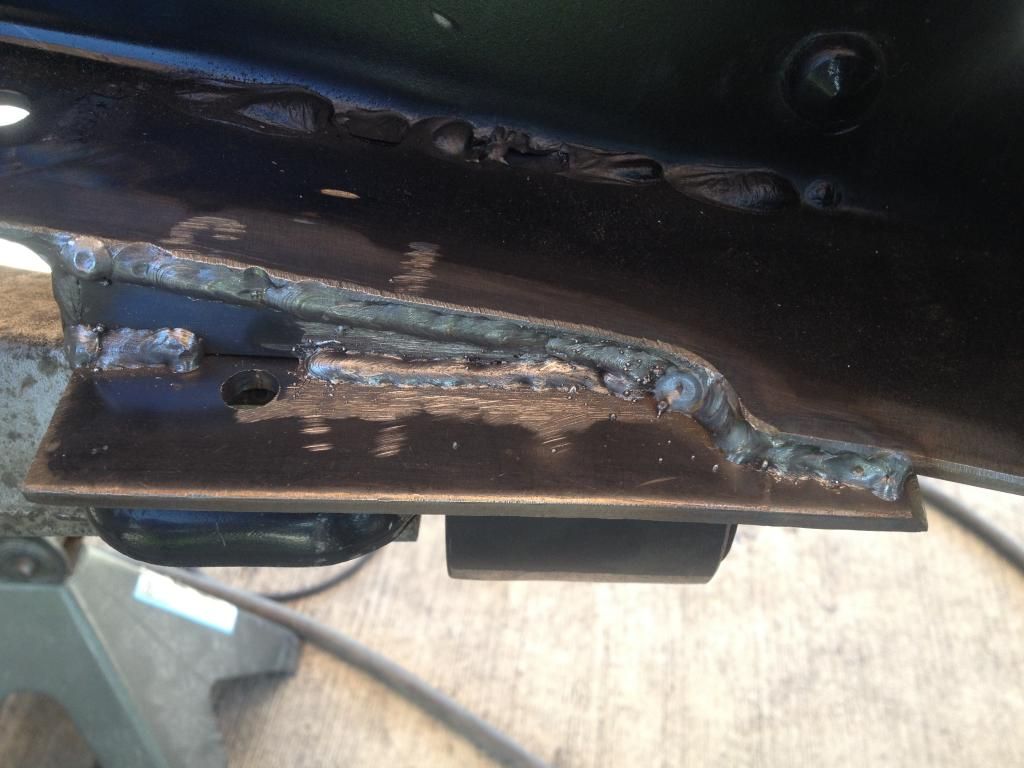
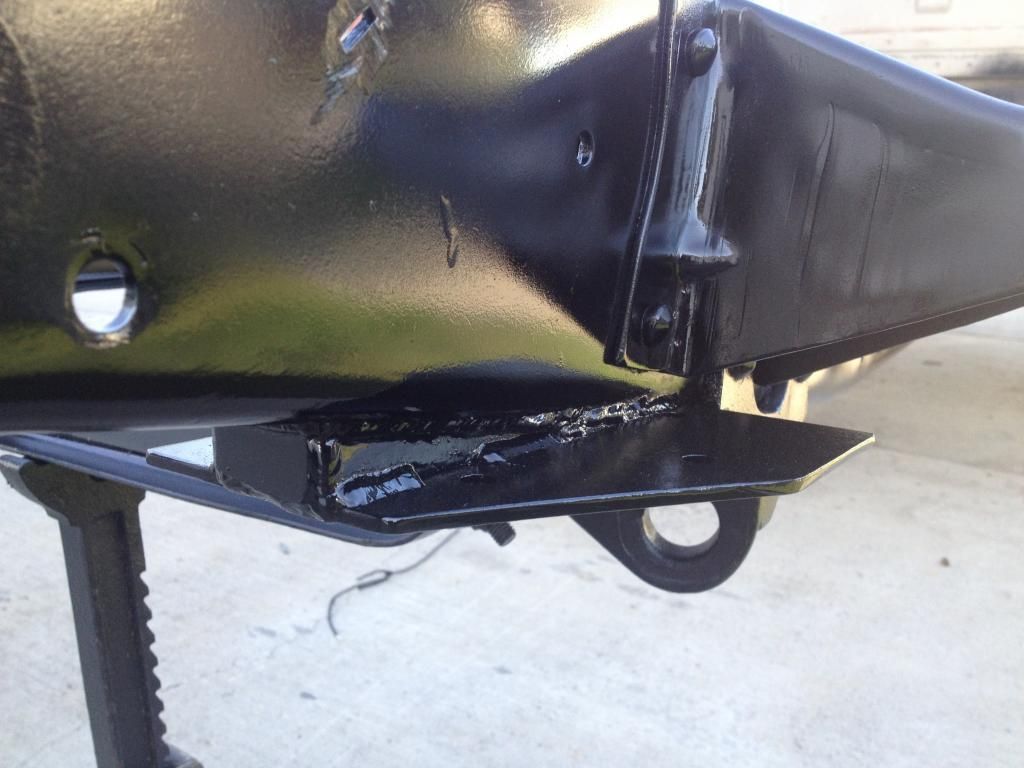
Next I bolted the crown vic in place with the lower conrol arms installed and built a rear mounting plate. You can also see in this picture, the spacer i used between the frame and the upper mount for the k-frame. It is a piece of 1 1/2" x 5/8" aluminum flat bar cut to length and drilled for the mounting bolts to go through. It looks nice and clean. I built the mounting plates from 3/16" steel plate.
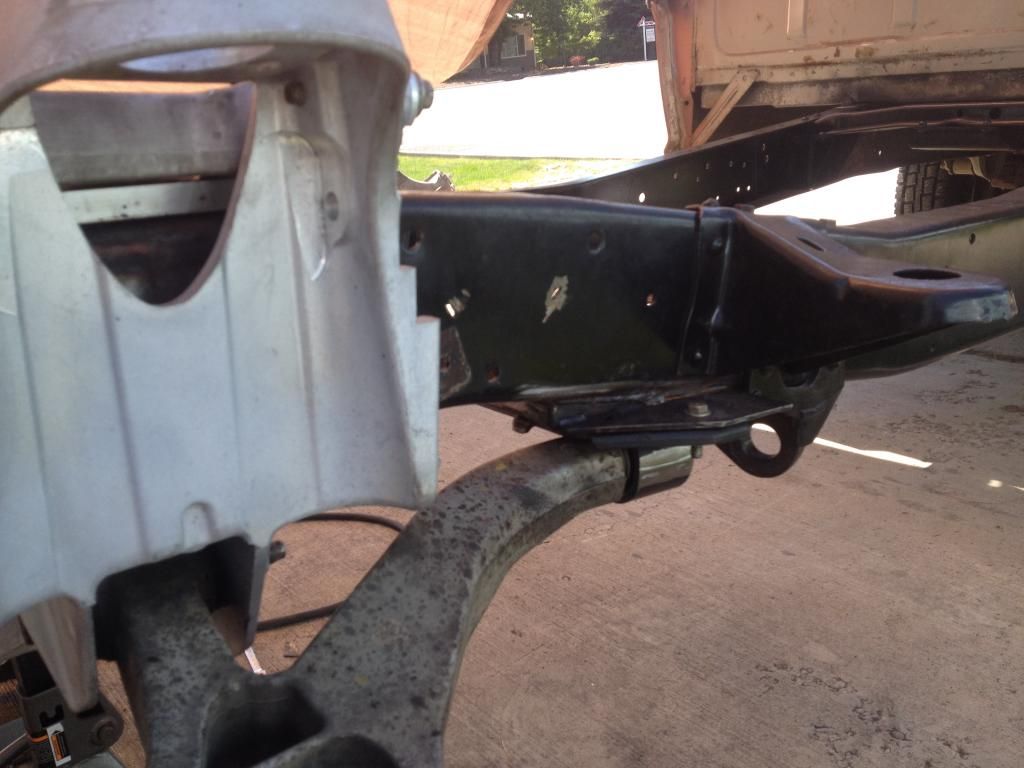
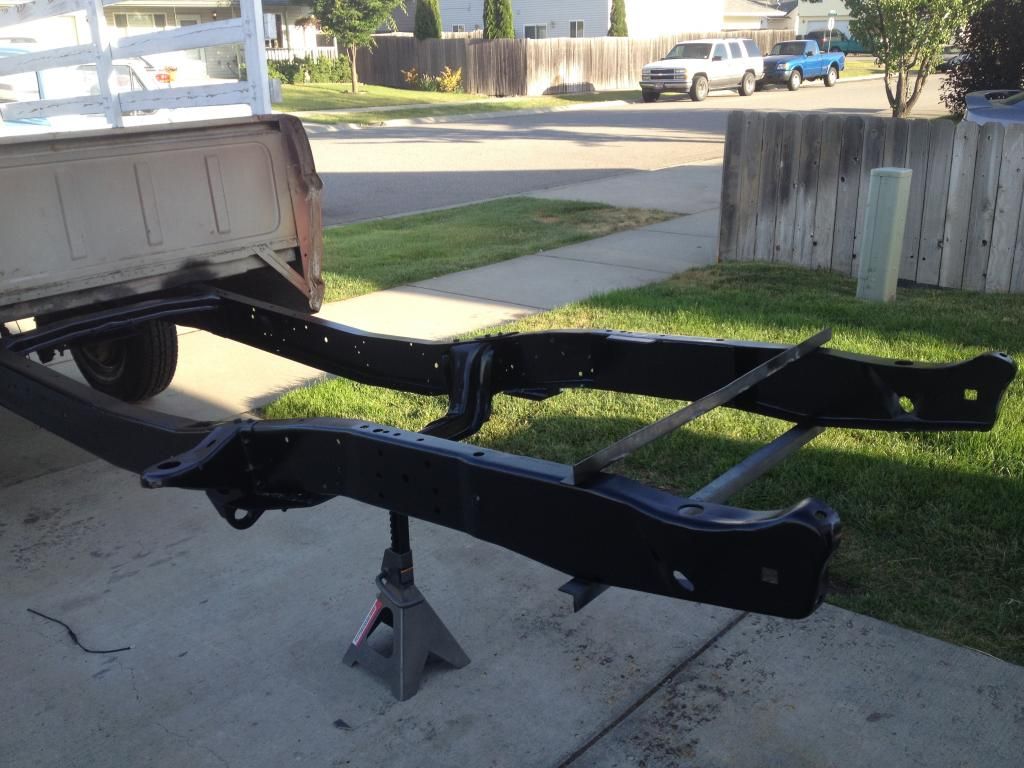
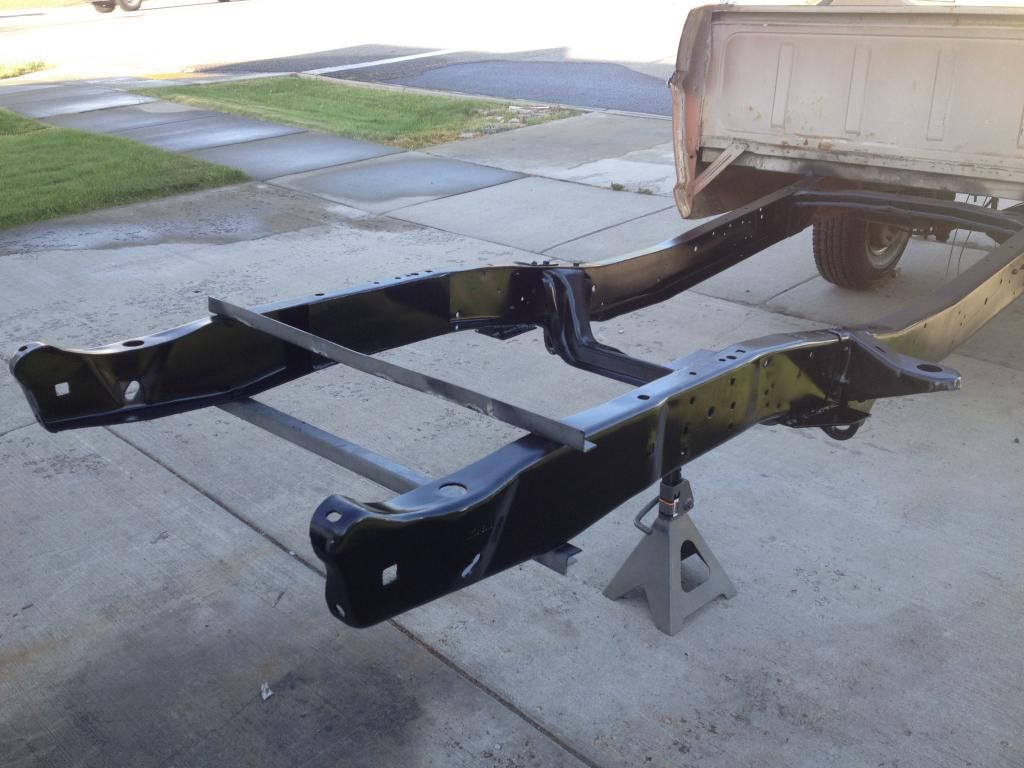
Also got the frame boxed in and painted
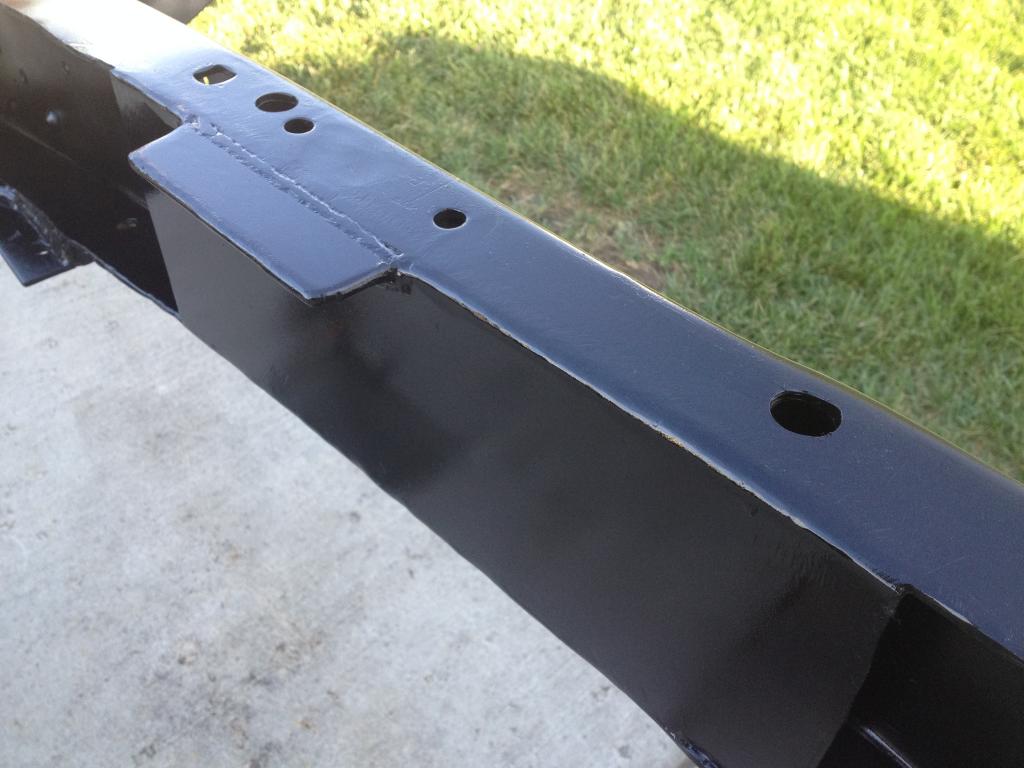
This is what my driver's side motor mount pedestal will be bolted to. I'm modified my factory motor mounts to fit and will make a post to show that process next once I have them finished up. This is a piece of 3/16" welded to the inside of the top of the frame (extends all the way to the inside corner). Then I notched the boxing plate around it and welded the box to it with another piece of 3/16" welded on top. It extends out about 1 1/2" off the frame:
I did this to keep a nice clean look on top of the frame with my flat bar and it will also allow me to remove the mounts if needed without unbolting the suspension.
And the frame is painted and ready to re-assemble:
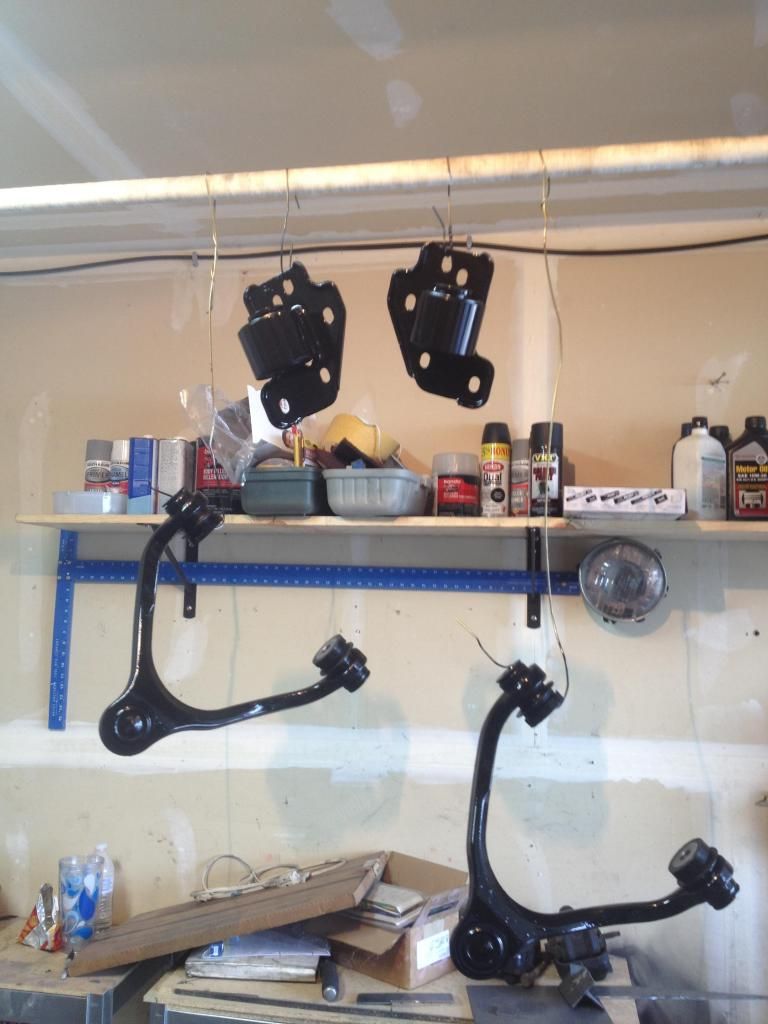
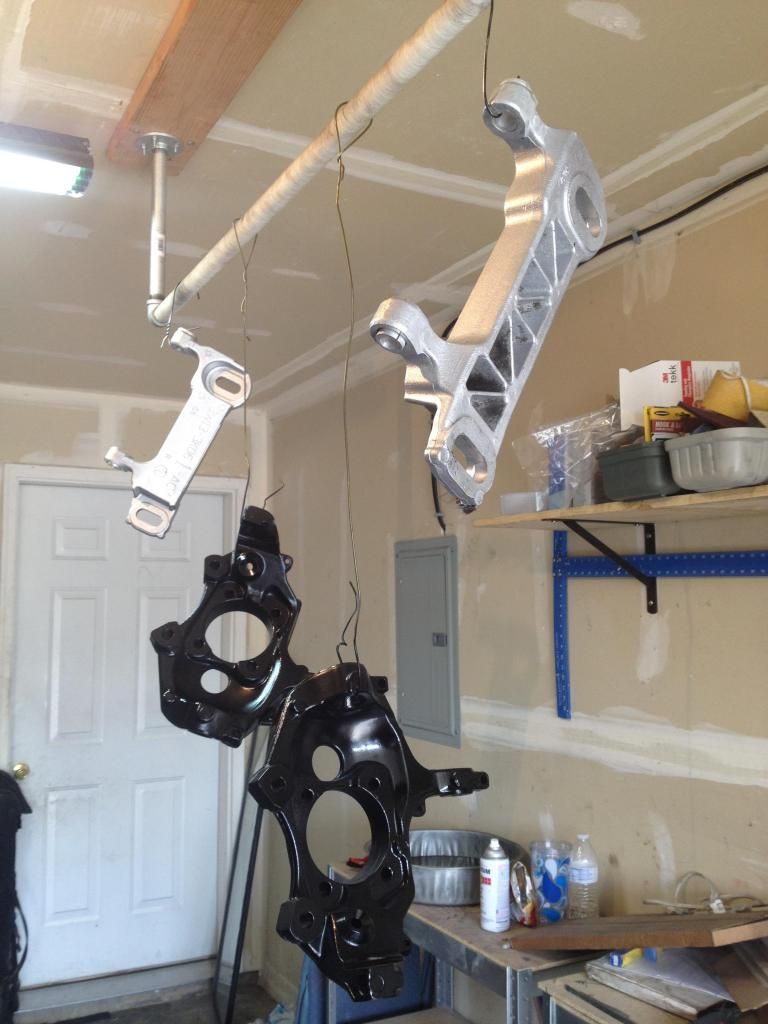
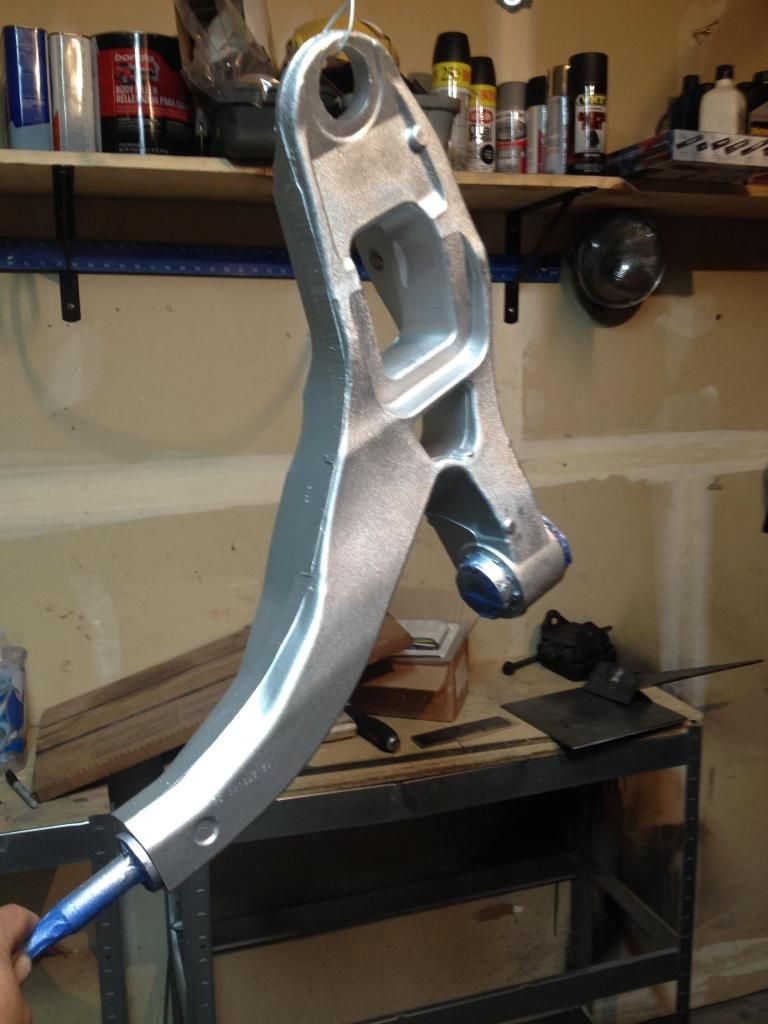
Next up I'll be cleaning up, painting, and installing the front steering/suspension parts. Here's a preview:
I got the inside of the frame rails all cleaned up by removed the remainder of the crossmember left over from cutting the middle section out with a sawzall. I did all of my cutting inside the frame rails using at 4 1/2" grinder, a jig saw with the base plate removed and a hammer.
Then I bolted up my bumper just to make sure the frame hadn't moved at all (which it had not):
Then after re-measuring and double checking for my center line about 300 times I drilled out 3/4" holes on the bottom of the frame where my alignment pins were located on the crown vic k-frame, set the crown vic in place and drilled my 4 holes from the mounting bolts.
Tip: Double check your frame and make your own measurements but I found that my centerline on my frame was centered between two small holes on the bottom of my frame. Also I found that the center line was the center of the coil spring/shock towers. I measured this before removing the stock suspension parts from the frame. I used a square and laser to transfer my center line marks to the bottom of the frame and then realized all I had to do was measure between the two small holes on the bottom of the frame. Like I said you may want to double check but I thought I'd throw that out there since I hadn't read it anywhere while researching my install process. You can see the holes I'm talking about in the pic above ^
Next I removed the crown vic k-frame and welded in some 120 wall tubing to re-enforce the frame where the mounting bolts go through:
And painted the inside of the frame:
Here's an important step that I haven't seen anyone post about yet:
On the crown vic the lower control arm mounts to the frame at an angle. It doesn't sit parallel to the ground like our trucks once it's mounted. This is important because of the way the bushing is clocked on the plate. I cut the tubing/bushing off of the mounting plate and re-clocked if so that the slotted hole would be parallel to the ground when welded up to the frame. This way when I want to adjust my camber and caster the rear of the control arm is only moving side to side and not up and down in the mount. This will also keep the control arm in place instead of it trying to ride up and in from the weight of the vehicle:
You can see the cut line in the tubing where it was welded to the plate before.
Next I bolted the crown vic in place with the lower conrol arms installed and built a rear mounting plate. You can also see in this picture, the spacer i used between the frame and the upper mount for the k-frame. It is a piece of 1 1/2" x 5/8" aluminum flat bar cut to length and drilled for the mounting bolts to go through. It looks nice and clean. I built the mounting plates from 3/16" steel plate.
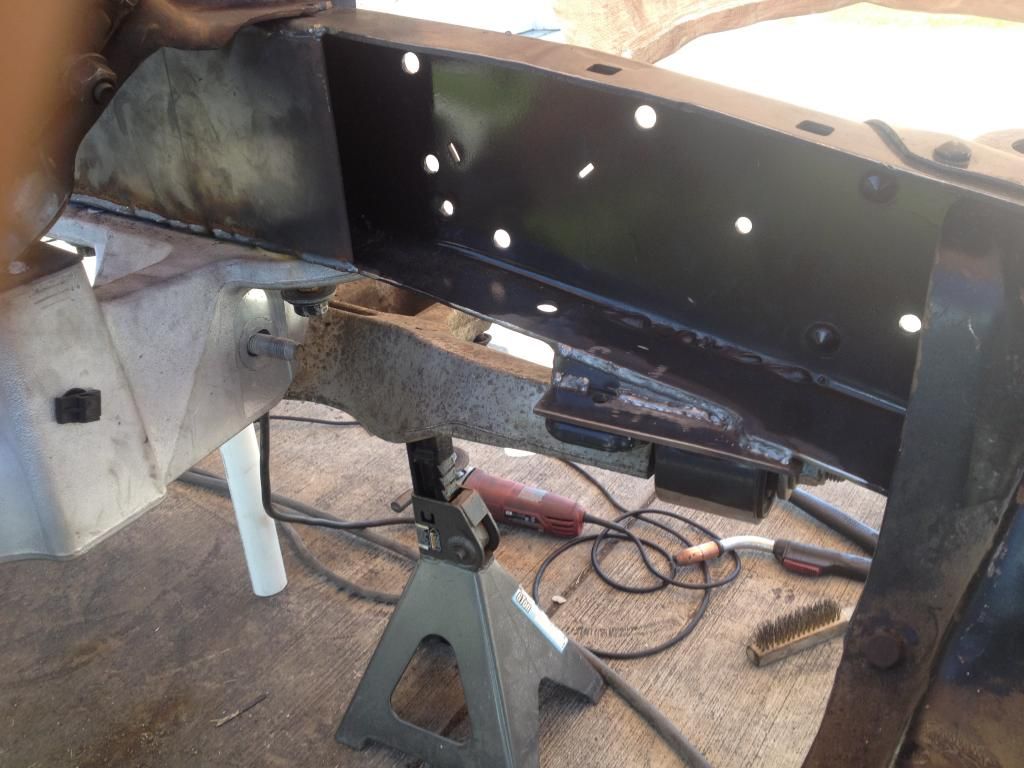
Also got the frame boxed in and painted
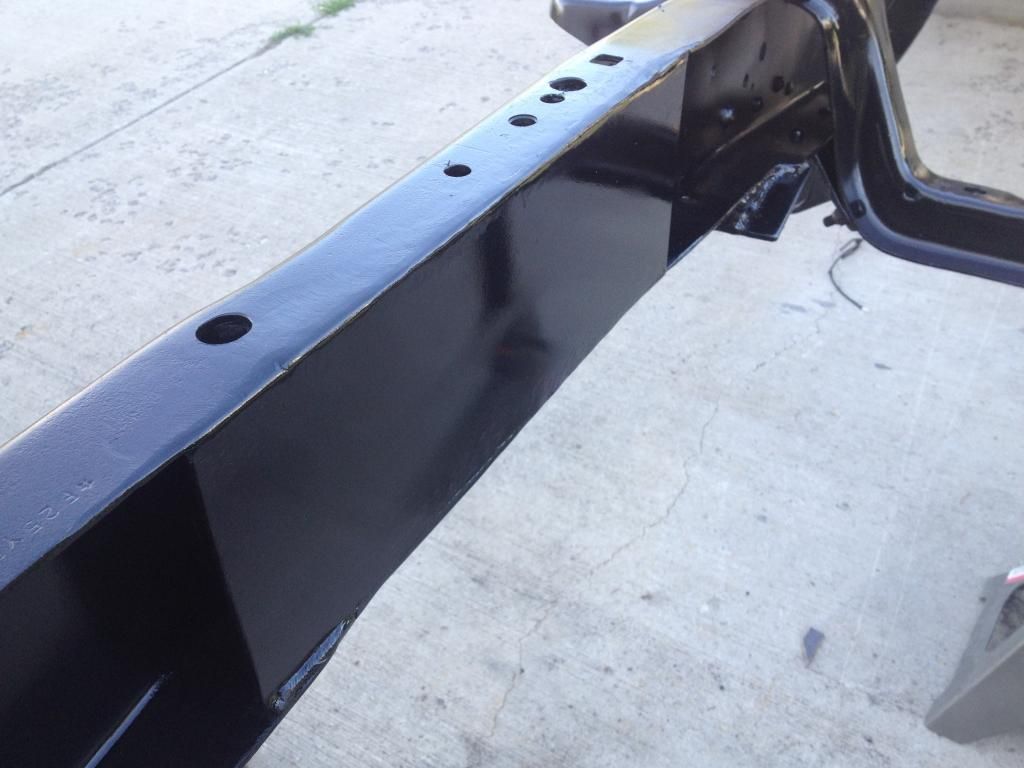
This is what my driver's side motor mount pedestal will be bolted to. I'm modified my factory motor mounts to fit and will make a post to show that process next once I have them finished up. This is a piece of 3/16" welded to the inside of the top of the frame (extends all the way to the inside corner). Then I notched the boxing plate around it and welded the box to it with another piece of 3/16" welded on top. It extends out about 1 1/2" off the frame:
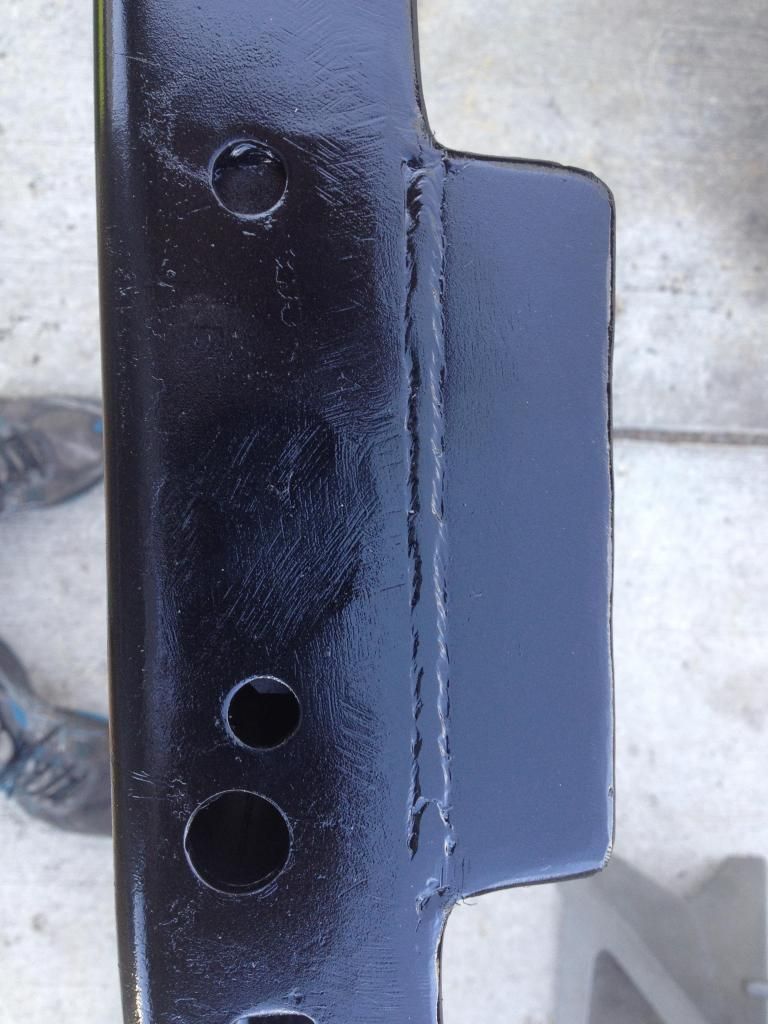
I did this to keep a nice clean look on top of the frame with my flat bar and it will also allow me to remove the mounts if needed without unbolting the suspension.
And the frame is painted and ready to re-assemble:
Next up I'll be cleaning up, painting, and installing the front steering/suspension parts. Here's a preview:
http://SpokaneSaveMore.com
Save More Automotive
- HIO Silver
- 100% FORDified!
- Posts: 1970
- Joined: Sat Jul 23, 2011 11:31 pm
- Location: Devil's Mountain, CA
Re: '67 F250
That's alot of unsupported area sticking out of the rear mounting plate. I suggest adding gusset vertically from the plate to the frame.
- theletup
- New Member
- Posts: 88
- Joined: Tue Jun 19, 2012 1:00 am
- Location: Post Falls, ID
Re: '67 F250
Good call ^. I did originally plan to do that and still plan on it but ran out of material and time last weekend and got excited to paint (oops). Thanks for the reminder that I need to get that done before bolting the control arm up.
http://SpokaneSaveMore.com
Save More Automotive
- theletup
- New Member
- Posts: 88
- Joined: Tue Jun 19, 2012 1:00 am
- Location: Post Falls, ID
Re: '67 F250
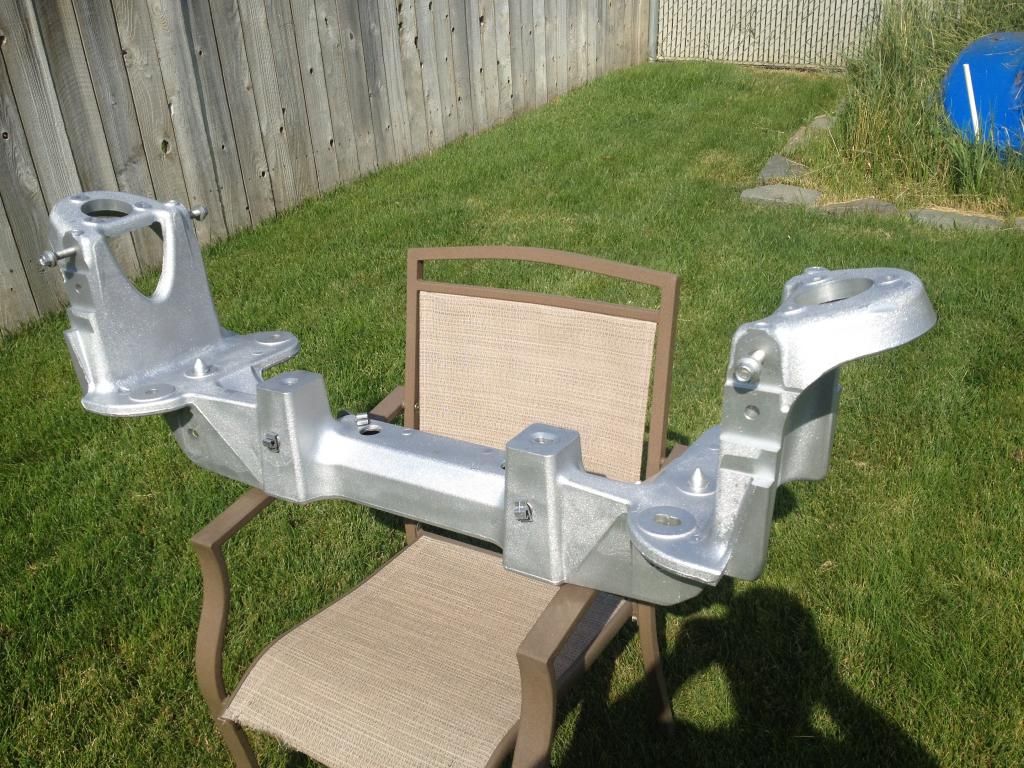
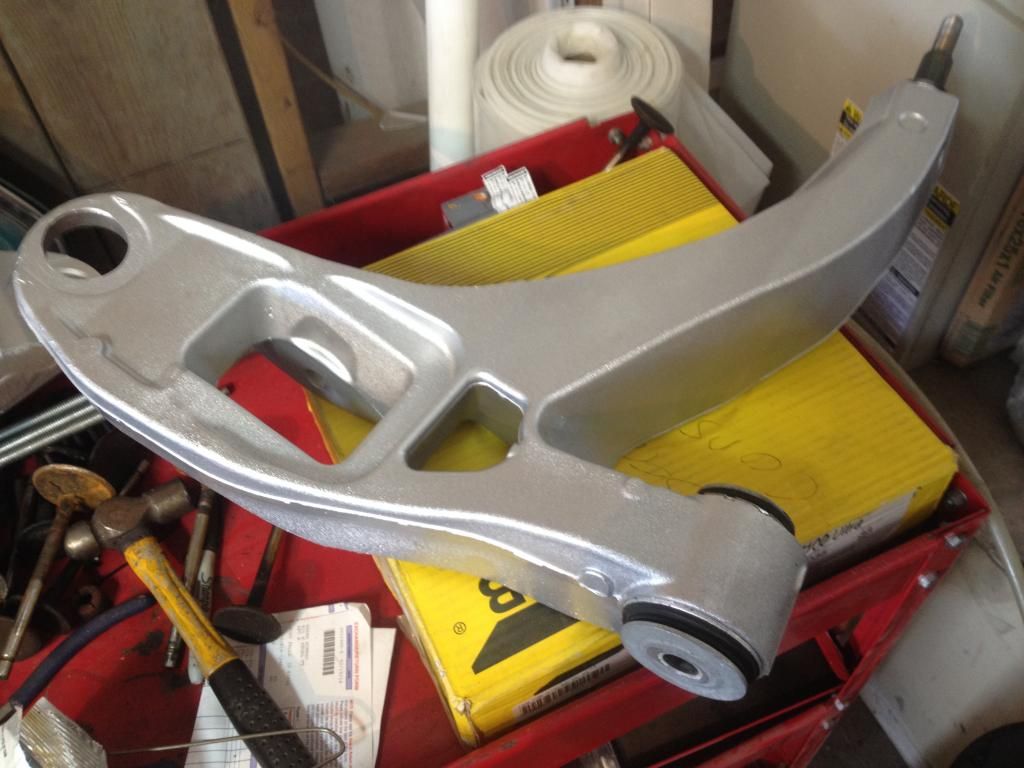
Got some paint and clear coat on all the suspension parts today. Considering just how dirty all the cast aluminum was I decided to paint it silver rather than leaving it bare. I also put an enamel clear coat over everything for durability.
The wheel acid I cleaned the k-frame with didn't even seem to touch the oxidation mixed with baked on brake dust on the knuckles. I spent hours with a wire wheel on my die grinder to get them cleaned down to bare metal and decided to go black rather than silver to keep them cleaner looking. I'm hoping painting everything and clear coating will make for easier clean up in the future.
http://SpokaneSaveMore.com
Save More Automotive
- Craigerf100
- Blue Oval Guru
- Posts: 1125
- Joined: Fri Dec 21, 2012 2:11 am
- Location: MO Ozark (Near Springfield MO)
Re: '67 F250
Looking good.
1964 F-100 Custom Cab Short Bed
1968 F-100 Short Bed
1967 Fairlane 500 Convertable
1967 Fairlane GT/A 289ci SOLD
1950 F-1 Original 239ci Flat Head V8 SOLD
1995 f-150 4x4 Swb 4.9L 5-speed FORSALE
My Build: http://www.fordification.com/forum/view ... &sk=t&sd=a
1968 F-100 Short Bed
1967 Fairlane 500 Convertable
1967 Fairlane GT/A 289ci SOLD
1950 F-1 Original 239ci Flat Head V8 SOLD
1995 f-150 4x4 Swb 4.9L 5-speed FORSALE
My Build: http://www.fordification.com/forum/view ... &sk=t&sd=a
- theletup
- New Member
- Posts: 88
- Joined: Tue Jun 19, 2012 1:00 am
- Location: Post Falls, ID
Re: '67 F250
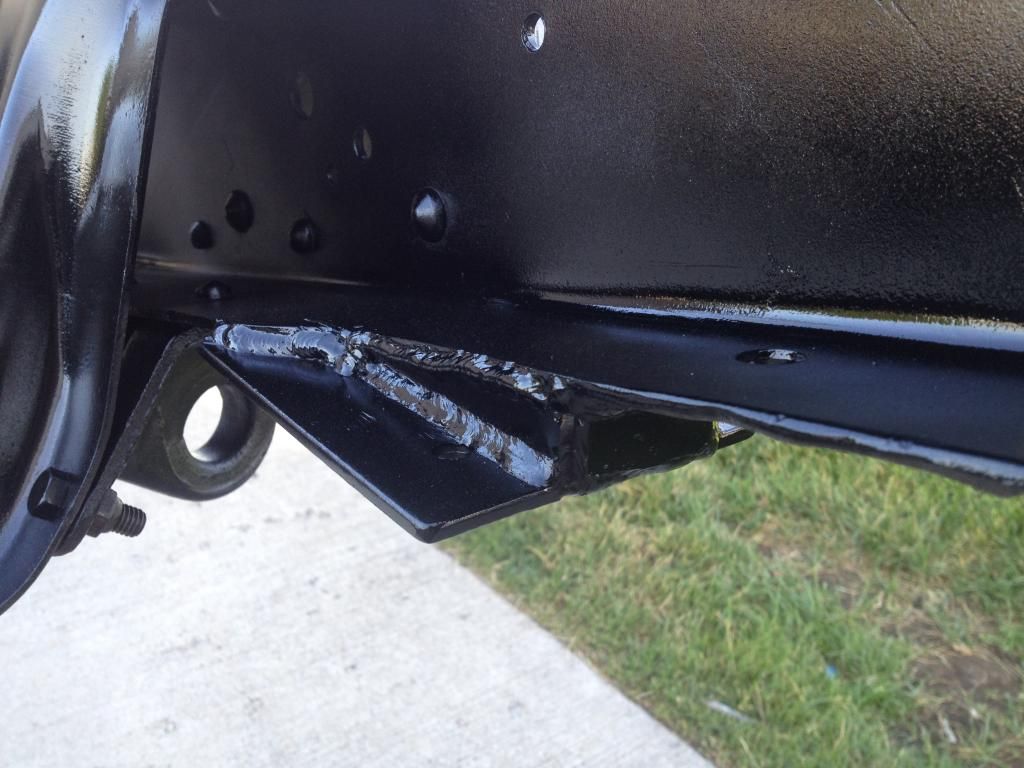
Welded up some gussets for the rear lower control arm brackets:
Touched up the frame with some gloss black and started bolting in some suspension. I don't have the lower ball joint pressed back in to the lower control arms and haven't painted the steering rack yet so this is as far as I could put it together for now but I couldn't wait to see how everything looked so:
http://SpokaneSaveMore.com
Save More Automotive
-
- New Member
- Posts: 108
- Joined: Wed May 25, 2005 1:12 am
- Location: Washington, Spokane
- Contact:
Re: '67 F250
Nice looking build might have to check it out in person at some point.
Phill
78 Mustang
67 F250ish
2010 F250 Harley Davidson
78 Mustang
67 F250ish
2010 F250 Harley Davidson
-
- New Member
- Posts: 15
- Joined: Fri Dec 14, 2012 9:54 am
Re: '67 F250
Not to sound weird but I think I know where you live!..., I live in post falls and ive seen this truck in your driveway, atleast im assuming its your driveway. But thats good to know theres another 67-72 enthusiast in post falls. Ive seen your blue truck around quite a bit. Saw it in the cruise. Love the old trucks we have 5 in total, 4 after the two become one good one. Damn things are addicting
- theletup
- New Member
- Posts: 88
- Joined: Tue Jun 19, 2012 1:00 am
- Location: Post Falls, ID
Re: '67 F250
Highboy are you the one in Post Falls with the Lifted Yellow F250?? I've seen you drive by my place quite a few times while I've been out working on the trucks if I'm correct
http://SpokaneSaveMore.com
Save More Automotive
- theletup
- New Member
- Posts: 88
- Joined: Tue Jun 19, 2012 1:00 am
- Location: Post Falls, ID
Re: '67 F250
Hey everyone. Life has taken some unexpected turns and this project is for sale either in it's entirety or I will part it out.
Send me an e-mail at theletup@yahoo.com and let's talk.
Thanks,
Cory
Send me an e-mail at theletup@yahoo.com and let's talk.
Thanks,
Cory
http://SpokaneSaveMore.com
Save More Automotive
-
- New Member
- Posts: 189
- Joined: Sun Mar 13, 2011 7:26 pm
-
- New Member
- Posts: 15
- Joined: Fri Dec 14, 2012 9:54 am
Re: '67 F250 - This project is now for sale (EVERYTHING)
I have a green and white 72 f250, green roof and the rest is white with grey steel wheels. I think I know who you are talking about with the yellow truck. The one im thinking of has 5 slot mags on it. Recently restored. He also has a multicolor 68 with a flat bed