MyF100 Flareside Project (Take 2)
Moderator: FORDification
- bjde0b
- Preferred User

- Posts: 402
- Joined: Mon Dec 08, 2008 9:54 pm
- Location: Youngsville, LA
Re: MyF100 Flareside Project (Take 2)
I hear you, and understand (not by experience obviously). I am planning on finding an old door somewhere to practice on with the BC/CC. I like the black under carraige. I am planning on putting Rustoleum Satin Black on the frame and accenting the springs and differential with aluminum color. Rustoleum has high temp (400 °F) aluminum color paint that I will put on rear brake compenents to complete the rear axle.
How hot do the pipes get? I was thinking about also painting them the aluminum color. Mine are steel and rusted.
BJD
How hot do the pipes get? I was thinking about also painting them the aluminum color. Mine are steel and rusted.
BJD
Check out my build. http://s1088.photobucket.com/albums/i336/MyF100/
- dablack00
- Blue Oval Fan

- Posts: 695
- Joined: Wed Jan 12, 2005 7:32 am
- Location: Texas, Lufkin
Re: MyF100 Flareside Project (Take 2)
I'm sure what you are using will work great and last a long time. With that being said "for other readers that haven't started yet", black epoxy gives a nice semi-flat black look when dry that looks very much like the original frame paint.
For the exhaust pipes, I dunno. I would spend some time on google looking around.
For the exhaust pipes, I dunno. I would spend some time on google looking around.
- bjde0b
- Preferred User

- Posts: 402
- Joined: Mon Dec 08, 2008 9:54 pm
- Location: Youngsville, LA
Re: MyF100 Flareside Project (Take 2)
The Rust Encapsulator on the frame looks sooo good I hate to cover it up with the Satin Black, but I think the Satin will look really good too.
I read at this link (http://forums.eastwoodco.com/printthread.php?t=6802) that the exhaust will be too hot. The reply is obviously from someone trying to sell a more expensive product from Eastwood, but I will look around.
I read at this link (http://forums.eastwoodco.com/printthread.php?t=6802) that the exhaust will be too hot. The reply is obviously from someone trying to sell a more expensive product from Eastwood, but I will look around.
Check out my build. http://s1088.photobucket.com/albums/i336/MyF100/
- bjde0b
- Preferred User

- Posts: 402
- Joined: Mon Dec 08, 2008 9:54 pm
- Location: Youngsville, LA
Re: MyF100 Flareside Project (Take 2)
I put a top coat of Black Satin Rustoleum over two coats of Rust Encapsulator. I was hesitant because the RE looked so good, but I am very pleased with the results. My fiance helped me flip the frame again (I did it by myself the previous time and decided not to do it by myself anymore).

Compare the before and after pictures.


Now that we flipped the frame over for the second to last time, I will put some paint on the unpainted surfaces and I wil be done with the frame. The frame will look better in natural light as well.

Compare the before and after pictures.


Now that we flipped the frame over for the second to last time, I will put some paint on the unpainted surfaces and I wil be done with the frame. The frame will look better in natural light as well.
Check out my build. http://s1088.photobucket.com/albums/i336/MyF100/
-
dcbullet
- Blue Oval Fan

- Posts: 698
- Joined: Fri Apr 01, 2005 6:28 pm
- Location: Oceanside, CA
Re: MyF100 Flareside Project (Take 2)
Beautiful results. 
-
Fordnatic
- Preferred User

- Posts: 274
- Joined: Wed Dec 17, 2008 7:29 am
- Location: Anchorage, Alaska
Re: MyF100 Flareside Project (Take 2)
Excellent work!! Did you have to sand the rust encapsulator prior to painting the black? Or is there a time limit between coats? Just wondering, usually if the first coat is fully cured you have to scuff it up so the second will stick.
70F100: 410 Merc with tri-power, close ratio toploader, 4.56 detroit locker 9"
68F100 4x4: 390, 4 spd/NP 205, Rancho 4" urethane susp, 35x12.50 All Terrain T/A's
55F100
01F150 Daily Driver: TP tunes, AF1 intake, elec fans, Magnaflow exh, underdrive pulleys, Centerlines
68F100 4x4: 390, 4 spd/NP 205, Rancho 4" urethane susp, 35x12.50 All Terrain T/A's
55F100
01F150 Daily Driver: TP tunes, AF1 intake, elec fans, Magnaflow exh, underdrive pulleys, Centerlines
- bjde0b
- Preferred User

- Posts: 402
- Joined: Mon Dec 08, 2008 9:54 pm
- Location: Youngsville, LA
Re: MyF100 Flareside Project (Take 2)
I am very maticulus with the painting. I sand between every coat with 320 grit. The paint has all stuck very well. I can scratch at the Rust Encapsulator and the paint doesn't rub off unless I rub real hard.
Check out my build. http://s1088.photobucket.com/albums/i336/MyF100/
- bjde0b
- Preferred User

- Posts: 402
- Joined: Mon Dec 08, 2008 9:54 pm
- Location: Youngsville, LA
Re: MyF100 Flareside Project (Take 2)
I have been finishing up the painting of the suspension parts and I am very pleased. All parts have two coats of Rust Encapsulator and then top coated with Rustoleum. I used high temp paint on the drums and I will do the same for the rotors for the front wheels. Hopefully this week I can get the frame rolling, it just depends on getting all the bearings pressed. I know it looks like a lot of parts are painted the aluminum color, but it is only going to be the coil springs, rear axle and leaf springs.


Check out my build. http://s1088.photobucket.com/albums/i336/MyF100/
- bjde0b
- Preferred User

- Posts: 402
- Joined: Mon Dec 08, 2008 9:54 pm
- Location: Youngsville, LA
Re: MyF100 Flareside Project (Take 2)
I have the suspension all put of the frame and the brakes done. I have made some of the break lines and will be done with those soon.
http://www.bjandkristen.com/myf100/phot ... ry/frame2/

http://www.bjandkristen.com/myf100/pict ... C04094.jpg
http://www.bjandkristen.com/myf100/phot ... ry/frame2/

http://www.bjandkristen.com/myf100/pict ... C04094.jpg
Check out my build. http://s1088.photobucket.com/albums/i336/MyF100/
- bjde0b
- Preferred User

- Posts: 402
- Joined: Mon Dec 08, 2008 9:54 pm
- Location: Youngsville, LA
Re: MyF100 Flareside Project (Take 2)
I have been working on the engine a transmission, slowly. We have been very busy lately with the dog and going to the Magnolia Beach so I have not had as much time to work on these things.
The engine recieved numorous treatments of oven cleaner and then powerwashing.
One day I decided the block was clean enough and I bought same naval jelly to clean up remaining rust. That was a bad idea. The phosphoric acid would cause light surface rust as soon as the block was rinsed off. I ended up spending a few hours with scotch brite pads and WD40 to get it clean, then a final oven cleaner rinse.

I since have gotten all the bearings installed. Cam, crank and timing chain. I had the heads get a valve job and I will be putting them on soon. First I will clean up the timing cover and harmonic balancer.

The transmission is done as well. I replaced needle bearings, seals, gaskets and gave the whole thing a good cleaning. It looks a lot different now than it did before. The worst part was scrubbing the paint of the top cover. I found that the shift fork pads were missing on one of the forks and it had been cut into. I placed new fork shoes on both forks. I put Mobil 1 75W90 synthetic in the box. I am sure everything will run a lot smoother, not that I ever noticed it was bad.


Some things I discovered during this rebuild that we did not do correctly the first time.
The rear main seal originally was packing. There was a pin that kept the packing from spinning. When we placed the rubber seal in before, we did not remove the pin which caused the seal to not sit correctly and most likely caused some leaking. We also made the seal split line even with the main bearing split line which is a no-no. I don't know if we put any silicone around it or not, I couldn't tell.
I also don't remember during the first start up that we ran the engine for 20-30 minutes at 2000-3000 RPM's for proper cam break-in. The cam lobes were smooth, but worn all the way across and Tom Monroe's book said that if this is the case, the cam is work and needs replaced.
The pin that locks the position of the timing gear on the cam needs to extend though the timing gear to also secure the fuel pump lobe. The camshaft came with two pins: one long, one short. The pin I took out was short and would not have been long enough to lock the lobe in place. It always worked, but this was not done correctly.
I am sure I am not doing everything correctly this time, but next time will be better. One big mistake I made was that I misread the correct torque for the main bearings. I read to the point in Tom Monroe's book to torque the main bearings to 95-105 ft·lbs and stopped reading. The rest of the sentence said for 351W or 302 Boss. The following sentence stated all others 60-70 ft·lbs. I snapped the second bolt I put in and nearly cried. I taped off the block and protected the whole thing while I drilled and used a reverse out to get the bolt out. The broken off part came out easy because it was lubricated. I bought a new bolt at the Ford stealership for $8.50. I then proceeded to torque all 10 bolts to 95 ft·lbs and then I finished reading the sentence. I replaced all bolts with APR bolts since I overstressed them all. Small learning mistake.
There are pictures of a lot of this stuff in the following gallery.
http://www.bjandkristen.com/myf100/phot ... ine-set-1/
The engine recieved numorous treatments of oven cleaner and then powerwashing.
One day I decided the block was clean enough and I bought same naval jelly to clean up remaining rust. That was a bad idea. The phosphoric acid would cause light surface rust as soon as the block was rinsed off. I ended up spending a few hours with scotch brite pads and WD40 to get it clean, then a final oven cleaner rinse.

I since have gotten all the bearings installed. Cam, crank and timing chain. I had the heads get a valve job and I will be putting them on soon. First I will clean up the timing cover and harmonic balancer.

The transmission is done as well. I replaced needle bearings, seals, gaskets and gave the whole thing a good cleaning. It looks a lot different now than it did before. The worst part was scrubbing the paint of the top cover. I found that the shift fork pads were missing on one of the forks and it had been cut into. I placed new fork shoes on both forks. I put Mobil 1 75W90 synthetic in the box. I am sure everything will run a lot smoother, not that I ever noticed it was bad.


Some things I discovered during this rebuild that we did not do correctly the first time.
The rear main seal originally was packing. There was a pin that kept the packing from spinning. When we placed the rubber seal in before, we did not remove the pin which caused the seal to not sit correctly and most likely caused some leaking. We also made the seal split line even with the main bearing split line which is a no-no. I don't know if we put any silicone around it or not, I couldn't tell.
I also don't remember during the first start up that we ran the engine for 20-30 minutes at 2000-3000 RPM's for proper cam break-in. The cam lobes were smooth, but worn all the way across and Tom Monroe's book said that if this is the case, the cam is work and needs replaced.
The pin that locks the position of the timing gear on the cam needs to extend though the timing gear to also secure the fuel pump lobe. The camshaft came with two pins: one long, one short. The pin I took out was short and would not have been long enough to lock the lobe in place. It always worked, but this was not done correctly.
I am sure I am not doing everything correctly this time, but next time will be better. One big mistake I made was that I misread the correct torque for the main bearings. I read to the point in Tom Monroe's book to torque the main bearings to 95-105 ft·lbs and stopped reading. The rest of the sentence said for 351W or 302 Boss. The following sentence stated all others 60-70 ft·lbs. I snapped the second bolt I put in and nearly cried. I taped off the block and protected the whole thing while I drilled and used a reverse out to get the bolt out. The broken off part came out easy because it was lubricated. I bought a new bolt at the Ford stealership for $8.50. I then proceeded to torque all 10 bolts to 95 ft·lbs and then I finished reading the sentence. I replaced all bolts with APR bolts since I overstressed them all. Small learning mistake.
There are pictures of a lot of this stuff in the following gallery.
http://www.bjandkristen.com/myf100/phot ... ine-set-1/
Check out my build. http://s1088.photobucket.com/albums/i336/MyF100/
- dablack00
- Blue Oval Fan

- Posts: 695
- Joined: Wed Jan 12, 2005 7:32 am
- Location: Texas, Lufkin
Re: MyF100 Flareside Project (Take 2)
Great read so far. I like the learning experiences.
I can tell you for a fact that there are some mistakes in Monroe's book. You might want to pick up a ford service manual for your year truck. Get all four books if you can. It is good to have a second reference.
Great pictures by the way. Looks like you are having a good time.
Austin
I can tell you for a fact that there are some mistakes in Monroe's book. You might want to pick up a ford service manual for your year truck. Get all four books if you can. It is good to have a second reference.
Great pictures by the way. Looks like you are having a good time.
Austin
- bjde0b
- Preferred User

- Posts: 402
- Joined: Mon Dec 08, 2008 9:54 pm
- Location: Youngsville, LA
Re: MyF100 Flareside Project (Take 2)
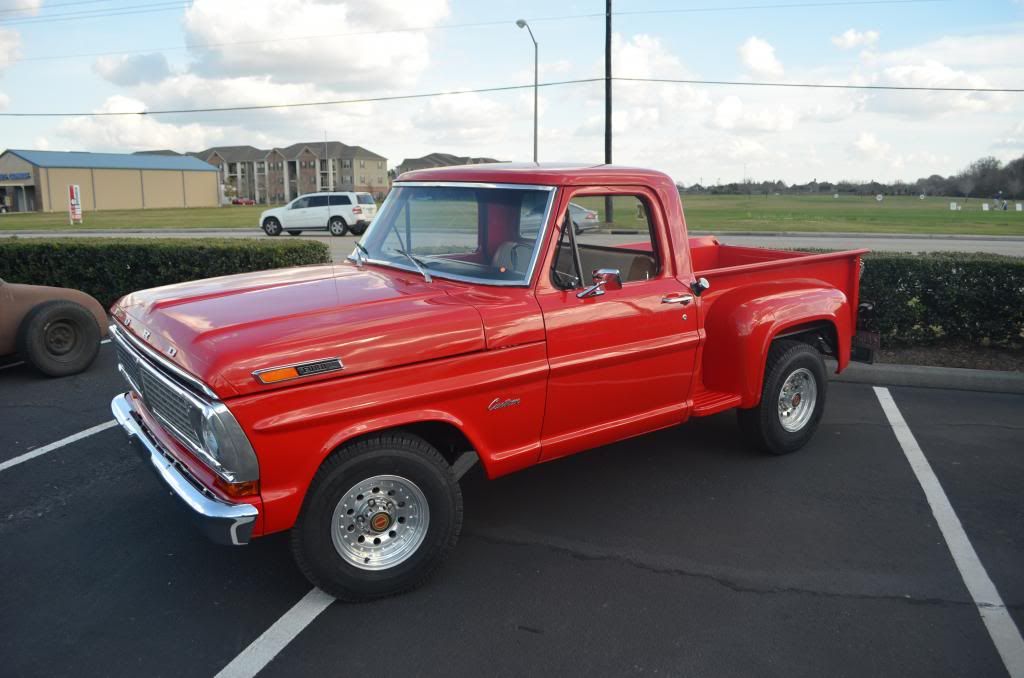
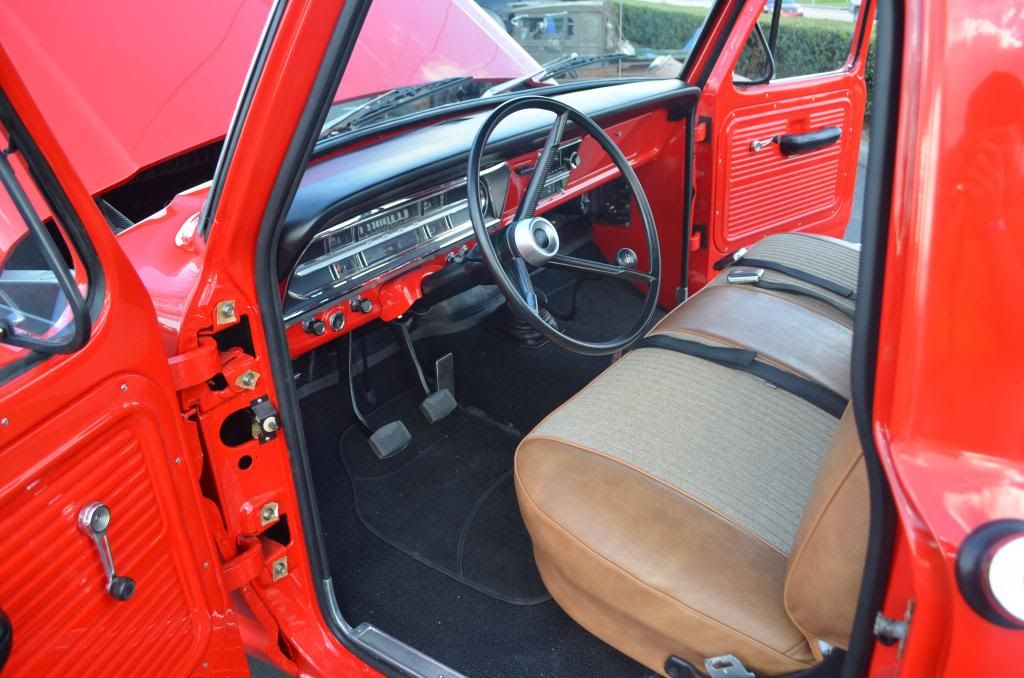
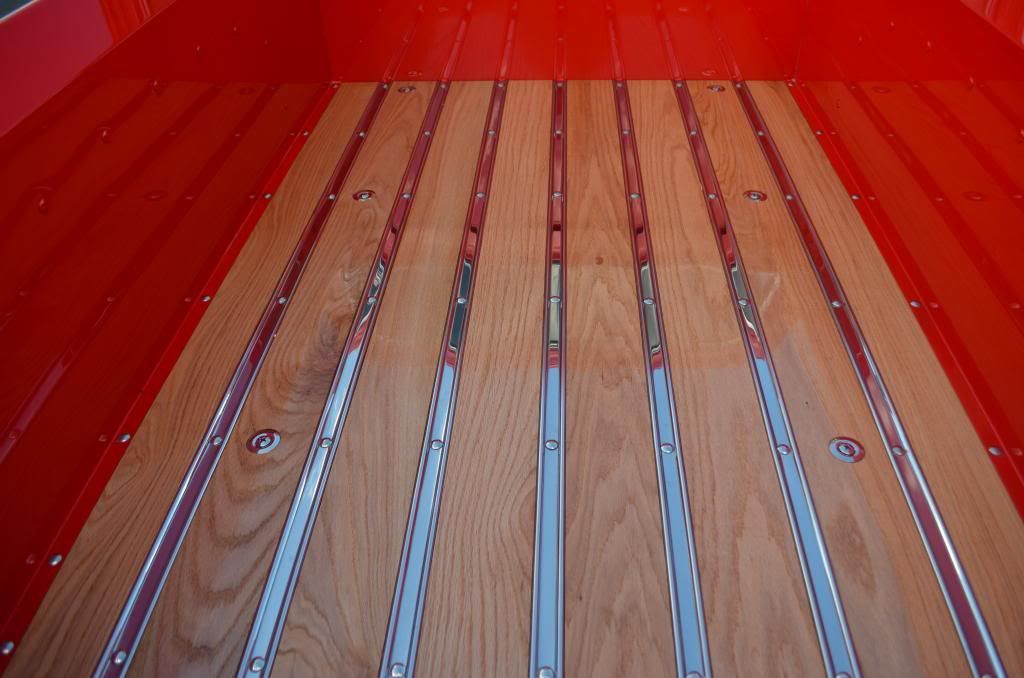
I haven't a put any updates for a long time, but I am basically done. I have to take the grill to get brite dipped and anodized, but otherwise, I am just tinkering.
I was in a car show this last week as a big finale. You can check out the gallery at the following link.
http://s1088.beta.photobucket.com/user/ ... Car%20Show


I was in a car show this last week as a big finale. You can check out the gallery at the following link.
http://s1088.beta.photobucket.com/user/ ... Car%20Show


Check out my build. http://s1088.photobucket.com/albums/i336/MyF100/
- stephen44
- Blue Oval Fan

- Posts: 655
- Joined: Thu Jun 11, 2009 3:28 pm
- Location: Danville, VA
Re: MyF100 Flareside Project (Take 2)
very very nice - what wheels are those ?
thanks
Stephen
(1967 F100, FE352, 2wd, 3 on the tree, flareside)
Stephen
(1967 F100, FE352, 2wd, 3 on the tree, flareside)
- sargentrs
- 100% FORDified!

- Posts: 9866
- Joined: Fri Jun 22, 2007 9:30 am
- Location: Georgia, Jasper
Re: MyF100 Flareside Project (Take 2)
Congratulations! Great job!
Randy
1970 F100 Sport Custom Limited LWB, 302cid, 3 on the tree. NO A/C, NO P/S, NO P/B. Currently in 1000 pcs while rebuilding. Project thread: http://www.fordification.com/forum/view ... 22&t=59995 Plan: 351w, C4, LSD, pwr front disc, p/s, a/c, bucket seats, new interior and paint.
1987 F-150 XLT Lariat, 5.0/C6 auto.