Thanks. It has a few places that need a little work with some fine sandpaper and a buffer, but all in all, I'm pretty pleased wth how it turned out.sargentrs wrote:That's one BEAUTIFUL paint job!
Project "Uncle Fester"- 9/21 Interior almost finished
Moderator: FORDification
- 72stepside
- Blue Oval Fan

- Posts: 537
- Joined: Tue May 09, 2006 10:31 pm
- Location: Florida, Milton
- Contact:
Re: Project "Uncle Fester"- 12/9 Front clip and doors on
Chris
72 F100 Stepside w/ 78 300 CID
Hedman Headers
Disc Brakes
Power Steering with 3 STILL on the tree
Comfy Crown Vic Seats
71 F250 PS, PB, AC, Auto, 390
Loooong way to go on this one!


72 F100 Stepside w/ 78 300 CID
Hedman Headers
Disc Brakes
Power Steering with 3 STILL on the tree
Comfy Crown Vic Seats
71 F250 PS, PB, AC, Auto, 390
Loooong way to go on this one!


- 72stepside
- Blue Oval Fan

- Posts: 537
- Joined: Tue May 09, 2006 10:31 pm
- Location: Florida, Milton
- Contact:
Re: Project "Uncle Fester"- 12/9 Front clip and doors on
I got some goodies in the mail since the last time I posted.
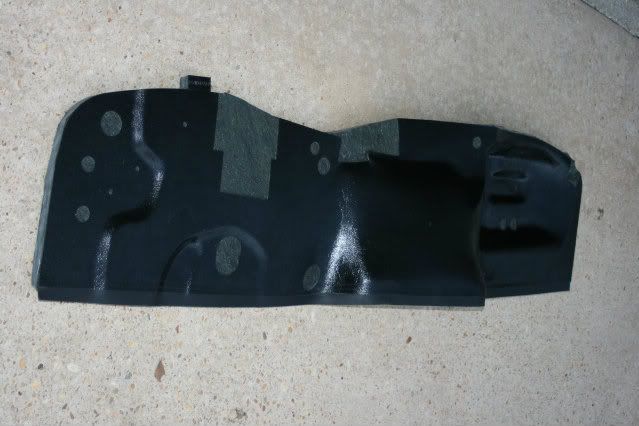
I received my firewall pad. I got it from Mac's. I think it'll work out nicely. Seems to have all the holes pre-punched and the padding on the back of the plastic is fairly thick. We'll see soon!
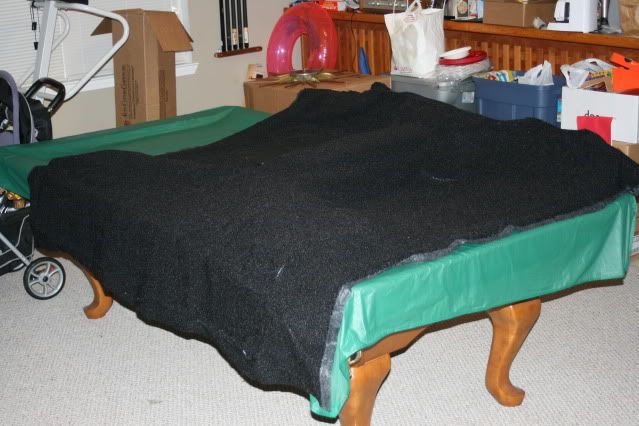
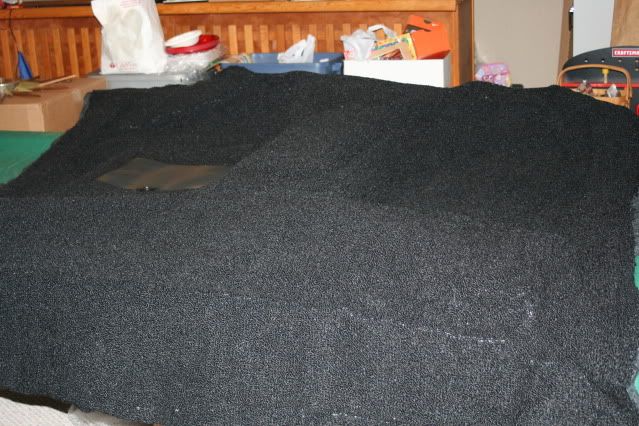
I also got my carpet from Stockinteriors.com the other day. I got the 80/20 loop without the mass backing and I asked them not to trim it so I'd have plenty of carpet to work with. This is the C-6 choice with the high hump and the 'no tank in cab' so that I'd have enough to go up the back of the cab a little bit. I laid it out on my pool table and 're-formed' it from packing. It looks really good. Excuse the quality of the pics cause it is really hard to take pics of black carpet!
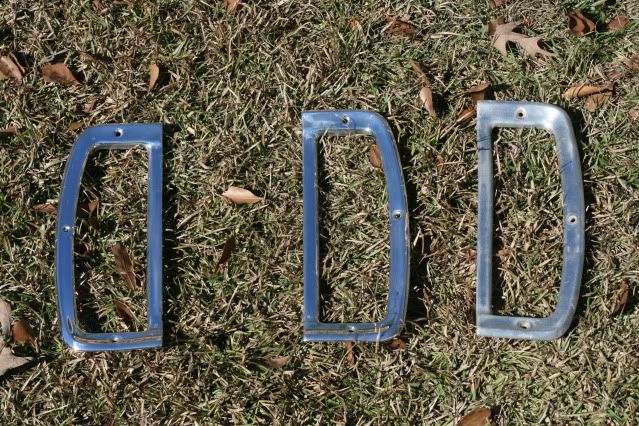
I also received my tailight trim that I got off ebay. I took the best one from that purchase and combined with the best one I already had (the other was totally destroyed) and came up with a good pair. I did the ole 220, 400, 600, 800, 1000, 1500, then buff trick to get them to shine. You can hopefully tell which two are going on the truck!!
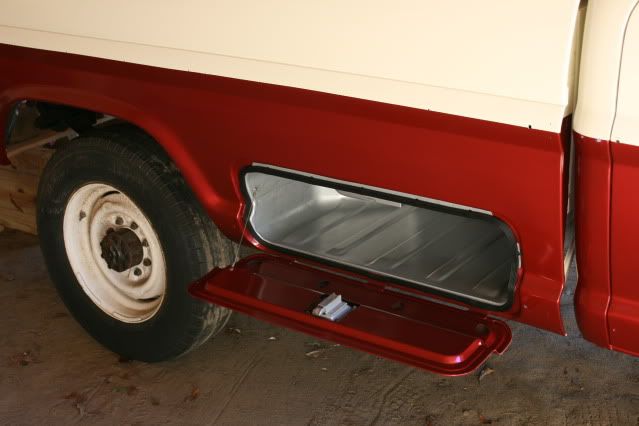
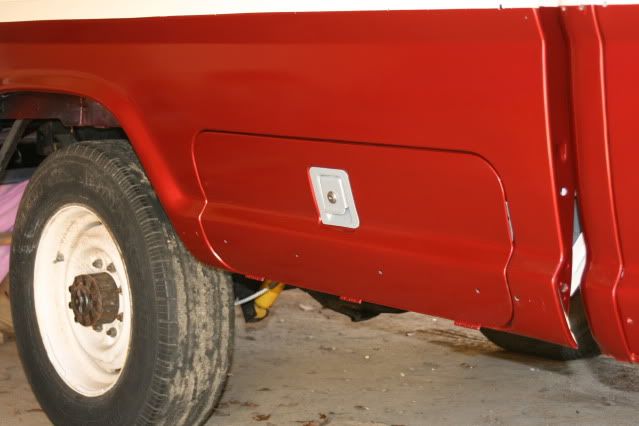
I got my bedside toolbox installed if for no other reason but to get it out of the way!!!! I cleaned it up and coated it with silver POR-15. I was gonna get the existing lock keyed but stumbled upon a lock set at Tractor Supply for $5... complete with two keys! It took just a very minor bit of filing to get it swapped over. The lock bezel and handle were painted with tractor paint. My Father used it on some rims for an antique Case VAC tractor he has. We used it on the bumper and all the tailgate hardware. It's proven to be pretty tough paint on that tractor. I had some rubber pieces from a tractor inner tube that I used to try to seal up all the places where water can get in through the latch. The original gasket just crumbled in my hand when I took the mechanism apart. Not sure how well it'll work. I suppose time will tell. I found some automotive weather stripping at a local mom & pop hardware store that looks nothing like the dry rotted original except in thickness... which is what matters the most. It makes the door fit really tight. I'm gonna put a cordless worklight in the box and shut the door to see if I can see any light.
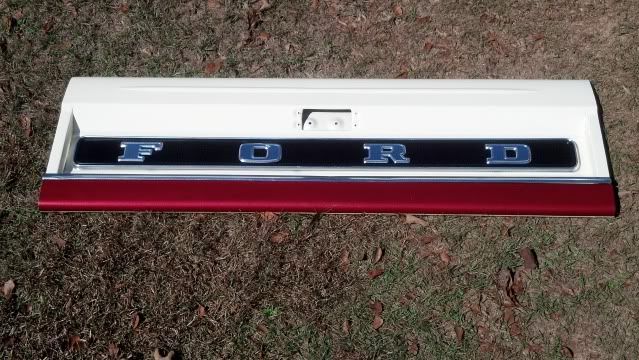
My painter (Dad) got the tailgate painted late last week. I laid the trim on it to see how it would look. I'm pretty excited about how it turned out.
Enough for now. Hope everyone has a great Christmas!
I received my firewall pad. I got it from Mac's. I think it'll work out nicely. Seems to have all the holes pre-punched and the padding on the back of the plastic is fairly thick. We'll see soon!

I also got my carpet from Stockinteriors.com the other day. I got the 80/20 loop without the mass backing and I asked them not to trim it so I'd have plenty of carpet to work with. This is the C-6 choice with the high hump and the 'no tank in cab' so that I'd have enough to go up the back of the cab a little bit. I laid it out on my pool table and 're-formed' it from packing. It looks really good. Excuse the quality of the pics cause it is really hard to take pics of black carpet!


I also received my tailight trim that I got off ebay. I took the best one from that purchase and combined with the best one I already had (the other was totally destroyed) and came up with a good pair. I did the ole 220, 400, 600, 800, 1000, 1500, then buff trick to get them to shine. You can hopefully tell which two are going on the truck!!

I got my bedside toolbox installed if for no other reason but to get it out of the way!!!! I cleaned it up and coated it with silver POR-15. I was gonna get the existing lock keyed but stumbled upon a lock set at Tractor Supply for $5... complete with two keys! It took just a very minor bit of filing to get it swapped over. The lock bezel and handle were painted with tractor paint. My Father used it on some rims for an antique Case VAC tractor he has. We used it on the bumper and all the tailgate hardware. It's proven to be pretty tough paint on that tractor. I had some rubber pieces from a tractor inner tube that I used to try to seal up all the places where water can get in through the latch. The original gasket just crumbled in my hand when I took the mechanism apart. Not sure how well it'll work. I suppose time will tell. I found some automotive weather stripping at a local mom & pop hardware store that looks nothing like the dry rotted original except in thickness... which is what matters the most. It makes the door fit really tight. I'm gonna put a cordless worklight in the box and shut the door to see if I can see any light.


My painter (Dad) got the tailgate painted late last week. I laid the trim on it to see how it would look. I'm pretty excited about how it turned out.

Enough for now. Hope everyone has a great Christmas!
Chris
72 F100 Stepside w/ 78 300 CID
Hedman Headers
Disc Brakes
Power Steering with 3 STILL on the tree
Comfy Crown Vic Seats
71 F250 PS, PB, AC, Auto, 390
Loooong way to go on this one!


72 F100 Stepside w/ 78 300 CID
Hedman Headers
Disc Brakes
Power Steering with 3 STILL on the tree
Comfy Crown Vic Seats
71 F250 PS, PB, AC, Auto, 390
Loooong way to go on this one!


- sargentrs
- 100% FORDified!

- Posts: 9866
- Joined: Fri Jun 22, 2007 9:30 am
- Location: Georgia, Jasper
Re: Project "Uncle Fester"- 12/22 Interior Bits and Tailgate
Fantastic! Great job!
Randy
1970 F100 Sport Custom Limited LWB, 302cid, 3 on the tree. NO A/C, NO P/S, NO P/B. Currently in 1000 pcs while rebuilding. Project thread: http://www.fordification.com/forum/view ... 22&t=59995 Plan: 351w, C4, LSD, pwr front disc, p/s, a/c, bucket seats, new interior and paint.
1987 F-150 XLT Lariat, 5.0/C6 auto.
- 67mann
- 100% FORDified!

- Posts: 1705
- Joined: Thu Feb 07, 2008 7:19 am
- Location: NY..Mt.Morris 3rdgen. homestead
Re: Project "Uncle Fester"- 12/22 Interior Bits and Tailgate
I've had enough and I'm not alone
http://s267.photobucket.com/albums/ii304/67mann/
http://s267.photobucket.com/albums/ii304/67mann/
- 72stepside
- Blue Oval Fan

- Posts: 537
- Joined: Tue May 09, 2006 10:31 pm
- Location: Florida, Milton
- Contact:
Re: Project "Uncle Fester"- 12/22 Interior Bits and Tailgate
Thanks for the kind words. That tank won't go back in until I'm ready to drive it!
Chris
72 F100 Stepside w/ 78 300 CID
Hedman Headers
Disc Brakes
Power Steering with 3 STILL on the tree
Comfy Crown Vic Seats
71 F250 PS, PB, AC, Auto, 390
Loooong way to go on this one!


72 F100 Stepside w/ 78 300 CID
Hedman Headers
Disc Brakes
Power Steering with 3 STILL on the tree
Comfy Crown Vic Seats
71 F250 PS, PB, AC, Auto, 390
Loooong way to go on this one!


- 72stepside
- Blue Oval Fan

- Posts: 537
- Joined: Tue May 09, 2006 10:31 pm
- Location: Florida, Milton
- Contact:
Re: Project "Uncle Fester"- 3/16 Front trim installed
Wow, haven't posted since December.
Since then, I PUT THAT FUEL TANK BACK IN!!!! I made for absolute sure there was nothing else to put in above or around it.
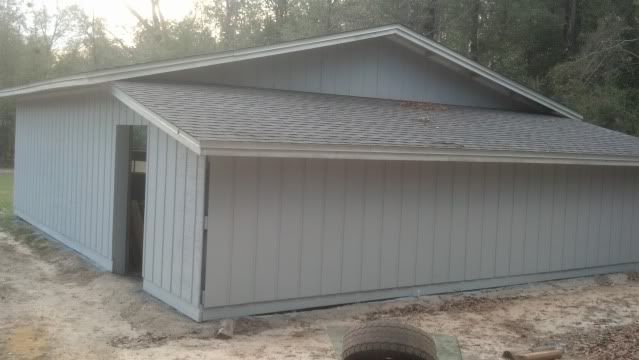
I've also put permanent walls on my pole barn.
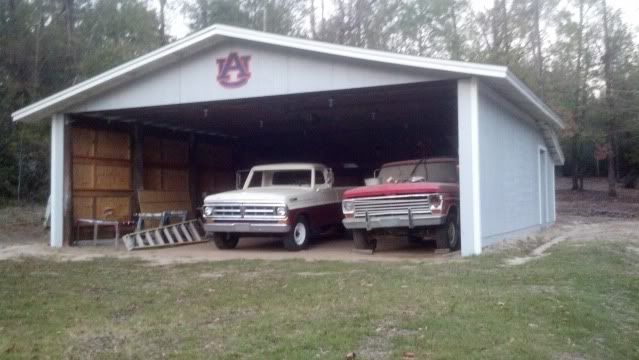
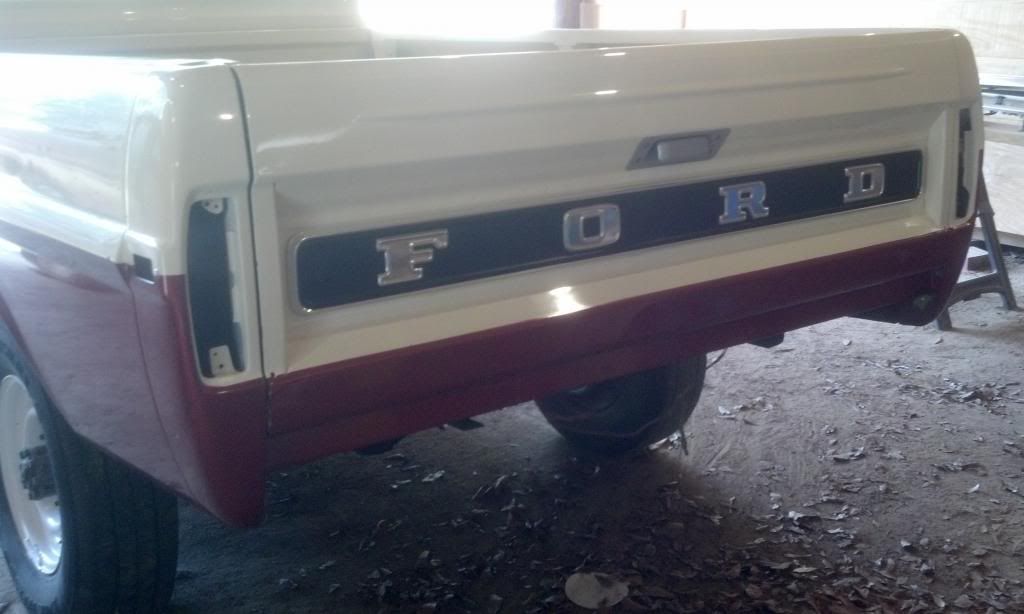
I've finally got some parts on the truck and out of my way in the other shop.
I've been tripping over this tailgate for WAY too long!
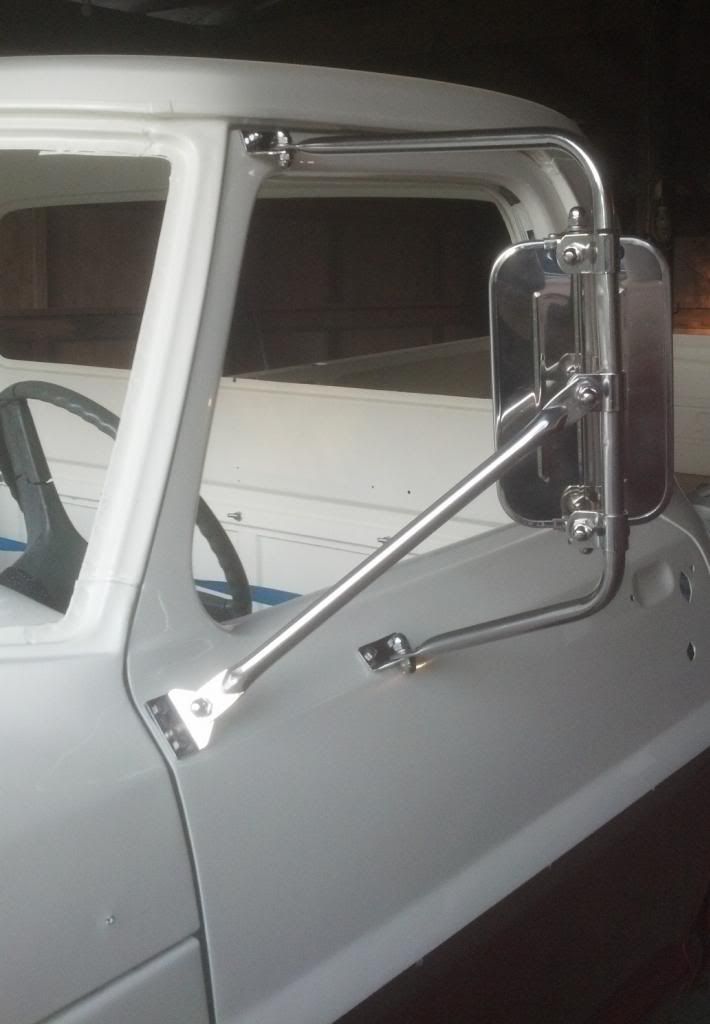
I got the mirrors installed earlier this week. I'm really excited about the way they turned out.
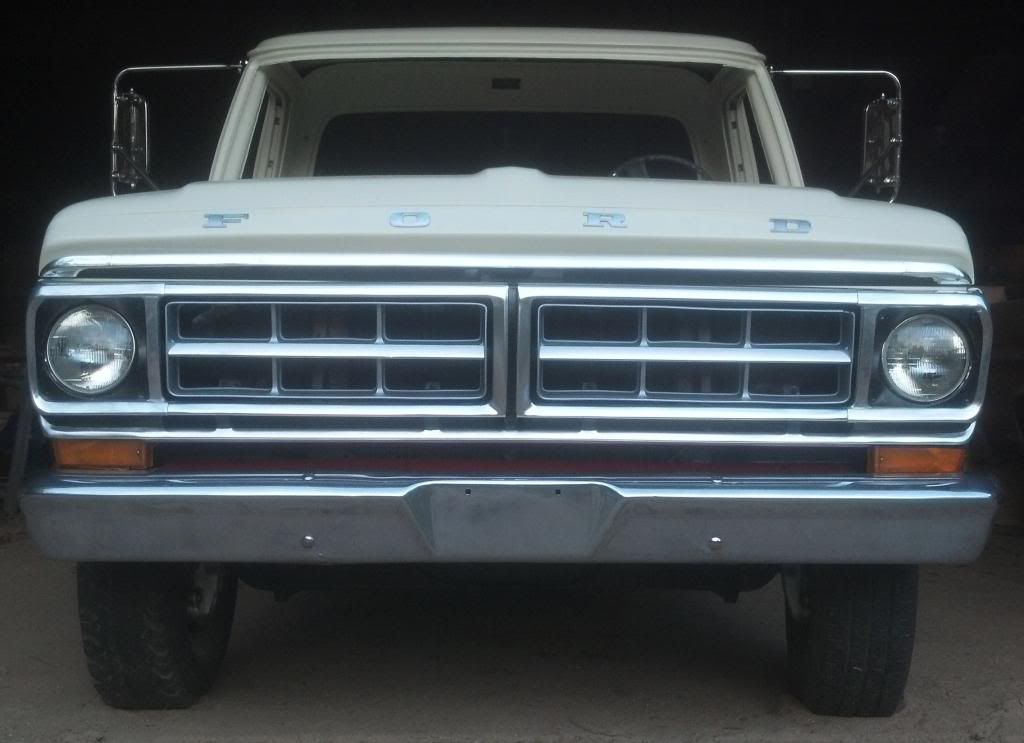
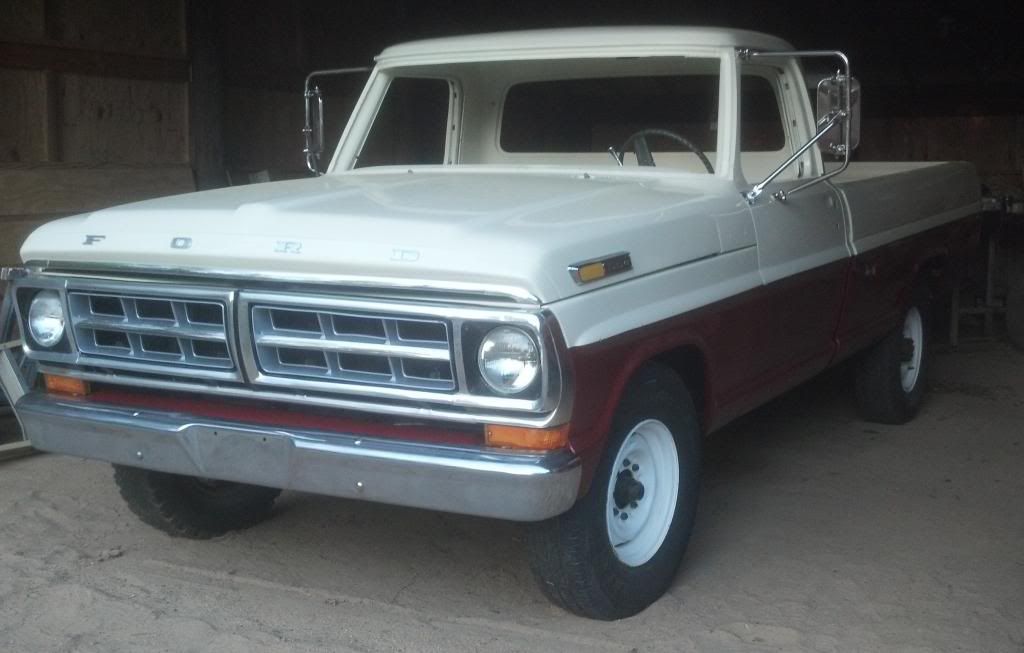
I also got tired of tripping over the front bumper and grille. I spent today getting the grill all ready to finally hang on the truck. Got it along with the hood side markers, letters, and trim installed. I bought new hood trim years ago and finally got it put on. Another piece out of the way!!!
Next up is to get the doors put back together. I ordered vent window seals last week. They should arrive on Monday.
Stay tuned!
Since then, I PUT THAT FUEL TANK BACK IN!!!! I made for absolute sure there was nothing else to put in above or around it.
I've also put permanent walls on my pole barn.


I've finally got some parts on the truck and out of my way in the other shop.
I've been tripping over this tailgate for WAY too long!

I got the mirrors installed earlier this week. I'm really excited about the way they turned out.

I also got tired of tripping over the front bumper and grille. I spent today getting the grill all ready to finally hang on the truck. Got it along with the hood side markers, letters, and trim installed. I bought new hood trim years ago and finally got it put on. Another piece out of the way!!!


Next up is to get the doors put back together. I ordered vent window seals last week. They should arrive on Monday.
Stay tuned!
Chris
72 F100 Stepside w/ 78 300 CID
Hedman Headers
Disc Brakes
Power Steering with 3 STILL on the tree
Comfy Crown Vic Seats
71 F250 PS, PB, AC, Auto, 390
Loooong way to go on this one!


72 F100 Stepside w/ 78 300 CID
Hedman Headers
Disc Brakes
Power Steering with 3 STILL on the tree
Comfy Crown Vic Seats
71 F250 PS, PB, AC, Auto, 390
Loooong way to go on this one!


- sargentrs
- 100% FORDified!

- Posts: 9866
- Joined: Fri Jun 22, 2007 9:30 am
- Location: Georgia, Jasper
Re: Project "Uncle Fester"- 3/16 - Front trim installed!
She's looking great!
Randy
1970 F100 Sport Custom Limited LWB, 302cid, 3 on the tree. NO A/C, NO P/S, NO P/B. Currently in 1000 pcs while rebuilding. Project thread: http://www.fordification.com/forum/view ... 22&t=59995 Plan: 351w, C4, LSD, pwr front disc, p/s, a/c, bucket seats, new interior and paint.
1987 F-150 XLT Lariat, 5.0/C6 auto.
1970 F100 Sport Custom Limited LWB, 302cid, 3 on the tree. NO A/C, NO P/S, NO P/B. Currently in 1000 pcs while rebuilding. Project thread: http://www.fordification.com/forum/view ... 22&t=59995 Plan: 351w, C4, LSD, pwr front disc, p/s, a/c, bucket seats, new interior and paint.
1987 F-150 XLT Lariat, 5.0/C6 auto.
- mcheath
- New Member

- Posts: 249
- Joined: Fri Aug 10, 2012 12:25 am
- Location: California, USA
- papabug71
- 100% FORDified!

- Posts: 2002
- Joined: Mon Oct 13, 2008 11:31 pm
- Location: McAlester, Oklahoma
Re: Project "Uncle Fester"- 3/16 - Front trim installed!
That old Ford is going to look better than new. Keep up the good work. 

Matt
1971 F-100 Sport Custom - My grandpaws truck
Been in the family since 10/3/'71 (Brand spankin' new)
Mine since 5/7/'94
302 / 3 speed / 3:25's
--Currently undergoing full frame off resto/mod--
- 72stepside
- Blue Oval Fan

- Posts: 537
- Joined: Tue May 09, 2006 10:31 pm
- Location: Florida, Milton
- Contact:
Re: Project "Uncle Fester"- 3/24 Anti-Rattle Fiasco
Over the past few days I've been getting the vent windows all squared away. I ordered some vent window seals from Carpenter. I have to say they went in quite well. They came with little brass rivets that were a challenge to install. I ended up taking a short piece of round stock (about an inch long) and ground a point on it to peen out the rivets. What it did was split the rivets so I ended up just folding the split pieced over with a light hammer and flat blade screw driver. Worked out fine. They're nice and tight.
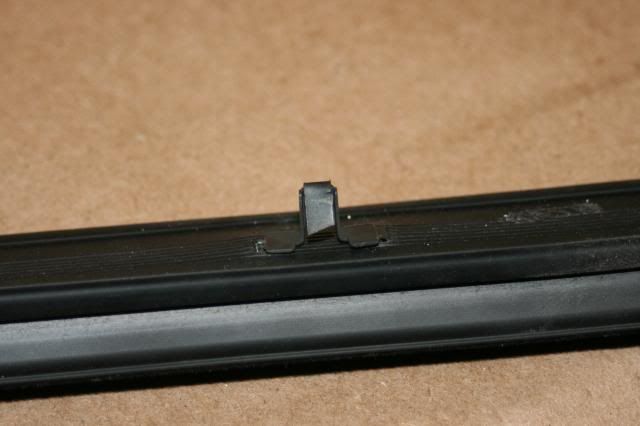
I finally got around to installing the anti-rattle kit I ordered from Macs back in November. I got everything out and found the rubber window channel seals all went in really well. When I got to the anti-rattle pieces at the bottom of the window opening, I hit a major snag. The outer rubber (my truck came with felt but I wanted rubber) clips came nowhere near matching the holes in the door. In fact, the whole piece was about an inch and a half too long. So, I carefully marked where the clips should be and removed and re-located the clips. This was not easy but I got it done nonetheless. Got ready to re-install and found it still didn't fit well. The clip at the rear of the door didn't line up well... the curve didn't line up right at all. The clips were really pathetic. They didn't really hold the part up against the door like they should and they were very brittle. When they started breaking, I got pretty mad. The interior felt seal fit really well with just a very minor trimming adjustment. I made the decision to call Macs. I found their website and discovered they have a 30 day return policy and I missed customer service closing time by 5 minutes.
Here are the pitiful little clips:
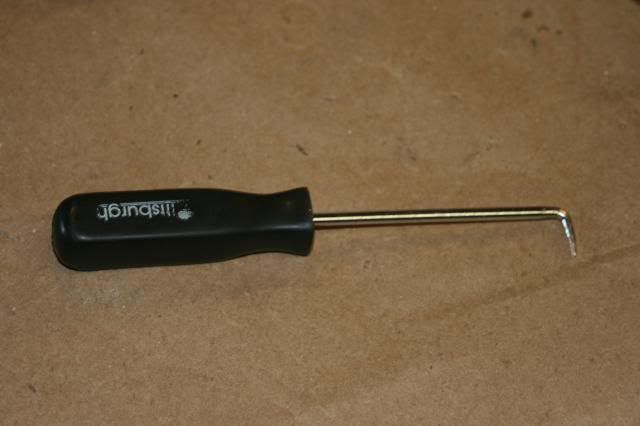
Today I decided that I'd try to install them using some stainless hardware instead of those poor little clips. I popped off all the clips and scribed the rubber with a right angle pick. This tool was very valuable throughout the whole process. It was great for popping off the clips, scribing the rubber, and setting the weatherstipping.
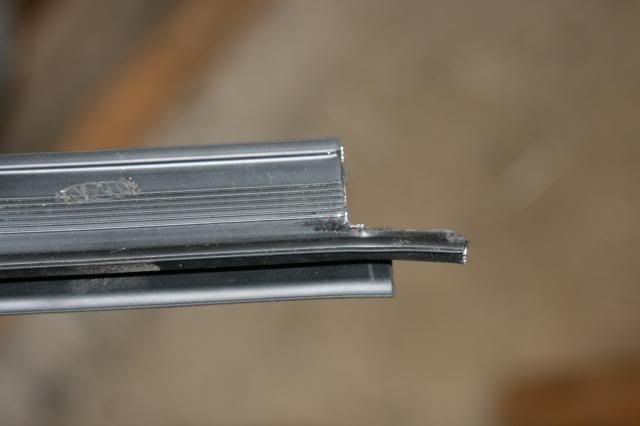
Here's what I had to trim with tinsnips to make it fit:
I drilled holes accordingly and installed #8-32x1/2" screws:
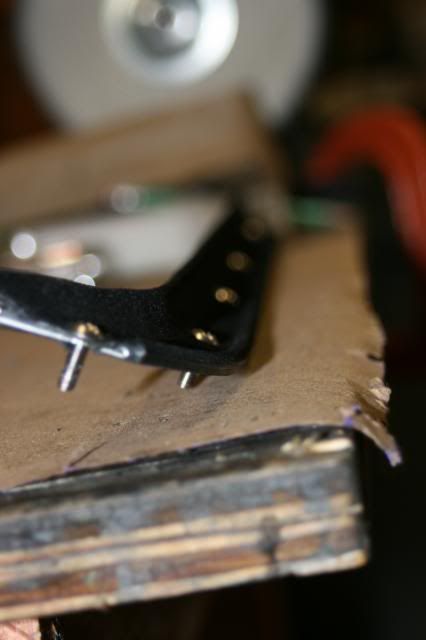
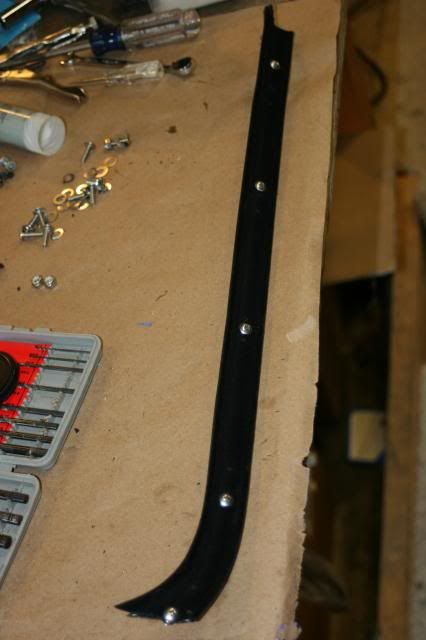
Tightening everything up wasn't too bad. I would have killed for a small ratcheting box end wrench, but I got it done. I used the pick to hold the screw from the window opening (because there was no way to get even a right angle phillips screwdriver in there) and reached underneath with a wrench to tighten. These bolts hold those pieces up nice and tight and make for a pretty good seal. You can see it turned out pretty good.
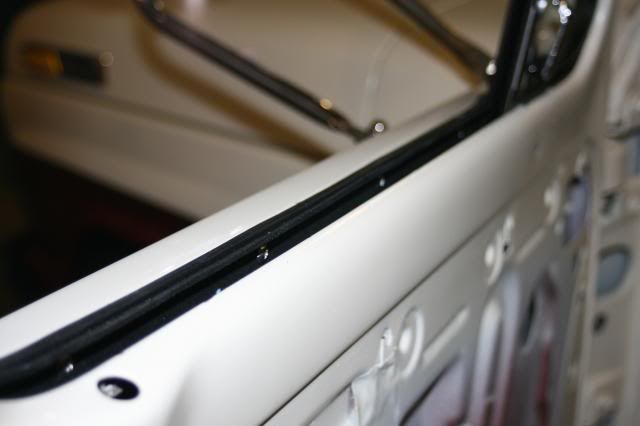
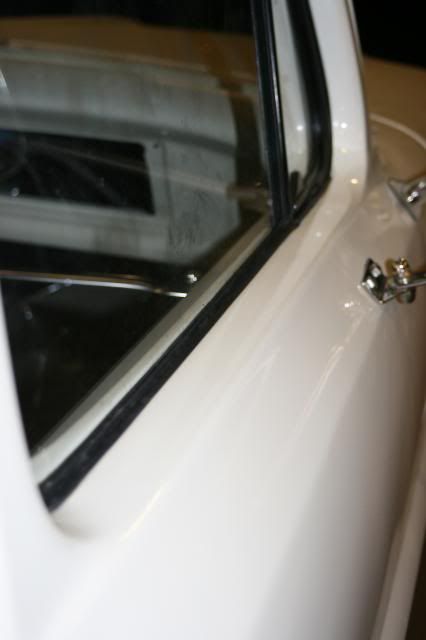
I did get the tail lights and trim installed yesterday after I thought I was dead in the water with the anti-rattle seals.
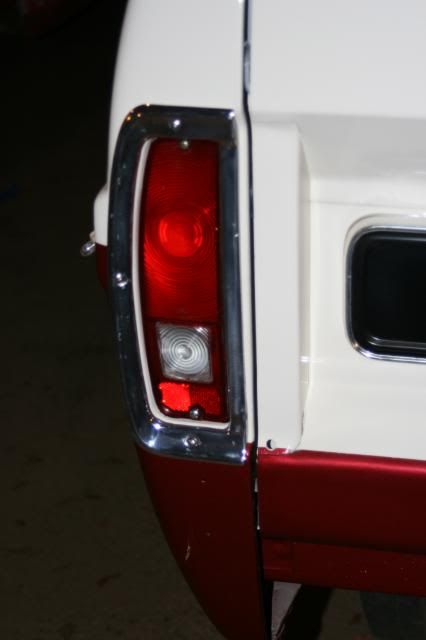
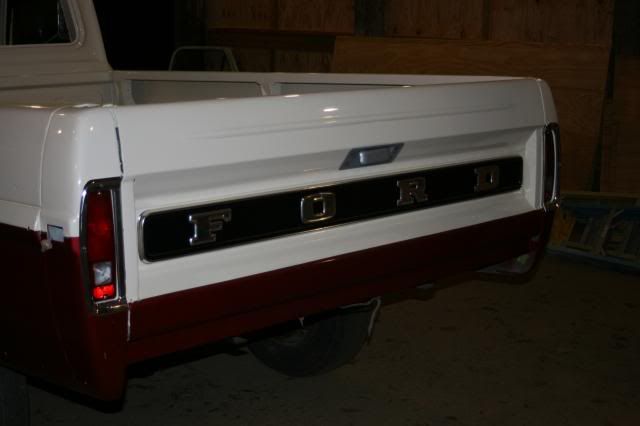
This week I will rob the inner door handles off my old doors, clean them up and get them, along with my door panels installed. At some point I'll get some arm rests to complete the doors.
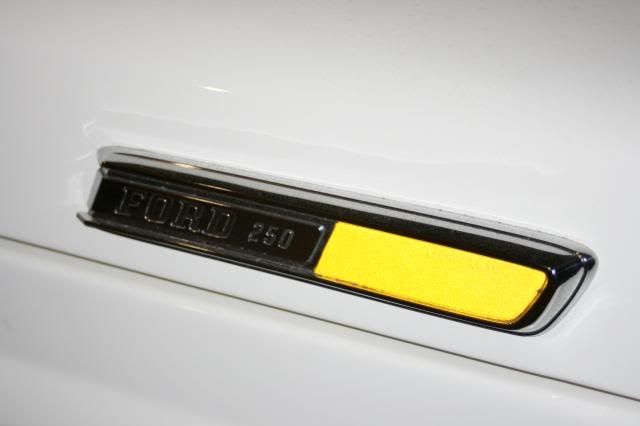
I don't think I ever took a pic of my side hood markers. Instead of buying new ones right away, I cleaned up what I had. I pryed the reflector out and covered it with some reflective sign adhesive sheet that I found. I JB welded them back in. They are quite reflective now and look pretty good, at least until I can buy some replacements.
More later...
I finally got around to installing the anti-rattle kit I ordered from Macs back in November. I got everything out and found the rubber window channel seals all went in really well. When I got to the anti-rattle pieces at the bottom of the window opening, I hit a major snag. The outer rubber (my truck came with felt but I wanted rubber) clips came nowhere near matching the holes in the door. In fact, the whole piece was about an inch and a half too long. So, I carefully marked where the clips should be and removed and re-located the clips. This was not easy but I got it done nonetheless. Got ready to re-install and found it still didn't fit well. The clip at the rear of the door didn't line up well... the curve didn't line up right at all. The clips were really pathetic. They didn't really hold the part up against the door like they should and they were very brittle. When they started breaking, I got pretty mad. The interior felt seal fit really well with just a very minor trimming adjustment. I made the decision to call Macs. I found their website and discovered they have a 30 day return policy and I missed customer service closing time by 5 minutes.
Here are the pitiful little clips:

Today I decided that I'd try to install them using some stainless hardware instead of those poor little clips. I popped off all the clips and scribed the rubber with a right angle pick. This tool was very valuable throughout the whole process. It was great for popping off the clips, scribing the rubber, and setting the weatherstipping.

Here's what I had to trim with tinsnips to make it fit:

I drilled holes accordingly and installed #8-32x1/2" screws:


Tightening everything up wasn't too bad. I would have killed for a small ratcheting box end wrench, but I got it done. I used the pick to hold the screw from the window opening (because there was no way to get even a right angle phillips screwdriver in there) and reached underneath with a wrench to tighten. These bolts hold those pieces up nice and tight and make for a pretty good seal. You can see it turned out pretty good.


I did get the tail lights and trim installed yesterday after I thought I was dead in the water with the anti-rattle seals.


This week I will rob the inner door handles off my old doors, clean them up and get them, along with my door panels installed. At some point I'll get some arm rests to complete the doors.
I don't think I ever took a pic of my side hood markers. Instead of buying new ones right away, I cleaned up what I had. I pryed the reflector out and covered it with some reflective sign adhesive sheet that I found. I JB welded them back in. They are quite reflective now and look pretty good, at least until I can buy some replacements.

More later...
Chris
72 F100 Stepside w/ 78 300 CID
Hedman Headers
Disc Brakes
Power Steering with 3 STILL on the tree
Comfy Crown Vic Seats
71 F250 PS, PB, AC, Auto, 390
Loooong way to go on this one!


72 F100 Stepside w/ 78 300 CID
Hedman Headers
Disc Brakes
Power Steering with 3 STILL on the tree
Comfy Crown Vic Seats
71 F250 PS, PB, AC, Auto, 390
Loooong way to go on this one!


-
dcbullet
- Blue Oval Fan

- Posts: 698
- Joined: Fri Apr 01, 2005 6:28 pm
- Location: Oceanside, CA
Re: Project "Uncle Fester"- 3/16 Front trim installed
Your truck looks really great and you've done a fantastic job.72stepside wrote:Wow, haven't posted since December.
I got the mirrors installed earlier this week. I'm really excited about the way they turned out.
[ Image ]
I have a question about the nuts on your mirrors. I was able to find the "round topped" nuts in stainless steel for my mirrors. However, a couple of them are bolts (or studs inside the rounded nuts, I'm not sure). Assuming you purchased new hardware, where did you get the round topped bolts? I couldn't find them.
- 72stepside
- Blue Oval Fan

- Posts: 537
- Joined: Tue May 09, 2006 10:31 pm
- Location: Florida, Milton
- Contact:
Re: Project "Uncle Fester"- 3/24 Anti-rattle Fiasco
Thanks for the kind words. I ordered all the acorn nuts from Fastenal. They were the cheapest place I could find them. To make the bolts, I bought some threaded stock, cut it, then put one of the acorn nuts on with Lock-tite.
Chris
72 F100 Stepside w/ 78 300 CID
Hedman Headers
Disc Brakes
Power Steering with 3 STILL on the tree
Comfy Crown Vic Seats
71 F250 PS, PB, AC, Auto, 390
Loooong way to go on this one!


72 F100 Stepside w/ 78 300 CID
Hedman Headers
Disc Brakes
Power Steering with 3 STILL on the tree
Comfy Crown Vic Seats
71 F250 PS, PB, AC, Auto, 390
Loooong way to go on this one!


- F100builder
- Blue Oval Guru

- Posts: 1304
- Joined: Thu Jan 10, 2008 6:55 pm
- Location: Idaho, Nampa
Re: Project "Uncle Fester"- 3/24 Anti-rattle Fiasco
I remember seeing the start of this thread quite some time ago...man, have you come a long way and done a fantastic job! I was worried about shooting new paint in my garage and driveway but it appears that you've done rather well and in a pole barn without full walls no less! The truck is looking great and I can't wait to see it finished! 
Patrick


'56 F100; Must.II IFS, 351W bored & stroked to 395c.i. 470hp/483ft-lbs., AOD, 4-link coilover 9" w/ 3.89's
'69 F100; 390, C6, Dana 60 w/ 4.10's
'70 F100; 'new' and latest project soon to have a built 390/C6 and 3.50 gears
To see more of my F100's: http://www.cardomain.com/id/lowfat56


'56 F100; Must.II IFS, 351W bored & stroked to 395c.i. 470hp/483ft-lbs., AOD, 4-link coilover 9" w/ 3.89's
'69 F100; 390, C6, Dana 60 w/ 4.10's
'70 F100; 'new' and latest project soon to have a built 390/C6 and 3.50 gears
To see more of my F100's: http://www.cardomain.com/id/lowfat56
- 72stepside
- Blue Oval Fan

- Posts: 537
- Joined: Tue May 09, 2006 10:31 pm
- Location: Florida, Milton
- Contact:
Re: Project "Uncle Fester"- 4/20 NEW WINDSHIELD
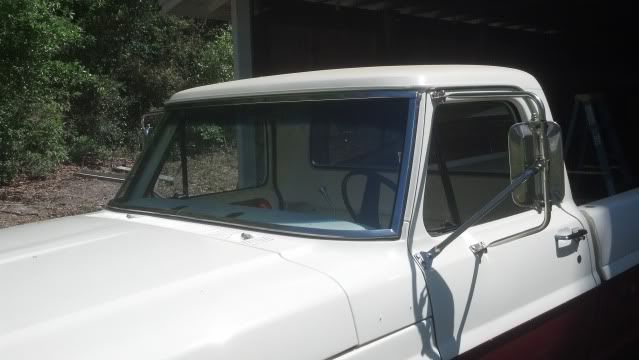
BEHOLD, we have a windshield!!!!
And a rear window (complete with the obligatory window sticker)!!!
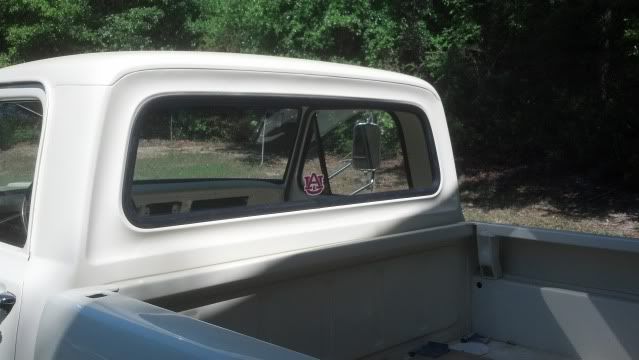
Installing the stainless windshield trim is no small task. I hired a windshield installer to do the work on the side and it was still tough. We fit the gasket to the windshield, put in the top trim, then the sides, THEN CAME THE BOTTOM!! Oh my what a pain. The curve of the window and the curve of the stainless didn't cooperate with one another. We'd get the curve in, then the middle would pop the gasket off the glass. We ended up strapping the gasket to the glass, installing the curve part first, then the middle. Finally got it all together. Then came the easy part... roping the glass into the truck. Once the glass is in and set, the gasket groove for the stainless gets REAL TIGHT!!! That trim isn't coming out! The windshield took an hour and a half. The rear window took about 10 minutes... no trim there! The rear gasket came with a trim groove, which is not what I ordered. Once in the truck, the fit was so tight that you can't even tell there is a groove. I'll live with it. I told the installer that if this windshield ever needs to be replaced, the stainless will be available on Ebay to someone else!!
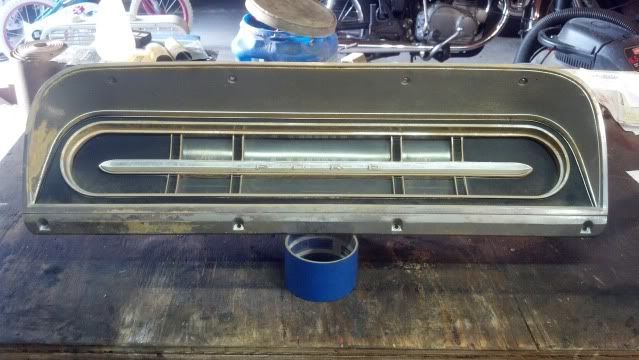
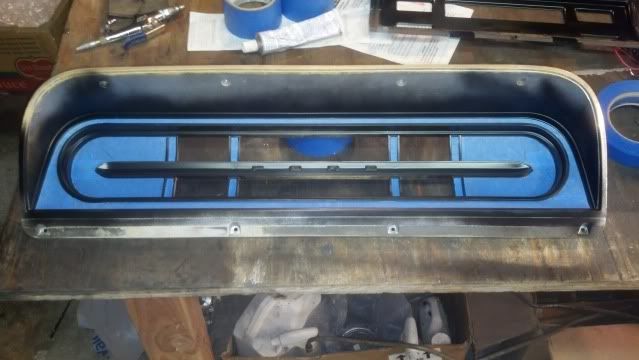
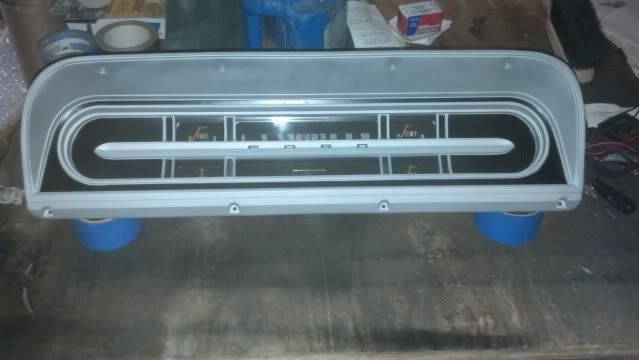
I've also cleaned up the instrument cluster. I used flourescent orange model airplane paint on the needles. I cleaned up the lens with Meguires plastic cleaner then polish. I was going to wipe the speedo down with Windex until the white numbers started to smear slightly. I stopped immediately and polished with a dry paper towel. Smear went away and the numbers remain unscathed WHEW!!! I painted with black satin engine enamel and brushed nickel metallic rustoleum (same as on my grille inserts). I masked with painters tape and cut with an X-acto knife. I pained the FORD letters and touched up the black with flat black model paint and a very small brush. It'll do until I can get a new bezel and lens.
Here are a before, during, and after pic.
We started the carpet and firewall cover install this afternoon. I ended the day with a really horrible picture so I'll get a good pic tomorrow once everything is trimmed out.
Stay tuned.

And a rear window (complete with the obligatory window sticker)!!!

Installing the stainless windshield trim is no small task. I hired a windshield installer to do the work on the side and it was still tough. We fit the gasket to the windshield, put in the top trim, then the sides, THEN CAME THE BOTTOM!! Oh my what a pain. The curve of the window and the curve of the stainless didn't cooperate with one another. We'd get the curve in, then the middle would pop the gasket off the glass. We ended up strapping the gasket to the glass, installing the curve part first, then the middle. Finally got it all together. Then came the easy part... roping the glass into the truck. Once the glass is in and set, the gasket groove for the stainless gets REAL TIGHT!!! That trim isn't coming out! The windshield took an hour and a half. The rear window took about 10 minutes... no trim there! The rear gasket came with a trim groove, which is not what I ordered. Once in the truck, the fit was so tight that you can't even tell there is a groove. I'll live with it. I told the installer that if this windshield ever needs to be replaced, the stainless will be available on Ebay to someone else!!
I've also cleaned up the instrument cluster. I used flourescent orange model airplane paint on the needles. I cleaned up the lens with Meguires plastic cleaner then polish. I was going to wipe the speedo down with Windex until the white numbers started to smear slightly. I stopped immediately and polished with a dry paper towel. Smear went away and the numbers remain unscathed WHEW!!! I painted with black satin engine enamel and brushed nickel metallic rustoleum (same as on my grille inserts). I masked with painters tape and cut with an X-acto knife. I pained the FORD letters and touched up the black with flat black model paint and a very small brush. It'll do until I can get a new bezel and lens.
Here are a before, during, and after pic.


We started the carpet and firewall cover install this afternoon. I ended the day with a really horrible picture so I'll get a good pic tomorrow once everything is trimmed out.
Stay tuned.
Chris
72 F100 Stepside w/ 78 300 CID
Hedman Headers
Disc Brakes
Power Steering with 3 STILL on the tree
Comfy Crown Vic Seats
71 F250 PS, PB, AC, Auto, 390
Loooong way to go on this one!


72 F100 Stepside w/ 78 300 CID
Hedman Headers
Disc Brakes
Power Steering with 3 STILL on the tree
Comfy Crown Vic Seats
71 F250 PS, PB, AC, Auto, 390
Loooong way to go on this one!


- sargentrs
- 100% FORDified!

- Posts: 9866
- Joined: Fri Jun 22, 2007 9:30 am
- Location: Georgia, Jasper
Re: Project "Uncle Fester"- 4/20 NEW WINDSHIELD
Great work!
Randy
1970 F100 Sport Custom Limited LWB, 302cid, 3 on the tree. NO A/C, NO P/S, NO P/B. Currently in 1000 pcs while rebuilding. Project thread: http://www.fordification.com/forum/view ... 22&t=59995 Plan: 351w, C4, LSD, pwr front disc, p/s, a/c, bucket seats, new interior and paint.
1987 F-150 XLT Lariat, 5.0/C6 auto.
1970 F100 Sport Custom Limited LWB, 302cid, 3 on the tree. NO A/C, NO P/S, NO P/B. Currently in 1000 pcs while rebuilding. Project thread: http://www.fordification.com/forum/view ... 22&t=59995 Plan: 351w, C4, LSD, pwr front disc, p/s, a/c, bucket seats, new interior and paint.
1987 F-150 XLT Lariat, 5.0/C6 auto.