1969 FS Bronco
Moderator: FORDification
-
FordTruck
- Blue Oval Guru

- Posts: 1160
- Joined: Wed Aug 15, 2007 4:47 pm
- Location: The GREAT State Of Missouri
- Contact:
Re: 1969 FS Bronco
this project is so freakin......AWSOME!!! 
"Flyin High On Caffine And Copenhagen" R.I.P Chris LeDoux
60 Mercury Comet
65 Ford Econoline
72 Ford F100 on 79 4x4 SWB frame
77 Ford F250 "lowboy" 4x4
09 Harley Xl1200c
60 Mercury Comet
65 Ford Econoline
72 Ford F100 on 79 4x4 SWB frame
77 Ford F250 "lowboy" 4x4
09 Harley Xl1200c
- trukcrazy
- Blue Oval Fanatic

- Posts: 905
- Joined: Sat Apr 02, 2005 8:55 am
- Location: Gulf Breeze, Florida, USA
Re: 1969 FS Bronco
That is looking incredible. I'll take one please..... 
John, #424
1967 F250 crewcab x 2.
2010 Dodge Ram 1500 Sport Quadcab
2008 Challenger SRT8

1967 F250 crewcab x 2.
2010 Dodge Ram 1500 Sport Quadcab
2008 Challenger SRT8

- Calfdemon
- 100% FORDified!

- Posts: 2672
- Joined: Tue May 25, 2010 11:31 pm
- Location: California, Santa Clarita
Re: 1969 FS Bronco
This is coming out amazing!! Truly a one of a kind "Bumpco"!! 
-Rich
Current toys -
69 Ford F350 Crew Cab - 460 / C6 - http://i253.photobucket.com/albums/hh67 ... lqgskp.jpg
31 Ford Vicky - 1955 270 Red Ram Hemi / 4 speed - http://i253.photobucket.com/albums/hh67 ... bsibvn.jpg
Former toys -
67 Pontiac Firebird 400 convertible (sold 9/13) - http://i253.photobucket.com/albums/hh67 ... bird-1.jpg
67 Ford Fairlane GT - 390 / 4 speed (sold 7/15) - http://i253.photobucket.com/albums/hh67 ... c5hu8z.jpg
- dolinick
- Blue Oval Fanatic

- Posts: 895
- Joined: Sun Aug 05, 2007 8:45 pm
- Location: Texas, San Antonio
Re: 1969 FS Bronco
FordTruck wrote:this project is so freakin......AWSOME!!!
2003 7.3L F250
1968 F500 Utility Truck
1968 F500 Utility Truck
-
lowridingf250
- New Member

- Posts: 71
- Joined: Fri Apr 08, 2011 9:26 pm
Re: 1969 FS Bronco
Just one?trukcrazy wrote:That is looking incredible. I'll take one please.....
- Joshpow
- 100% FORDified!

- Posts: 1790
- Joined: Fri Jan 21, 2005 10:43 am
- Location: Virginia
- Contact:
Re: 1969 FS Bronco
Looking good. Keep us posted. I think were in for a cool finished project in the near future!!
Josh
72 F-100 Ranger XLT SWB
71 F-100 Custom SWB
67 F-350 Dually Dump
02 F-250 Stroke
http://www.cardomain.com/ride/2972100
72 F-100 Ranger XLT SWB
71 F-100 Custom SWB
67 F-350 Dually Dump
02 F-250 Stroke
http://www.cardomain.com/ride/2972100
- dolinick
- Blue Oval Fanatic

- Posts: 895
- Joined: Sun Aug 05, 2007 8:45 pm
- Location: Texas, San Antonio
Re: 1969 FS Bronco
The first one is always the hardest right? We can all make a bump bronco now and take over the world! 
oh, wait I ought to let him finish this one first.
oh, wait I ought to let him finish this one first.
2003 7.3L F250
1968 F500 Utility Truck
1968 F500 Utility Truck
-
Fordnatic
- Preferred User

- Posts: 274
- Joined: Wed Dec 17, 2008 7:29 am
- Location: Anchorage, Alaska
Re: 1969 FS Bronco
How's it coming? I'm itching for an update!
70F100: 410 Merc with tri-power, close ratio toploader, 4.56 detroit locker 9"
68F100 4x4: 390, 4 spd/NP 205, Rancho 4" urethane susp, 35x12.50 All Terrain T/A's
55F100
01F150 Daily Driver: TP tunes, AF1 intake, elec fans, Magnaflow exh, underdrive pulleys, Centerlines
68F100 4x4: 390, 4 spd/NP 205, Rancho 4" urethane susp, 35x12.50 All Terrain T/A's
55F100
01F150 Daily Driver: TP tunes, AF1 intake, elec fans, Magnaflow exh, underdrive pulleys, Centerlines
- bnl44
- New Member

- Posts: 67
- Joined: Sat Jun 04, 2011 12:35 am
- Location: Mountain Home, Idaho
Re: 1969 FS Bronco
I needed a cross section of the bed to be able to see where things would line up.
I just happen to have a some left over to help out with this.
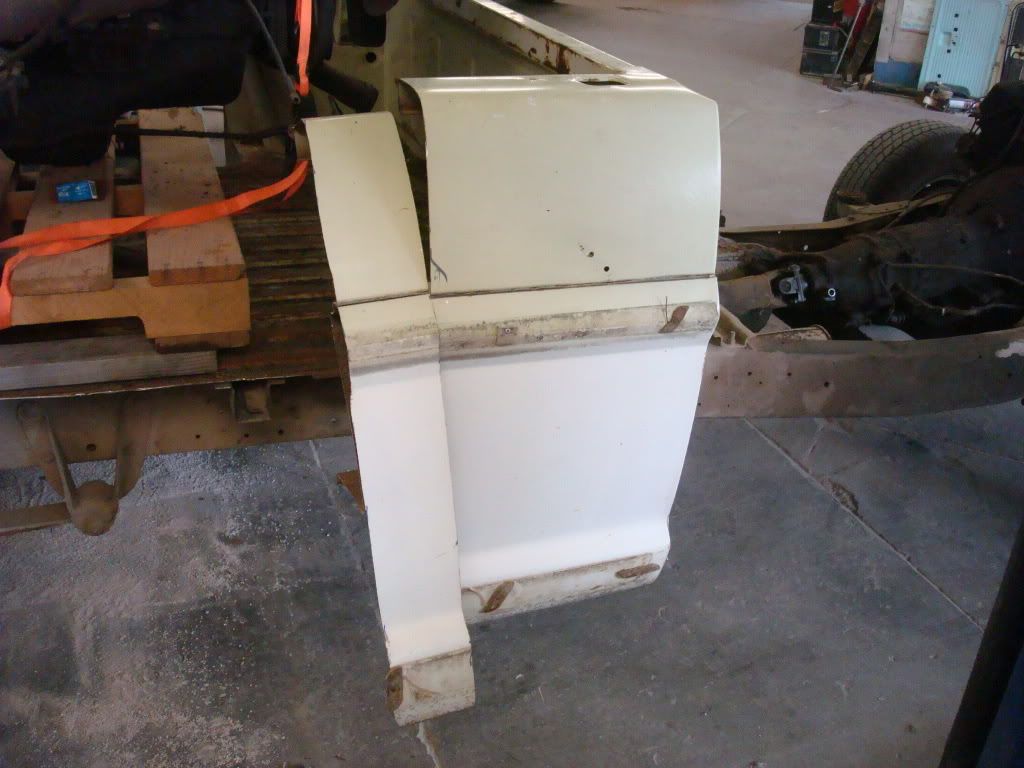
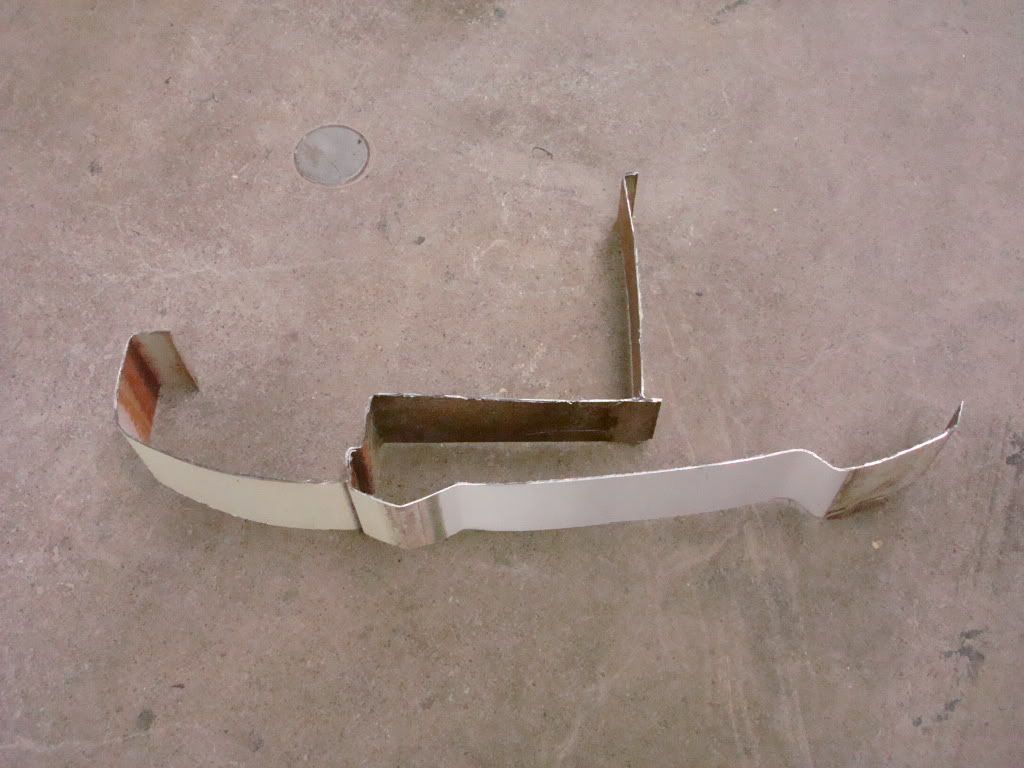
This part was actually done before the last post.
Not that I am trying to write a tutorial. I thought some of you would like to see some of the challenges that come up.
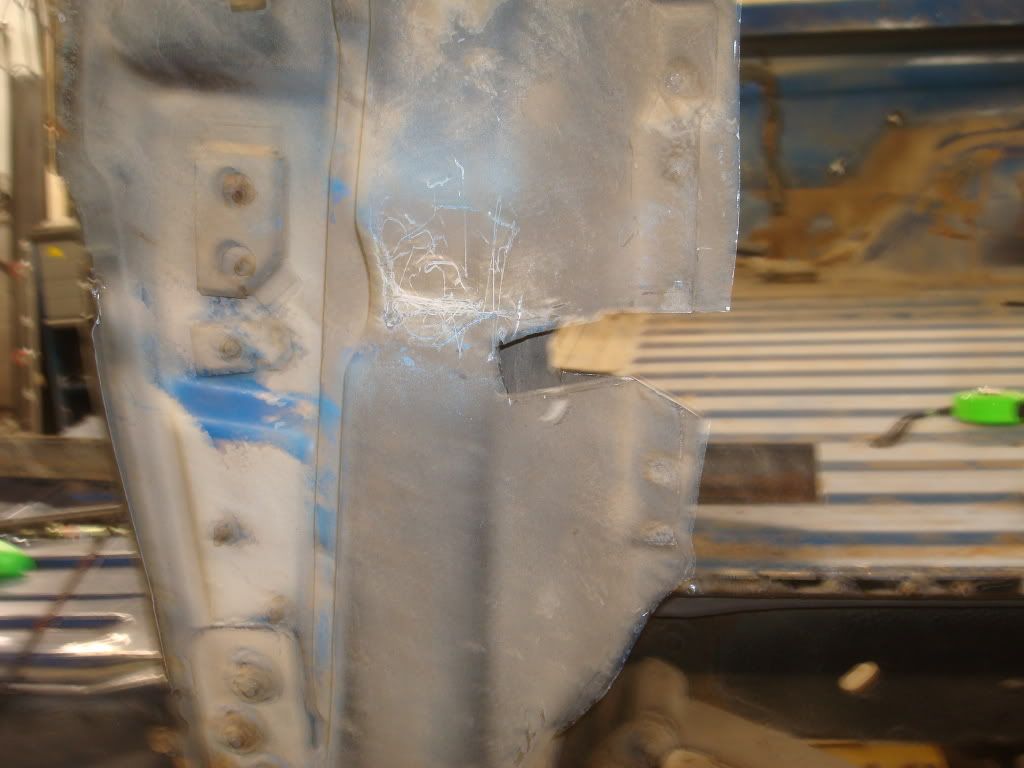
Here is a match up to the rear pillar.
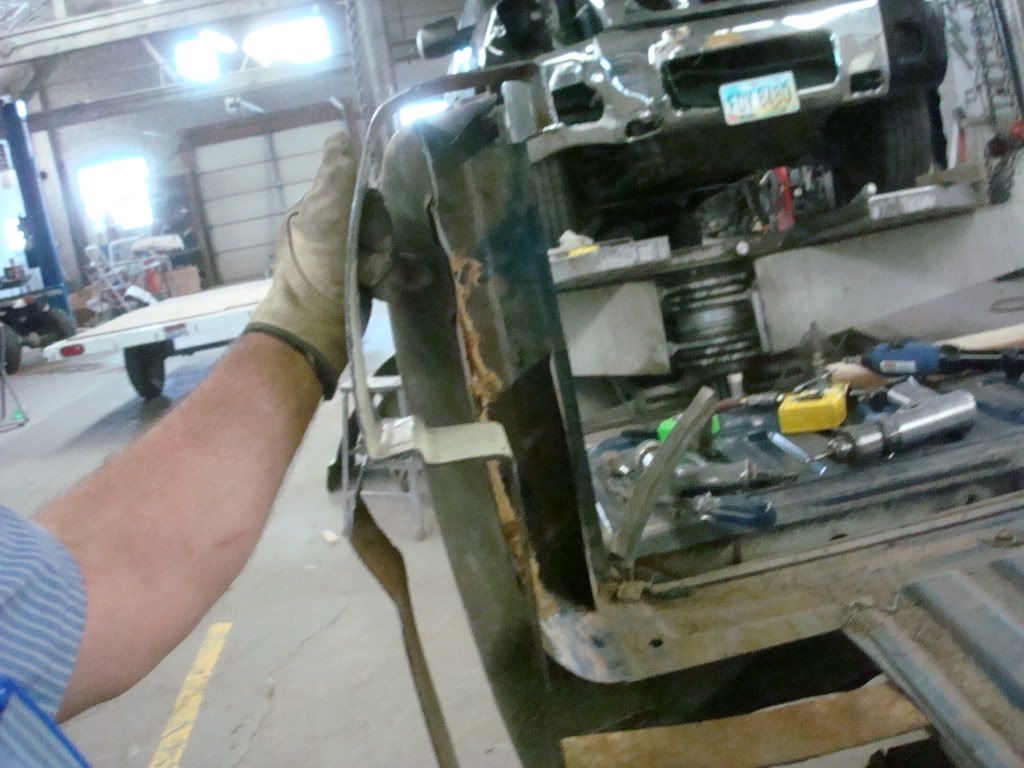
A slot is needed in this area. It leaves a little for height adjustment in the rear.
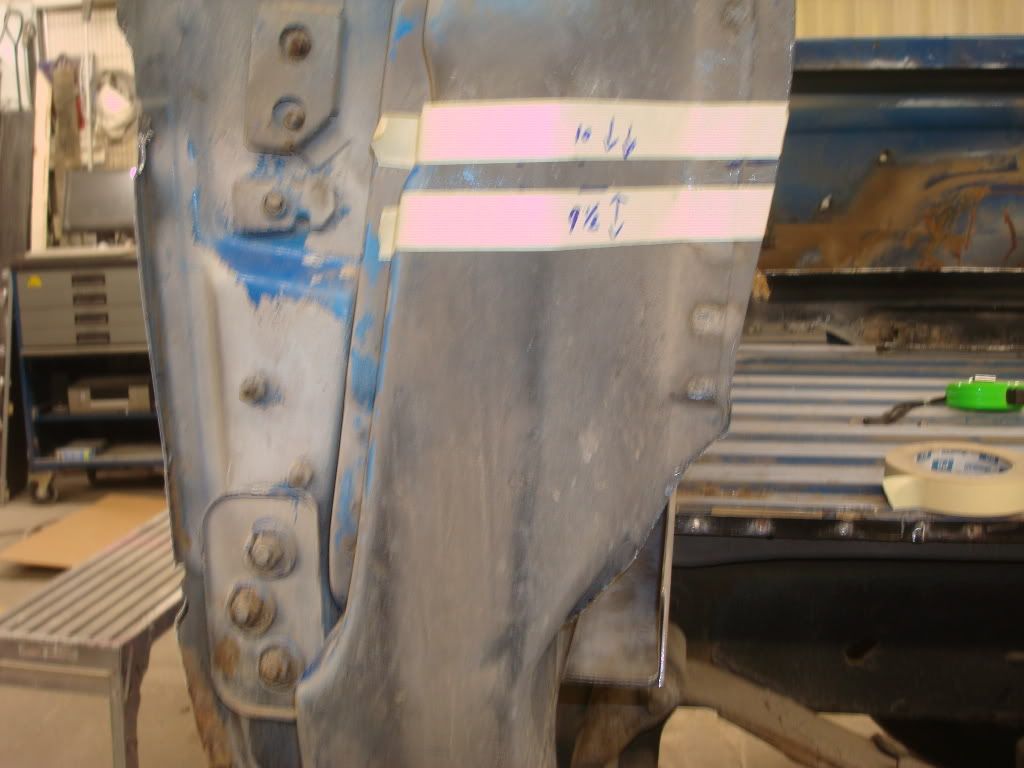
Slot made. The excess space will be filled with metal section or weld.
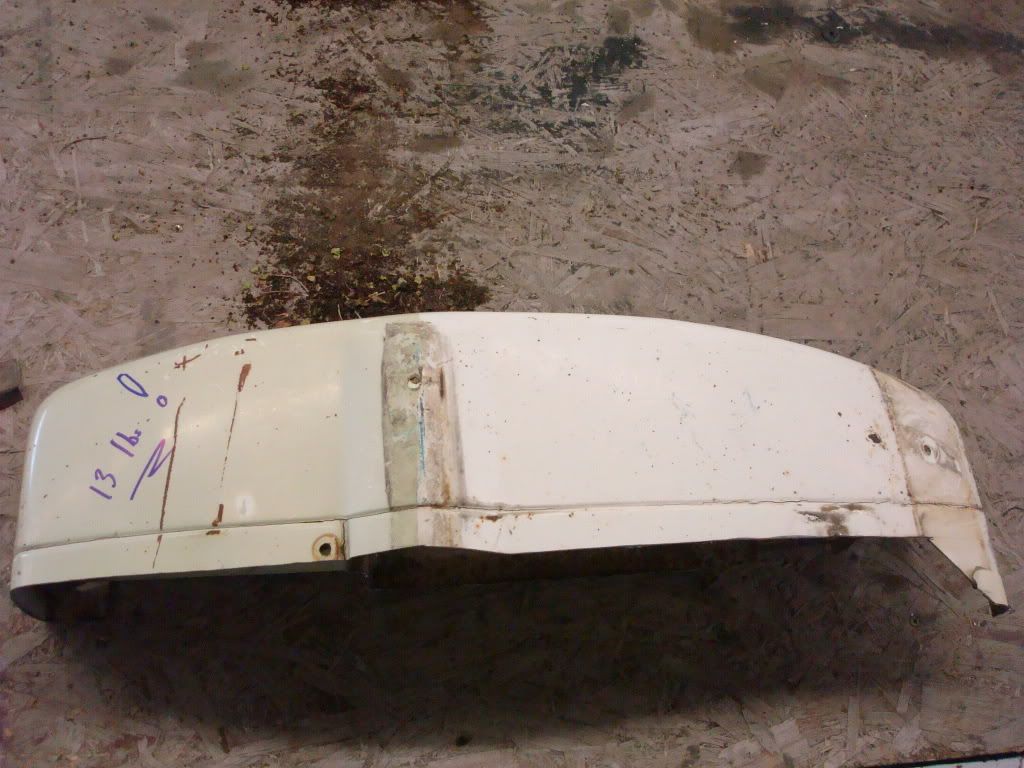
I couldn’t believe how heavy the bed end cap was, so I put it on a scale, 13 pounds!
Now that’s some “real metal”.
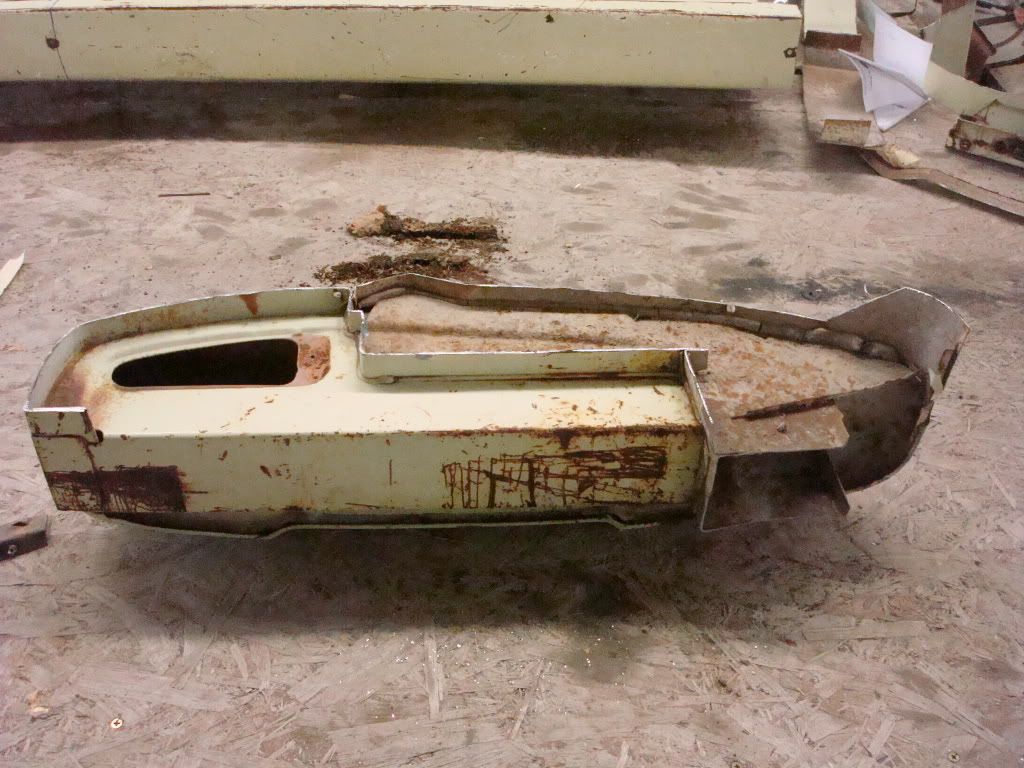
Marked for trimming.
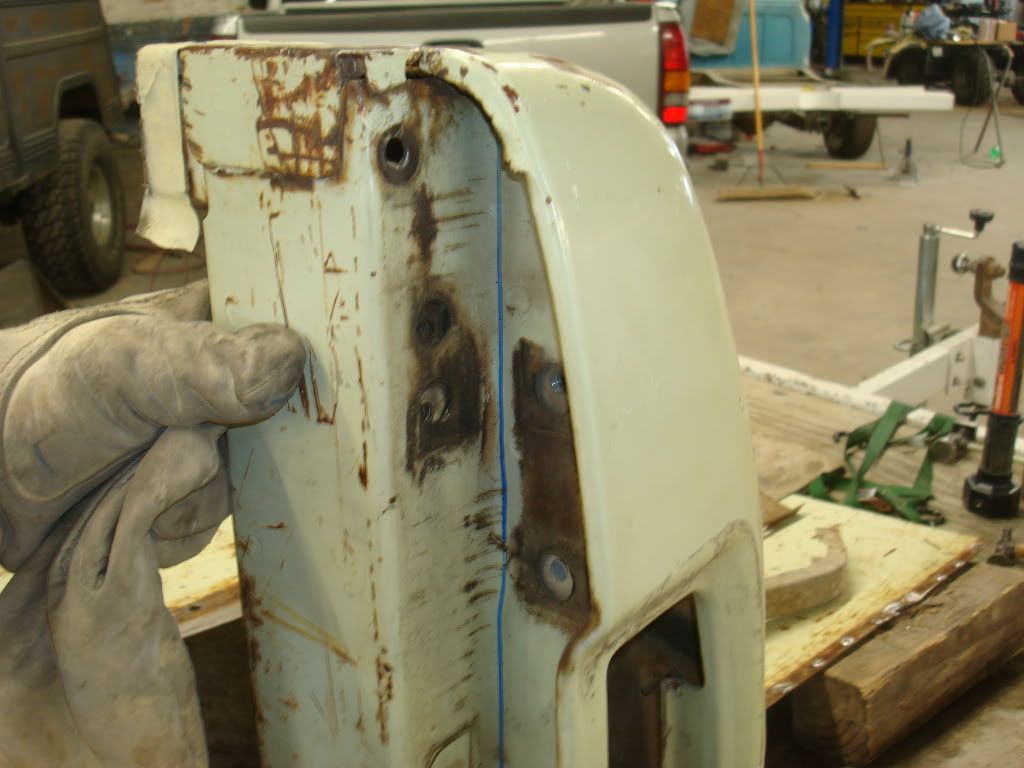
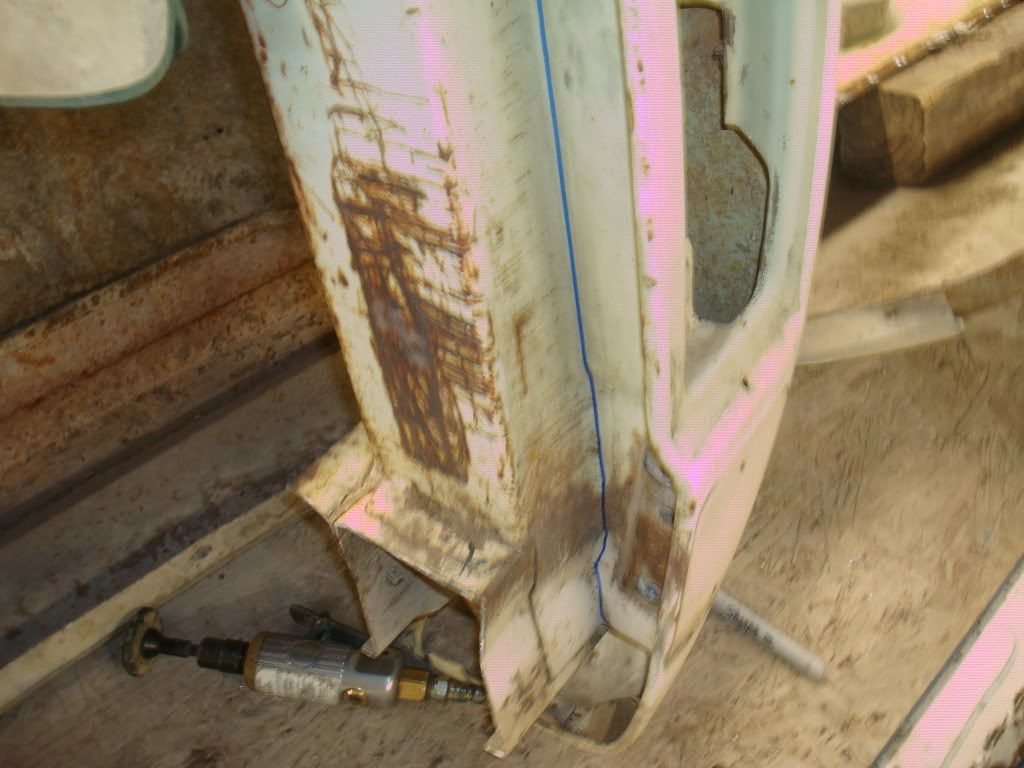
Here you can see how the Bronco end cap is mostly flush with the jamb. And the pickup end cap has the jamb recessed 3/8” for tailgate hardware. As the contour around the tail light and the body lines different, I need to move the jamb closer to the edge.
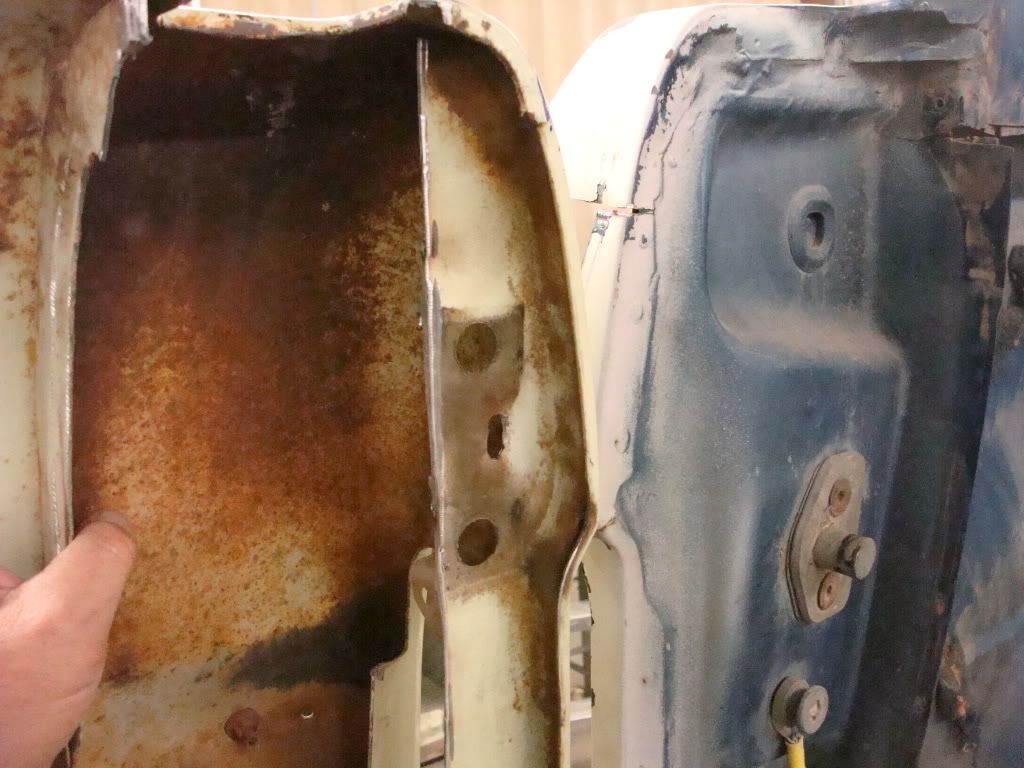
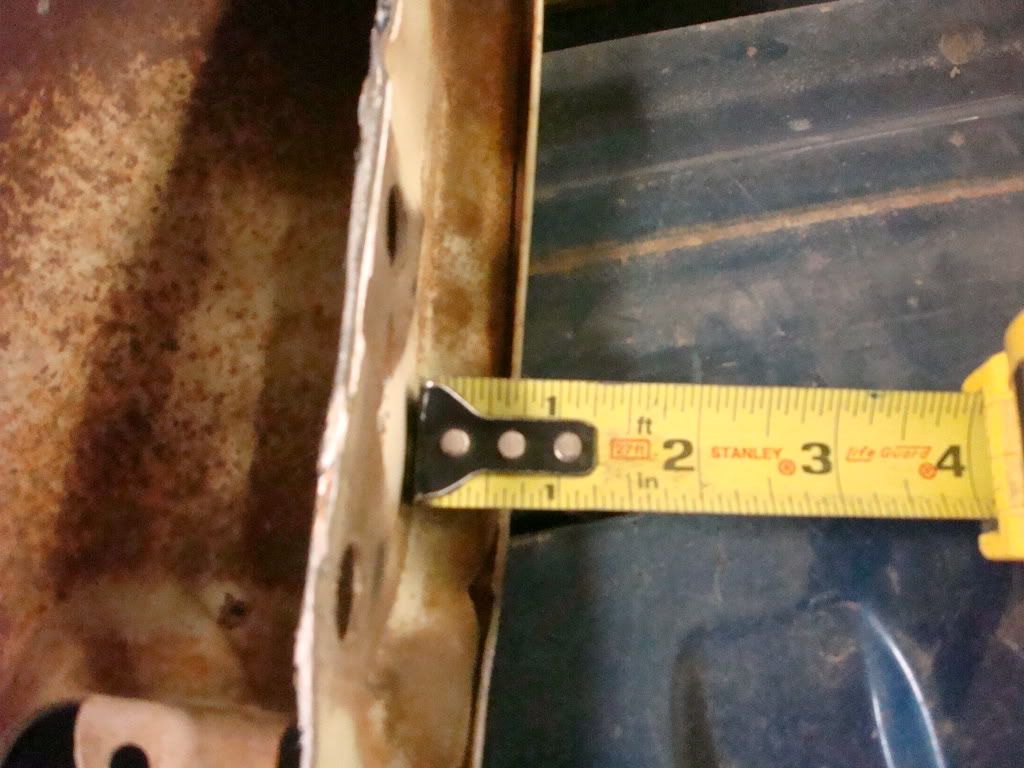
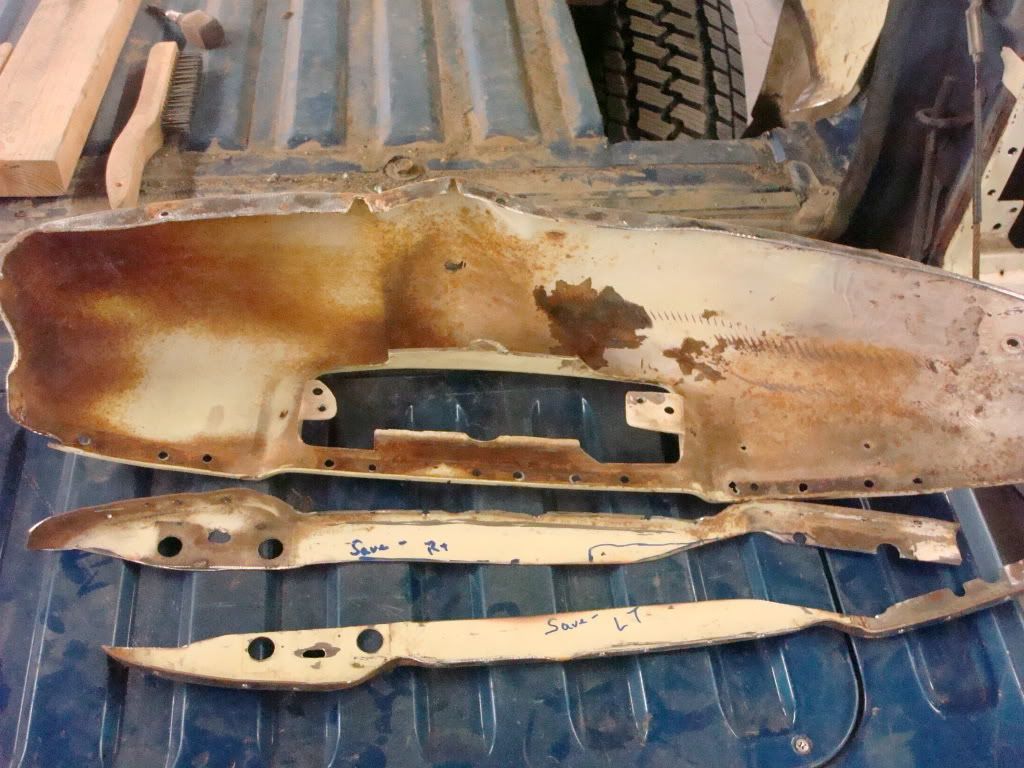
After drilling out the spot welds and trimming down to a minimum piece. The jamb pieces will be swapped left side to right side and right side to left, recessed only the thickness of the Bronco jamb piece and plug welded in on the back side.
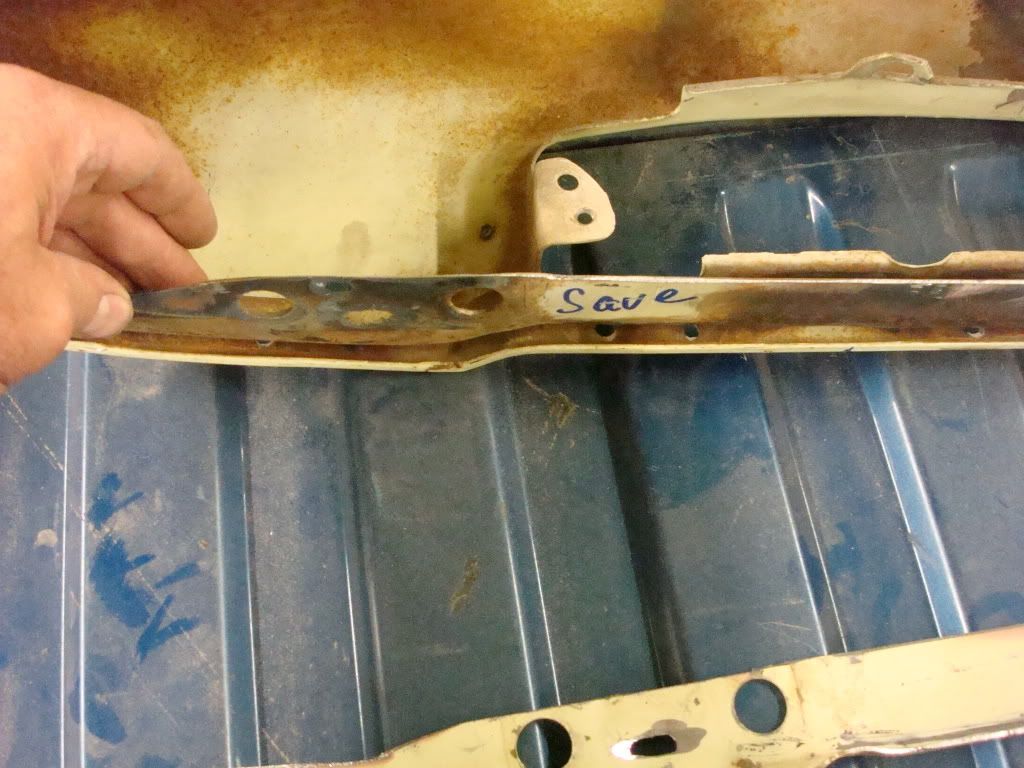
Next, the bottom of the rear corner pillar is totally interfering with the shorter pickup end caps.
I just happen to have a some left over to help out with this.


This part was actually done before the last post.
Not that I am trying to write a tutorial. I thought some of you would like to see some of the challenges that come up.
Here is a match up to the rear pillar.

A slot is needed in this area. It leaves a little for height adjustment in the rear.

Slot made. The excess space will be filled with metal section or weld.

I couldn’t believe how heavy the bed end cap was, so I put it on a scale, 13 pounds!
Now that’s some “real metal”.


Marked for trimming.


Here you can see how the Bronco end cap is mostly flush with the jamb. And the pickup end cap has the jamb recessed 3/8” for tailgate hardware. As the contour around the tail light and the body lines different, I need to move the jamb closer to the edge.


After drilling out the spot welds and trimming down to a minimum piece. The jamb pieces will be swapped left side to right side and right side to left, recessed only the thickness of the Bronco jamb piece and plug welded in on the back side.


Next, the bottom of the rear corner pillar is totally interfering with the shorter pickup end caps.
- forrestbump
- 100% FORDified!

- Posts: 2140
- Joined: Tue Aug 10, 2010 12:23 am
- Location: California, Phelan
Re: 1969 FS Bronco
I am absolutely amazed at your talent, attention to detail, thought processing and speed at which your project is traversing to completion. I am in awe of your work on this project!
1970, 2WD, F-250, C/S, Dual Tanks, 390 FE (of course), C6, Power Steering, Power Disc Brakes, Dana 60 3.73, Sky View Blue, Ranger XLT
1970, 2WD, F-250, C/S, A/C, Dual Tanks, 390 FE (again, of course), C6, Power Steering, Power Disc Brakes, Dana 60 3.73, Wimbledon White & Sky View Blue, Ranger (almost twin brothers!)
"One of the greatest discoveries a man makes, one of his great surprises, is to find he can do what he was afraid he couldn't do" - Henry Ford
Larry
- Joshpow
- 100% FORDified!

- Posts: 1790
- Joined: Fri Jan 21, 2005 10:43 am
- Location: Virginia
- Contact:
Re: 1969 FS Bronco
Lets see those cpas on!! Looking great. Cant wait to see some finished pics.
Josh
72 F-100 Ranger XLT SWB
71 F-100 Custom SWB
67 F-350 Dually Dump
02 F-250 Stroke
http://www.cardomain.com/ride/2972100
72 F-100 Ranger XLT SWB
71 F-100 Custom SWB
67 F-350 Dually Dump
02 F-250 Stroke
http://www.cardomain.com/ride/2972100
-
hotrod ford
- Blue Oval Guru

- Posts: 1121
- Joined: Wed Apr 25, 2007 12:09 am
Re: 1969 FS Bronco
WOW, that is awsome. Great Job! 
1971 Sport Custom SWB: 360/C6 3.00
1965 Ford Falcon 4Dr: Inline 170 3sp
1965 Ford Falcon 4Dr: Inline 170 3sp
- bnl44
- New Member

- Posts: 67
- Joined: Sat Jun 04, 2011 12:35 am
- Location: Mountain Home, Idaho
Re: 1969 FS Bronco
This picture shows how the bedside matches up to the rear pillar. The pillar is too low.
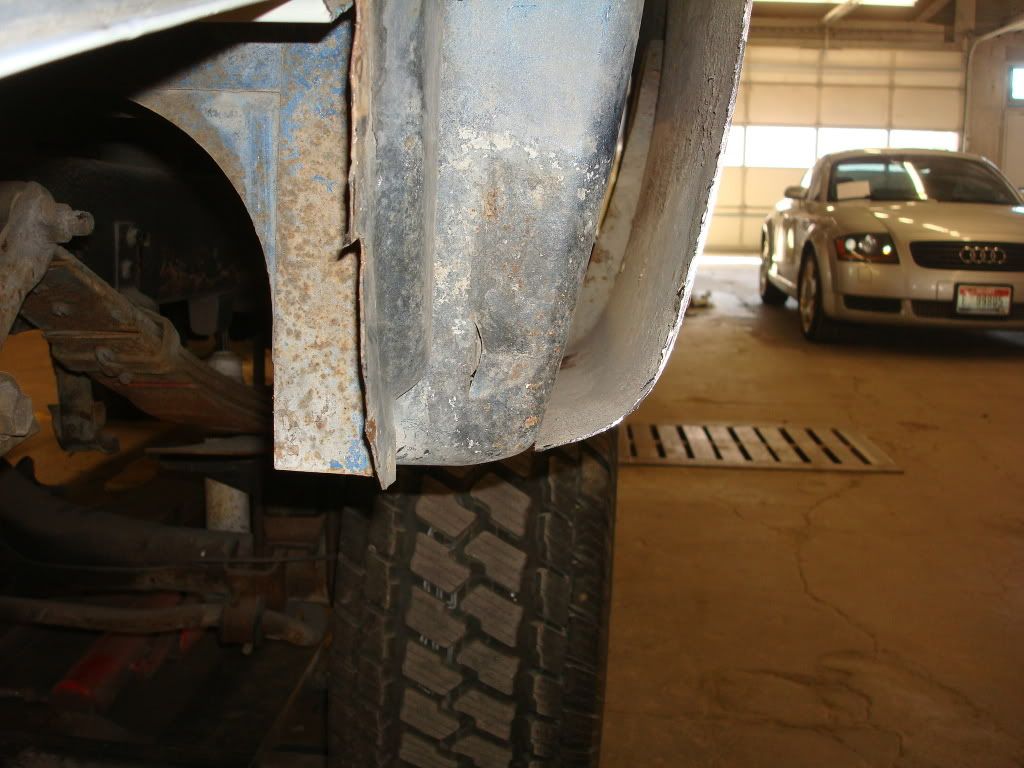
Here you can see how the vertical joint of the end cap is interfered by the rear pillar.
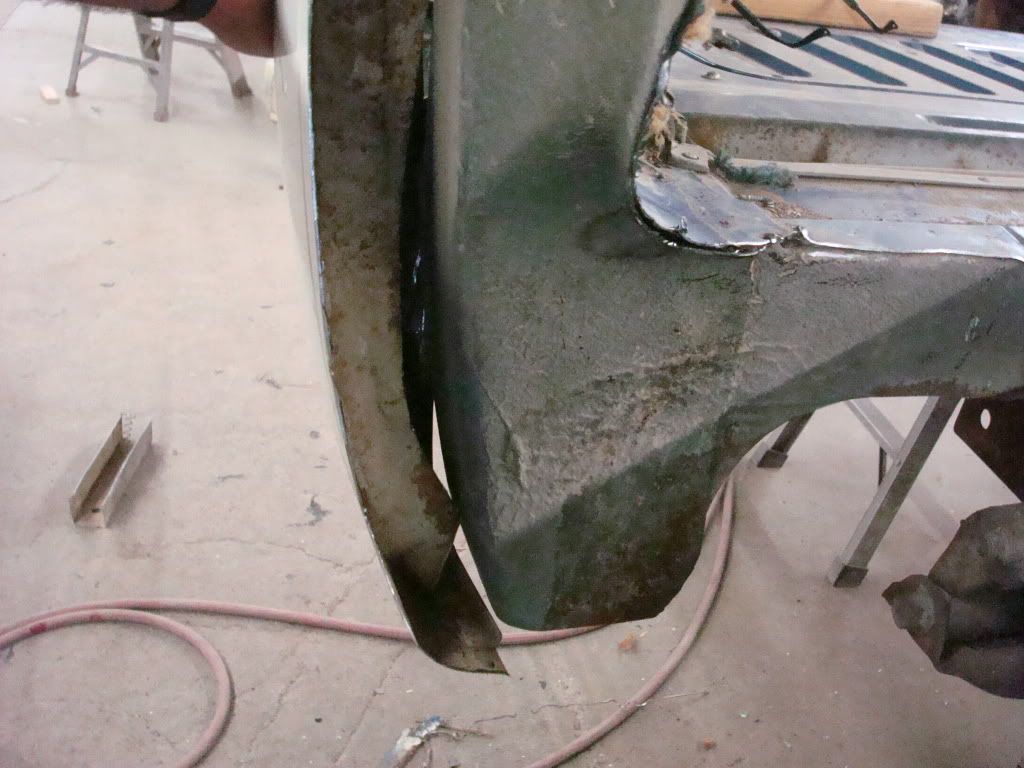
You can see how this pocket will fill up with mud and debris and cause a rust pocket. Notice the bottom of the pillar cut off.
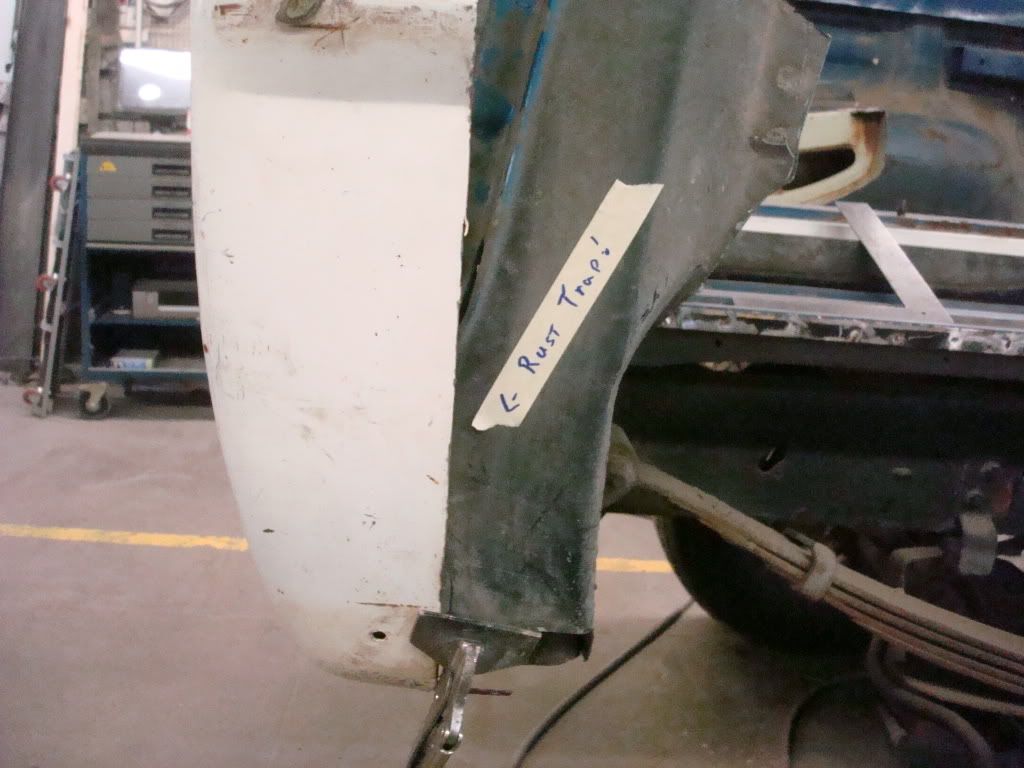
The bottom has already been trimmed off but more modification is necessary.
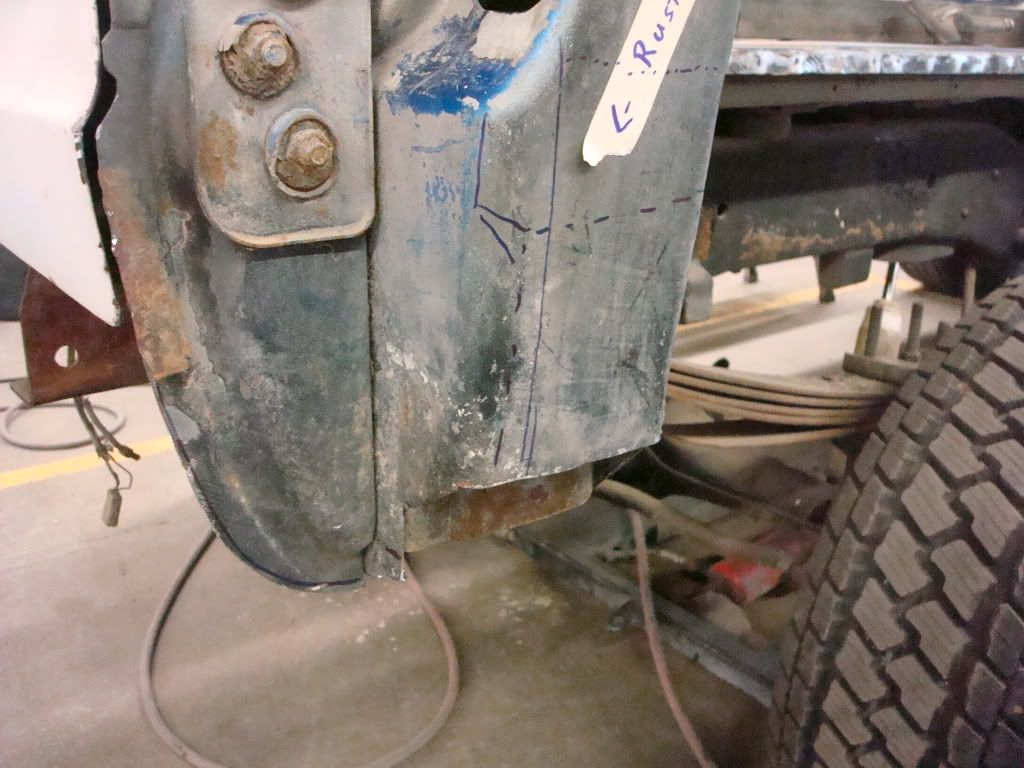
A little trimming.
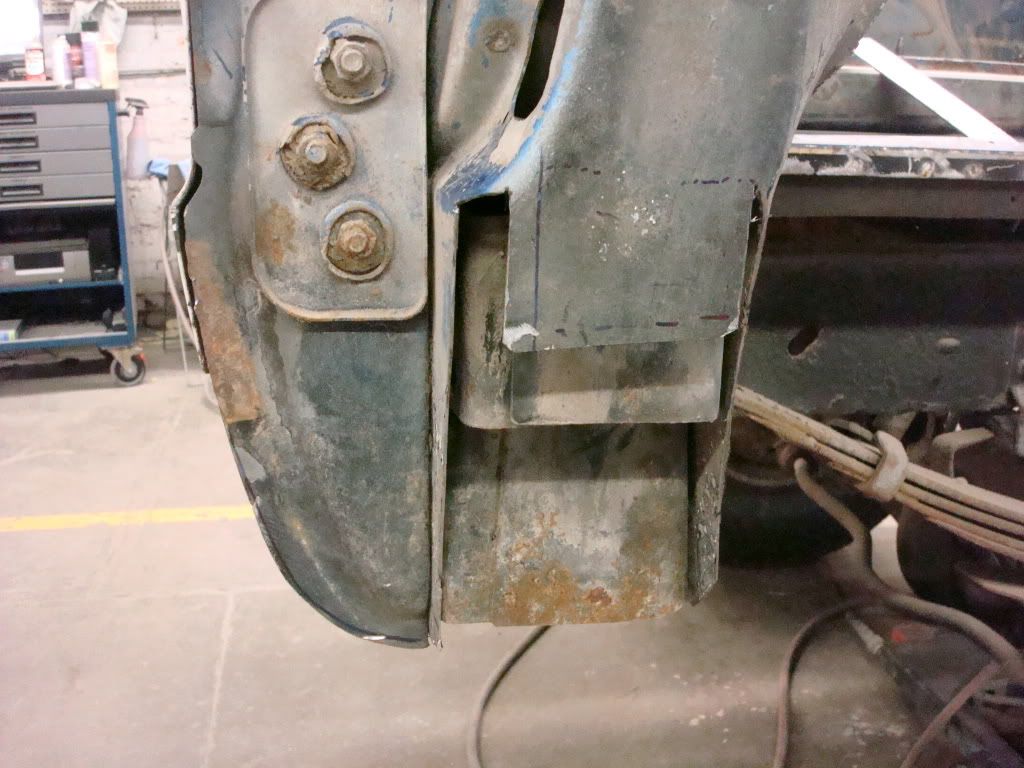
A little reforming.
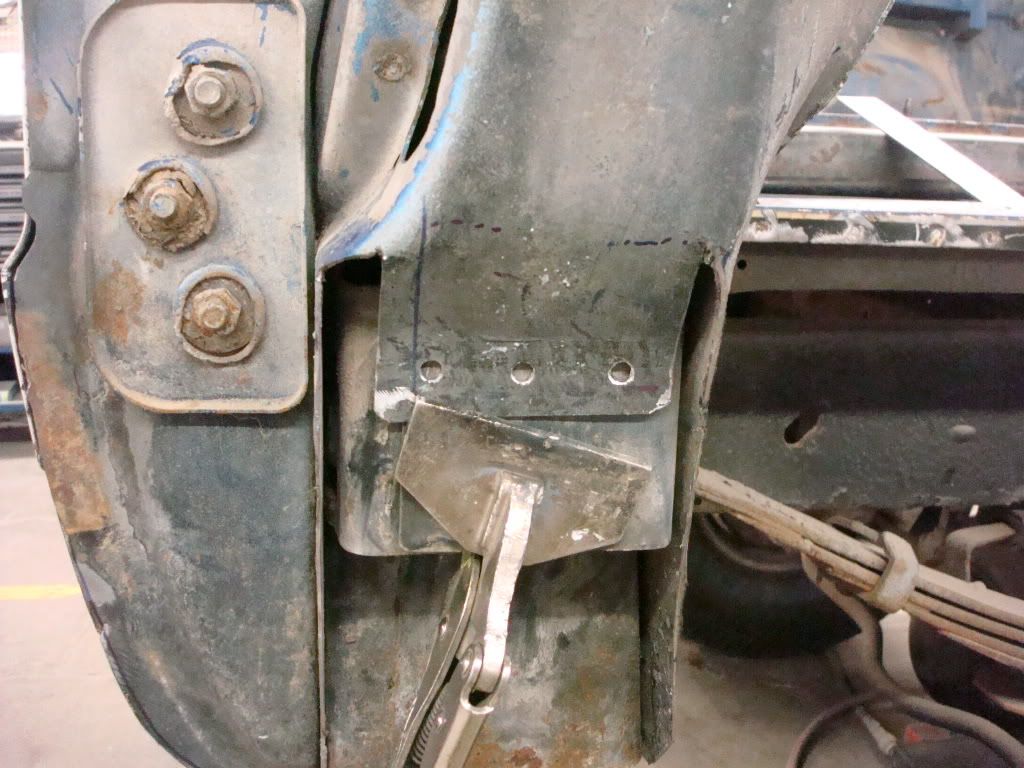
Weld to the rear sill panel. Strength retained, more clearance gained and no more pocket to trap debris.
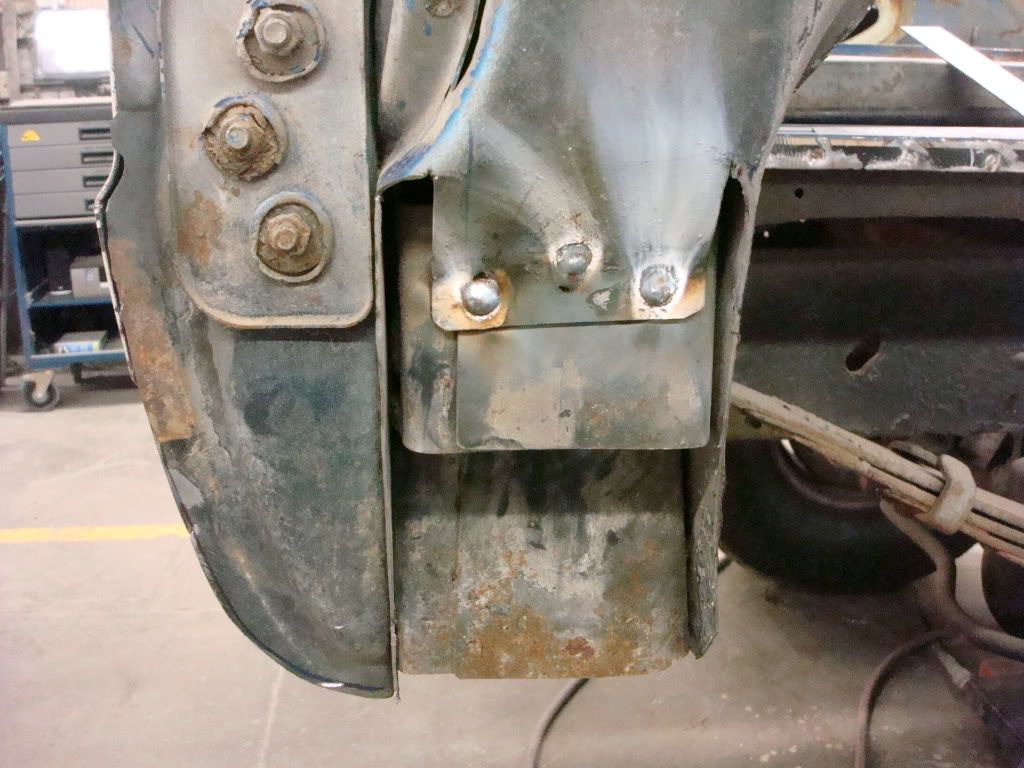

Here you can see how the vertical joint of the end cap is interfered by the rear pillar.

You can see how this pocket will fill up with mud and debris and cause a rust pocket. Notice the bottom of the pillar cut off.

The bottom has already been trimmed off but more modification is necessary.

A little trimming.

A little reforming.

Weld to the rear sill panel. Strength retained, more clearance gained and no more pocket to trap debris.

- bnl44
- New Member

- Posts: 67
- Joined: Sat Jun 04, 2011 12:35 am
- Location: Mountain Home, Idaho
Re: 1969 FS Bronco
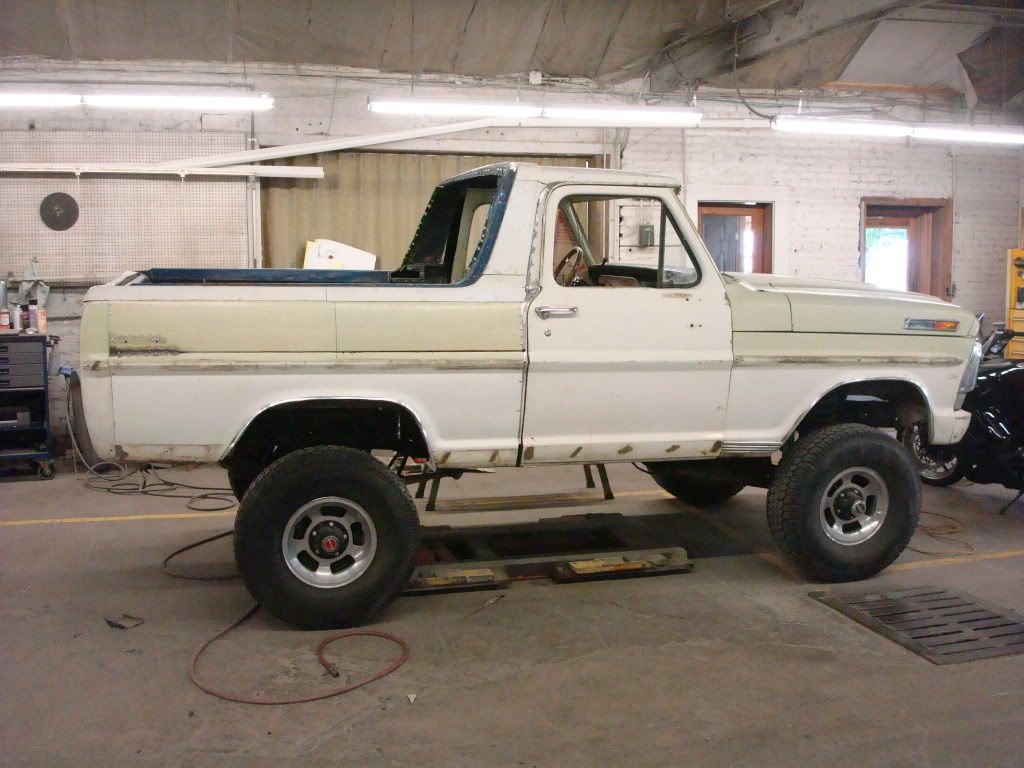
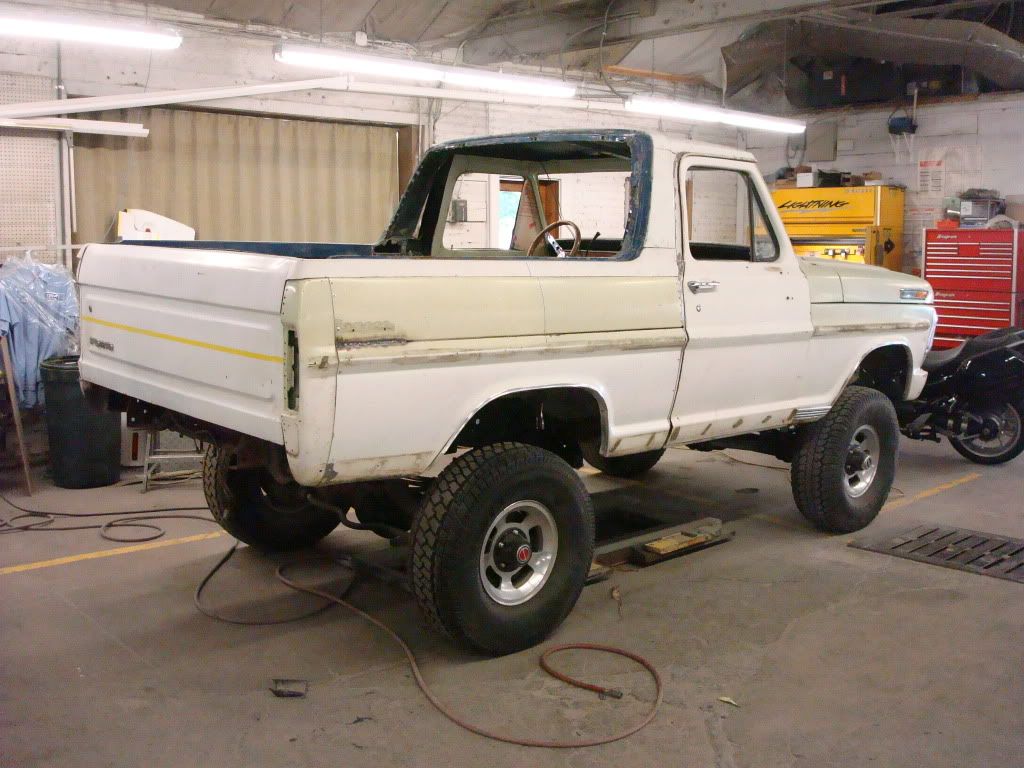
The front needs to be sucked in a little more. Modifying where the inner bed panel meets up with the front reinforcement pillar.
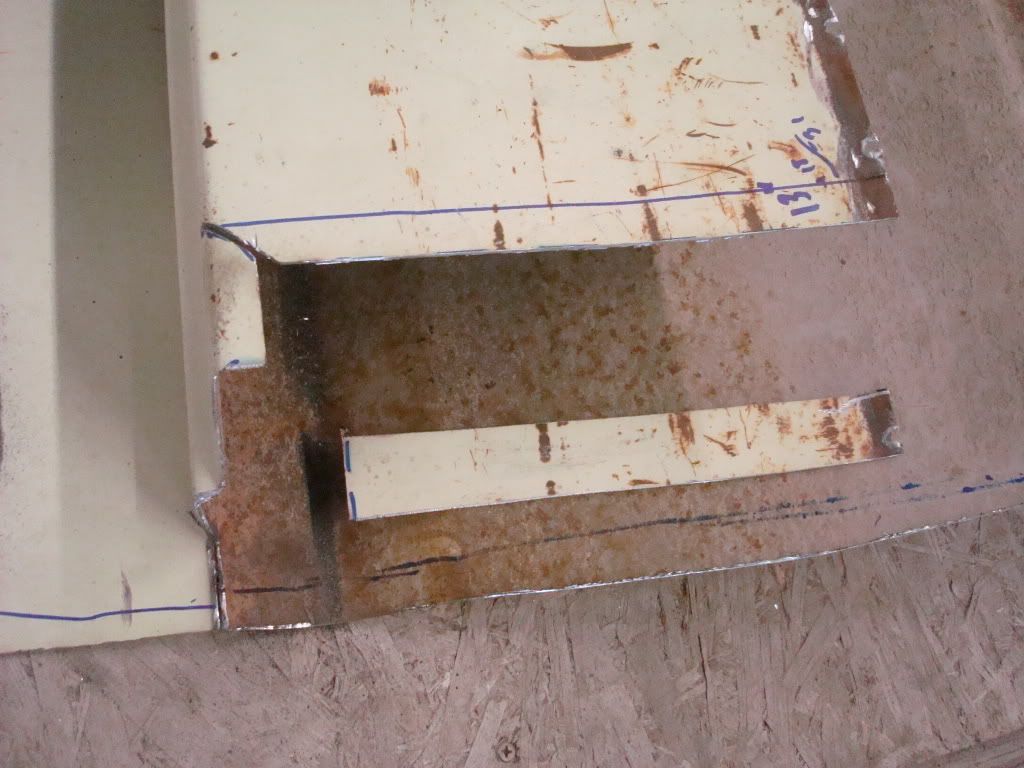
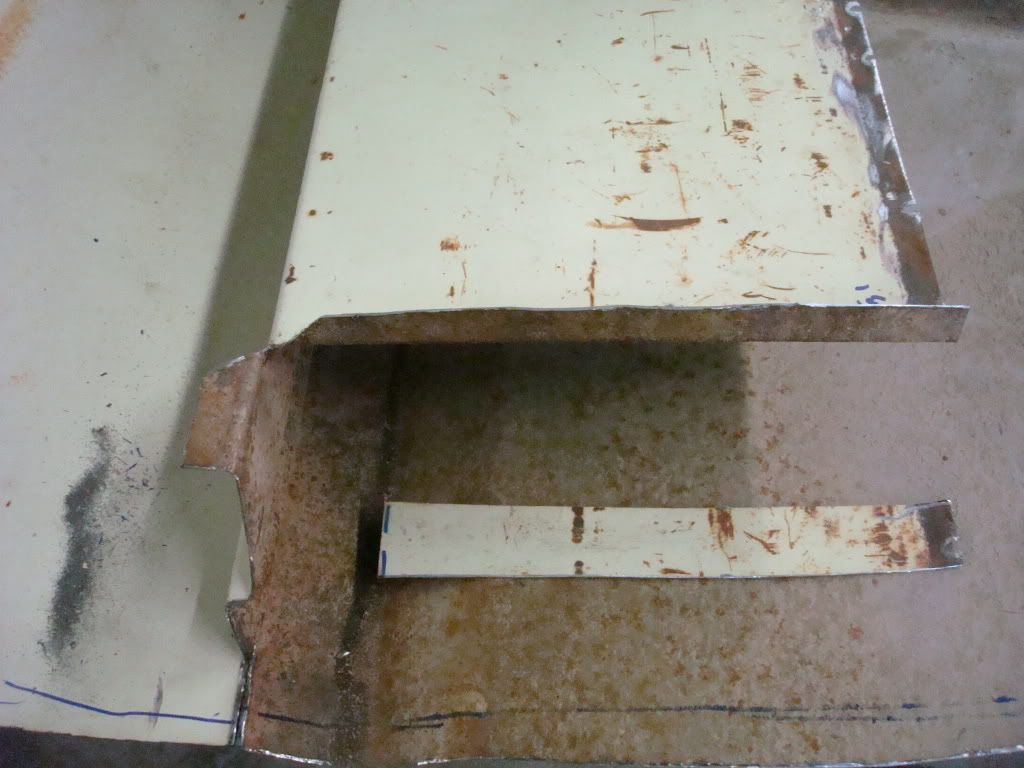
The correct wheel house in place.
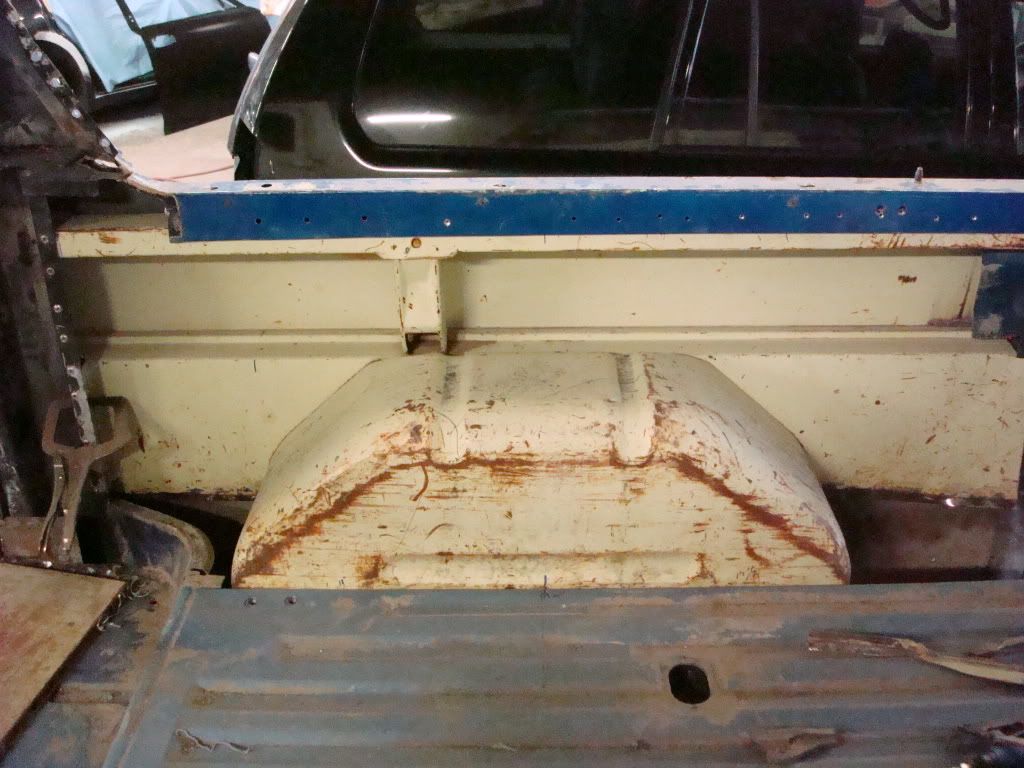
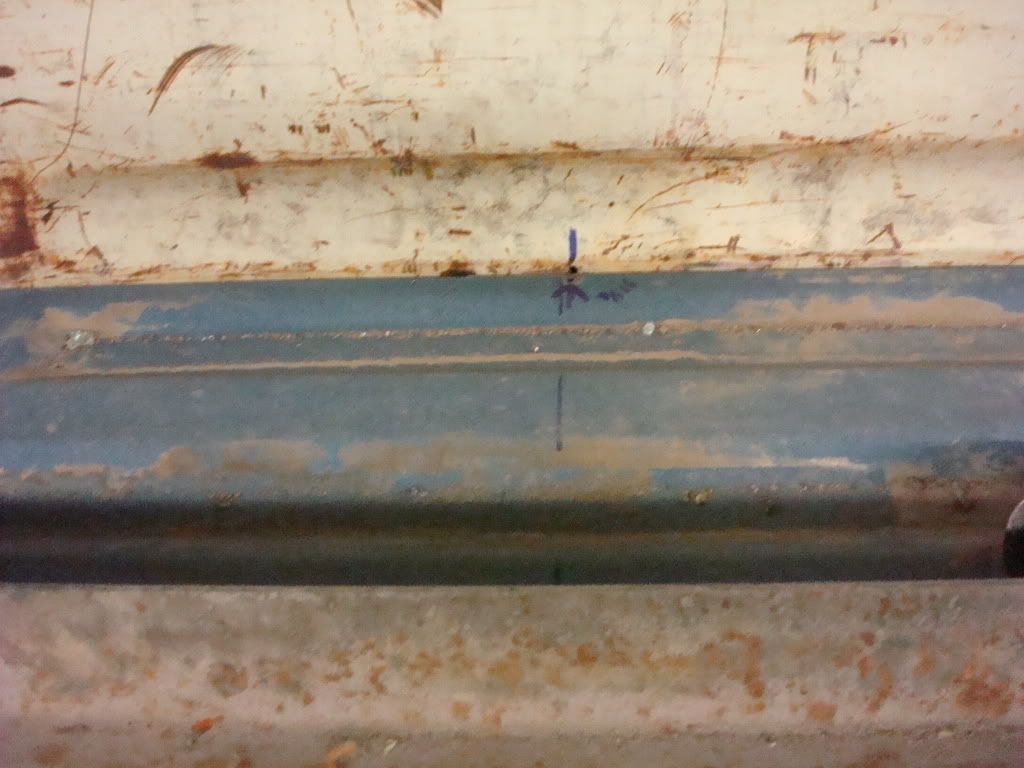
Remember that little 1/8” hole drilled in the wheel house for center line reference.
Here it is lined up with center line marked on the Bronco floor.
Cab corner flanged for tighter fit.
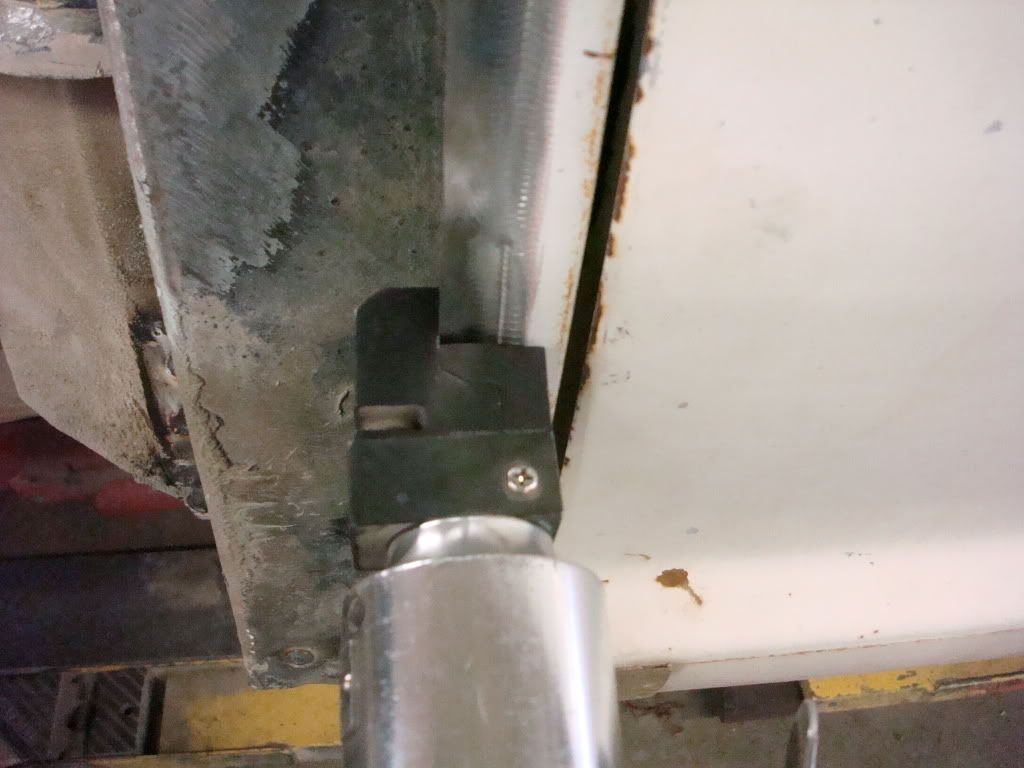
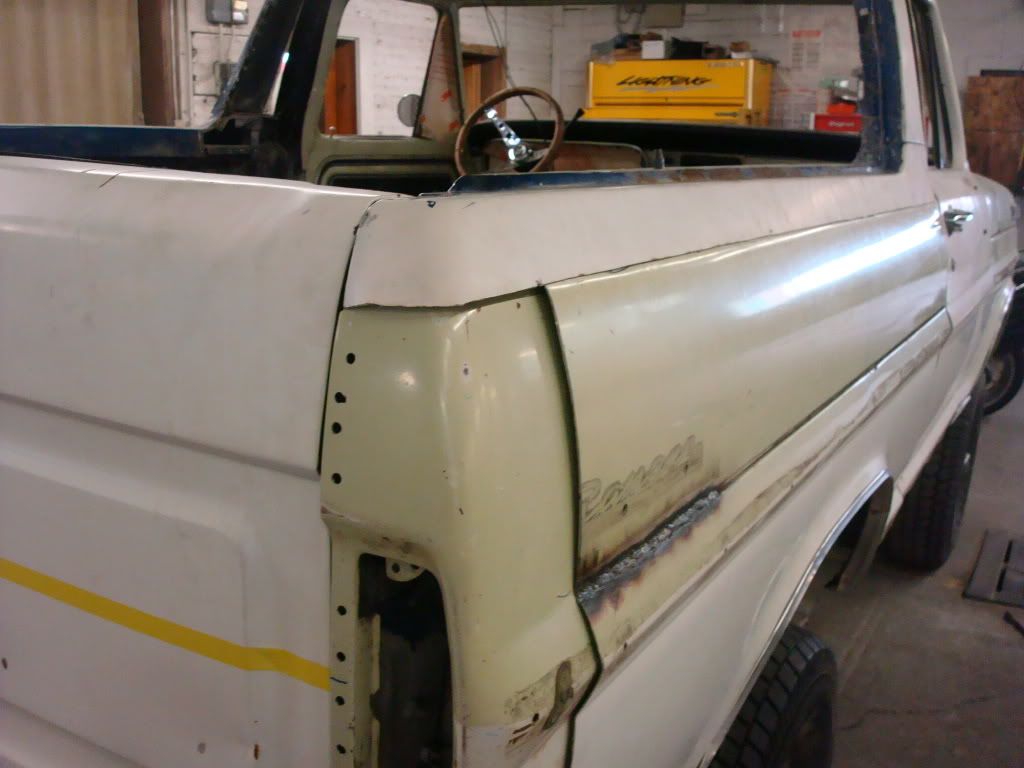
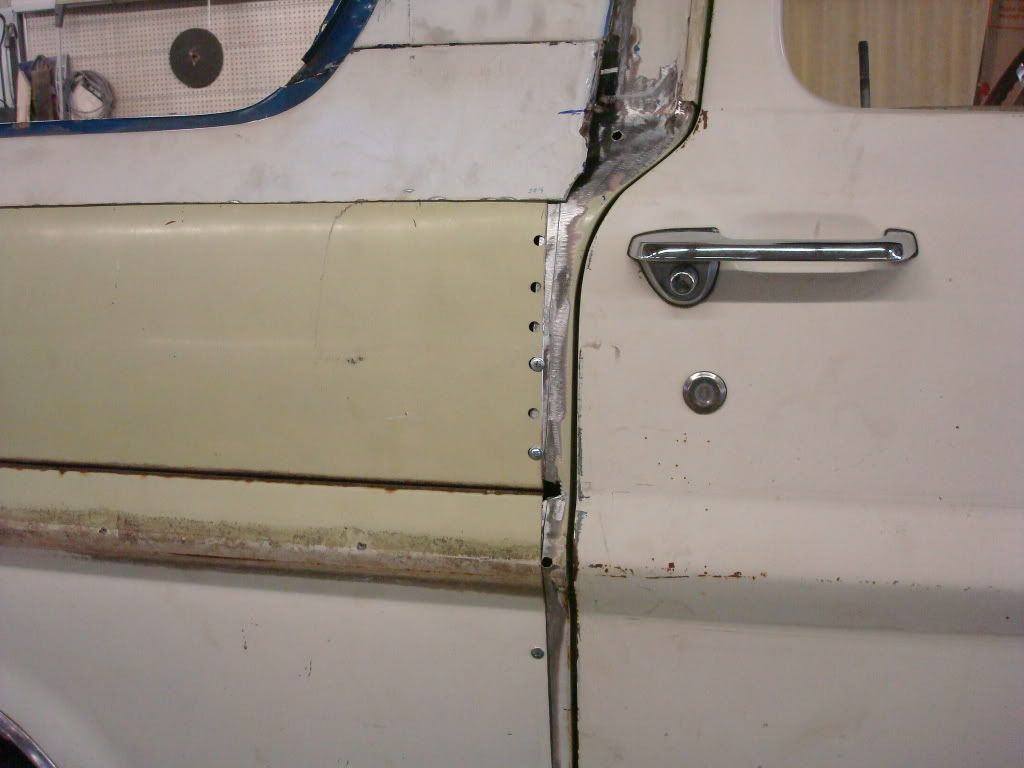
Here is a new issue. The upper bed portion has a greater curve than the door and end cap.
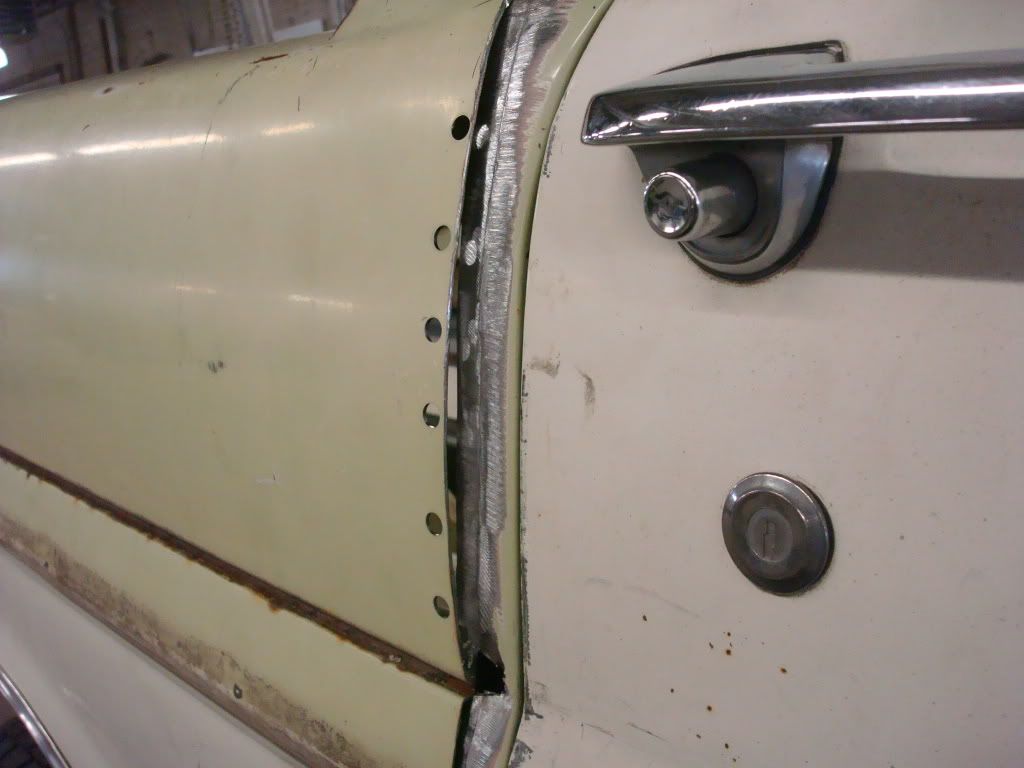
Relief cut to keep as much of the rear pillar’s strength in tact.
Notice all the holes from drilling out spot welds.
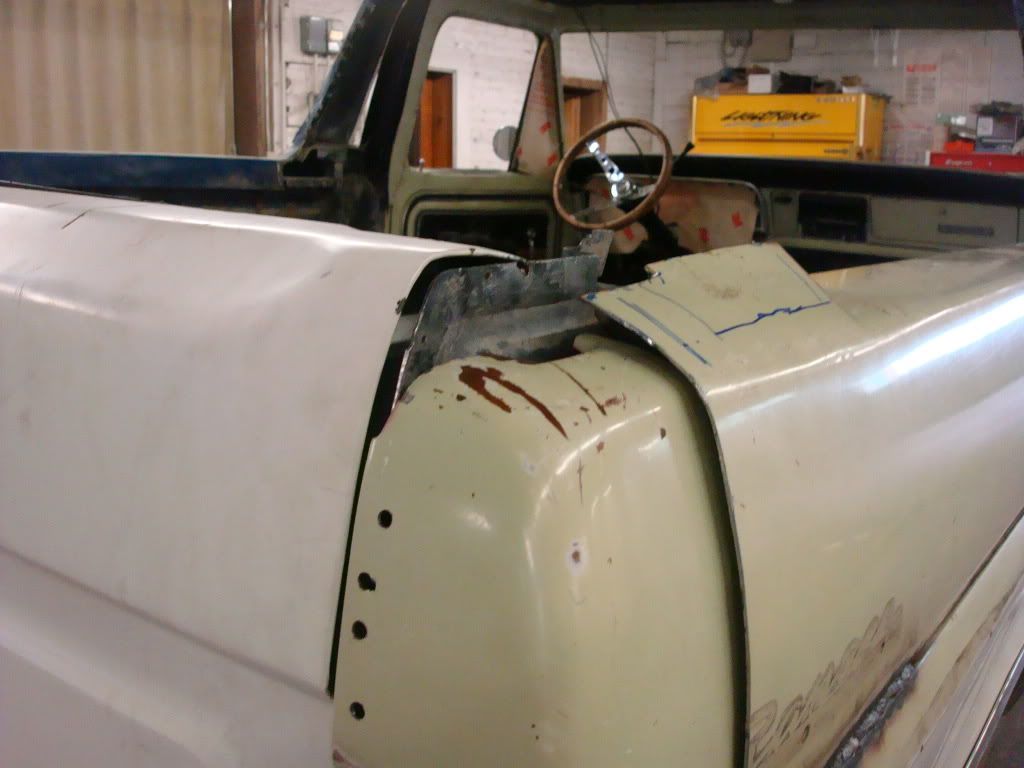
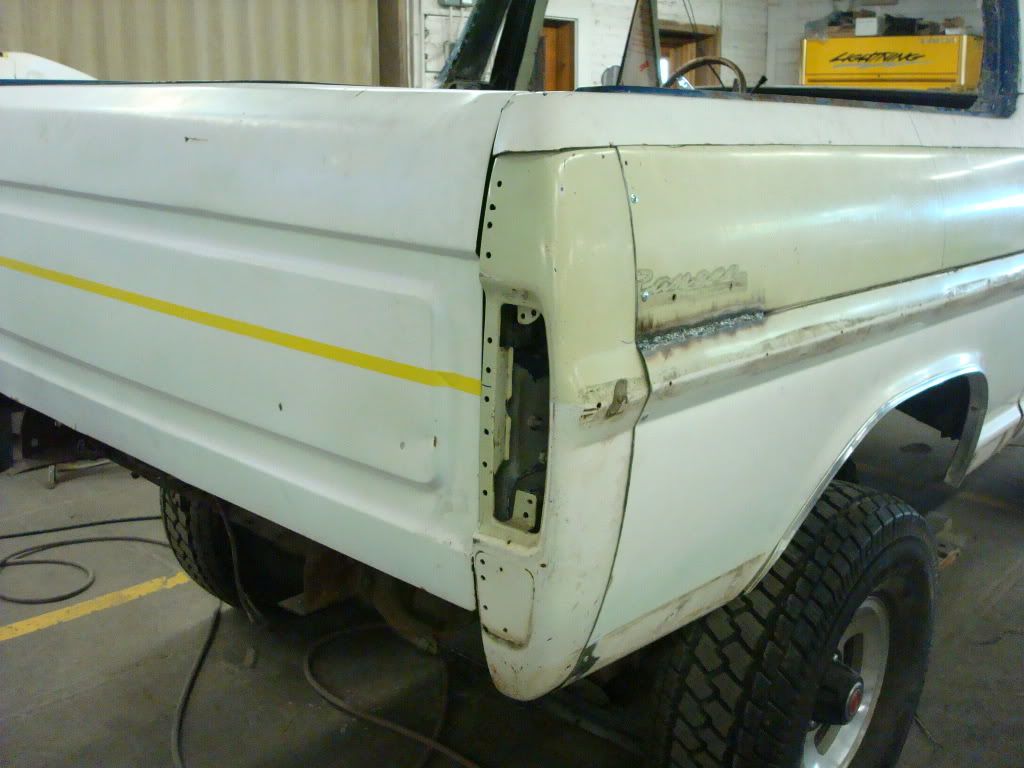
- Upper bed side has that greater curve than the end cap also, same as the front.
- The upper portion of the bump, next to the seam sticks out further than the shape on the end cap.
- How close the center line of the bump lines up to the tape reference line.
- The tailgate body lines are a little too far apart.
- The new decal on my yellow tool box in the back ground.
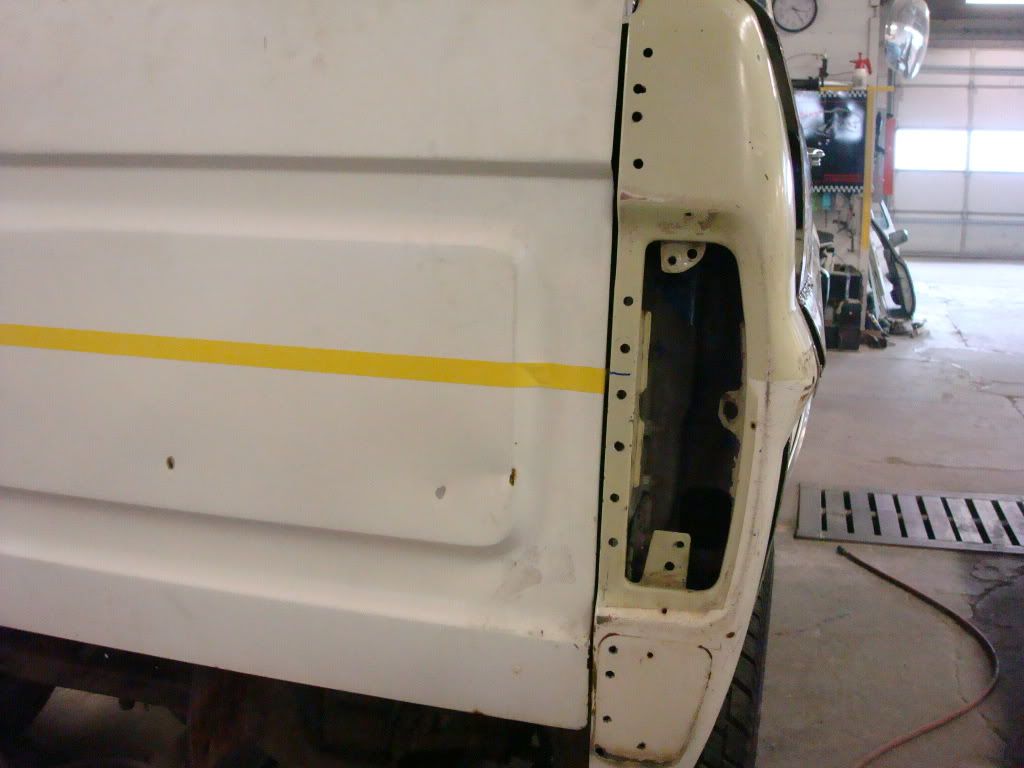
Bed cap in place.
A few screws.
So…. What do you think?
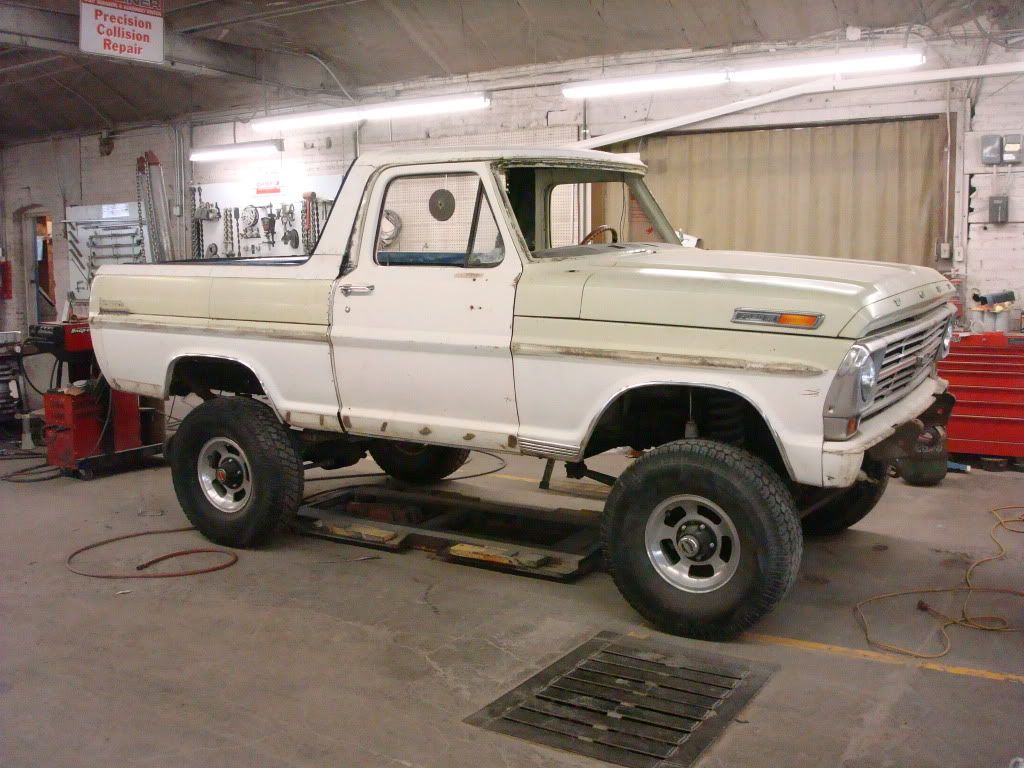
Now I just have to repeat for the left side.


The correct wheel house in place.

Remember that little 1/8” hole drilled in the wheel house for center line reference.
Here it is lined up with center line marked on the Bronco floor.

Cab corner flanged for tighter fit.

Here is a new issue. The upper bed portion has a greater curve than the door and end cap.

Relief cut to keep as much of the rear pillar’s strength in tact.

Notice all the holes from drilling out spot welds.
- Upper bed side has that greater curve than the end cap also, same as the front.
- The upper portion of the bump, next to the seam sticks out further than the shape on the end cap.
- How close the center line of the bump lines up to the tape reference line.
- The tailgate body lines are a little too far apart.
- The new decal on my yellow tool box in the back ground.

Bed cap in place.

A few screws.


So…. What do you think?


Now I just have to repeat for the left side.
-
67bartcat
- New Member

- Posts: 27
- Joined: Thu May 14, 2009 10:16 pm
- Location: Columbus Nebraska