1971 f250 DESERT truck- 10/24 race prep
Moderator: FORDification
- 67mann
- 100% FORDified!

- Posts: 1705
- Joined: Thu Feb 07, 2008 7:19 am
- Location: NY..Mt.Morris 3rdgen. homestead
Re: 1971 f250 DESERT truck- 3/19 bedcage
Wha'tch ya doing with the Ammo case's.....I could fill both those boxes 


I've had enough and I'm not alone
http://s267.photobucket.com/albums/ii304/67mann/
http://s267.photobucket.com/albums/ii304/67mann/
- 1971ford
- 100% FORDified!

- Posts: 5565
- Joined: Wed Jul 04, 2007 1:05 pm
- Location: Placerville CA
Re: 1971 f250 DESERT truck- 3/19 bedcage
Thanks guys.
Ammo cans will be filled with tools and rags
Or can be filled with ammo and put on the highboy for the Apocalypse
Ammo cans will be filled with tools and rags
Or can be filled with ammo and put on the highboy for the Apocalypse
-Ryan
- 1971ford
- 100% FORDified!

- Posts: 5565
- Joined: Wed Jul 04, 2007 1:05 pm
- Location: Placerville CA
Re: 1971 f250 DESERT truck- 4/10 almost done
Today was a slow progress day. I didnt have a lot of the materials i needed. This week i will grab all the stuff i need and then the truck needs to be trailered a few places.
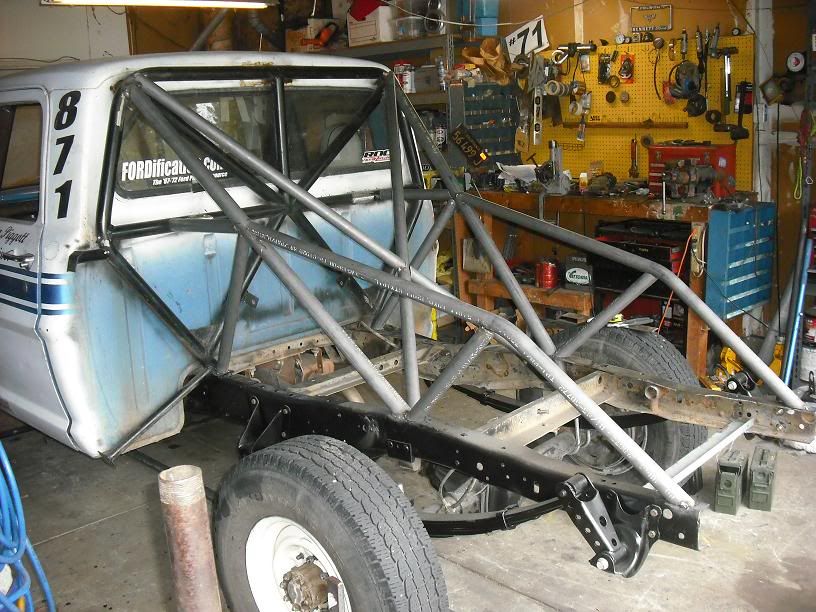
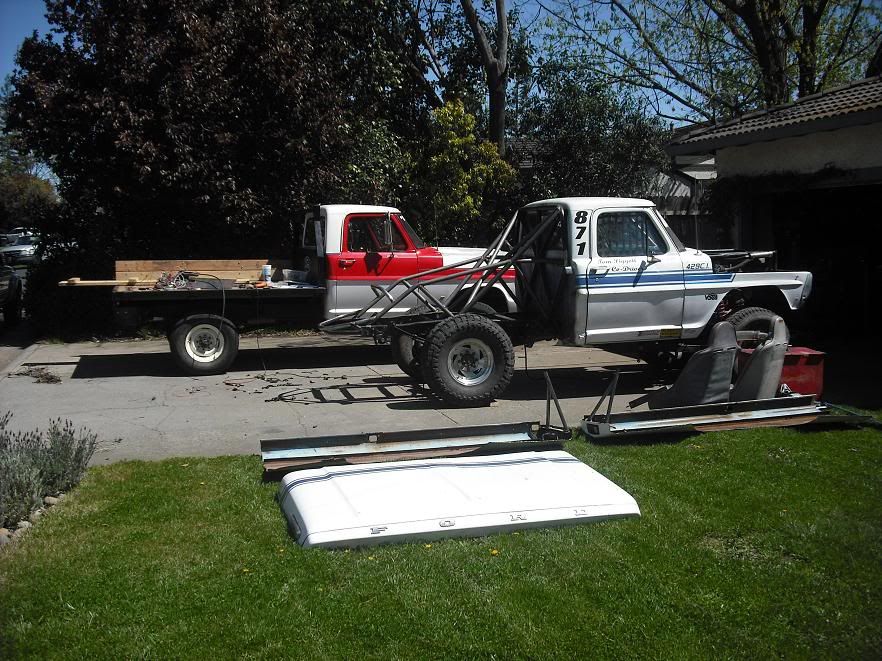
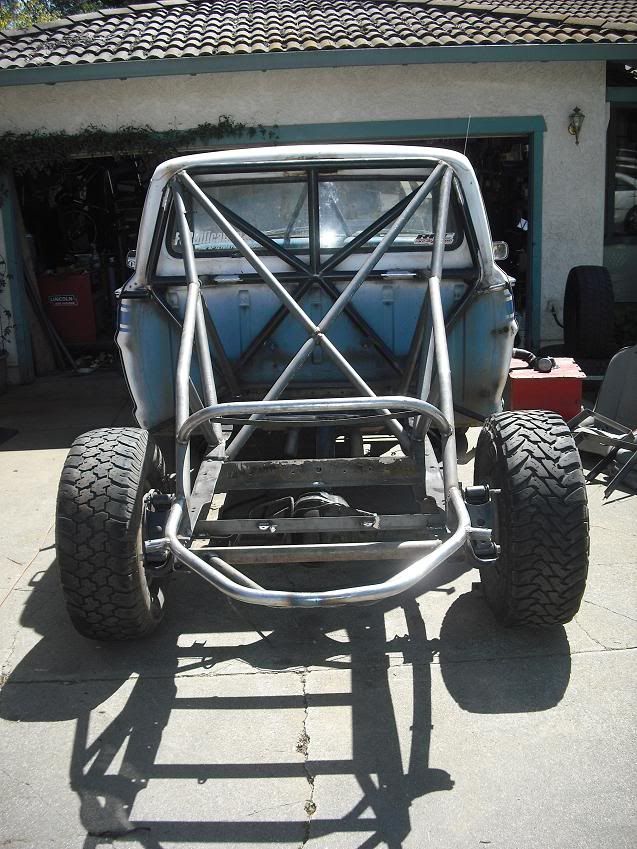
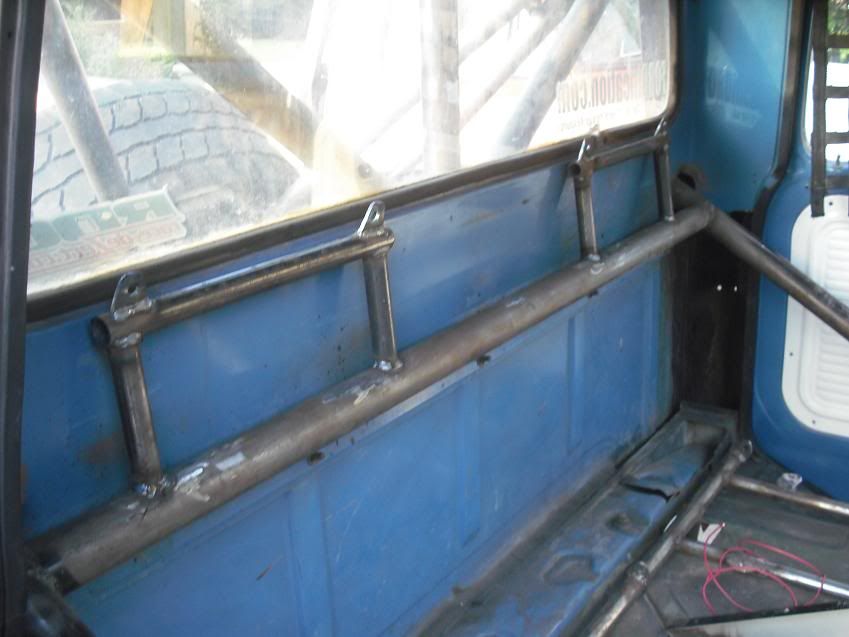
Pulled the stuff off the back to get a picture of the bedcage.
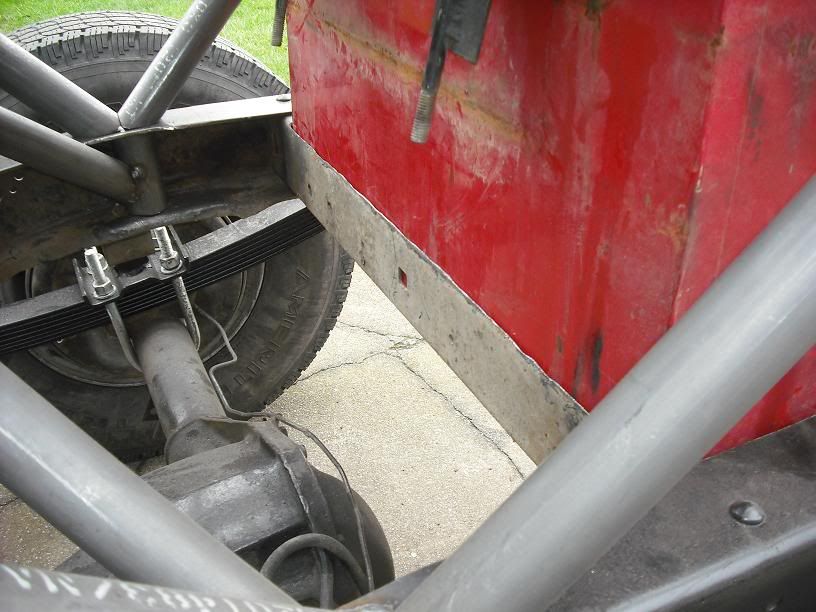
Notched a crossmember to hold the fuel cell nicely. I'll be running straps similiar to the ones i had before, going down to this crossmember and another piece of angle iron i'm putting in the back, then fuel cell mounting is complete.
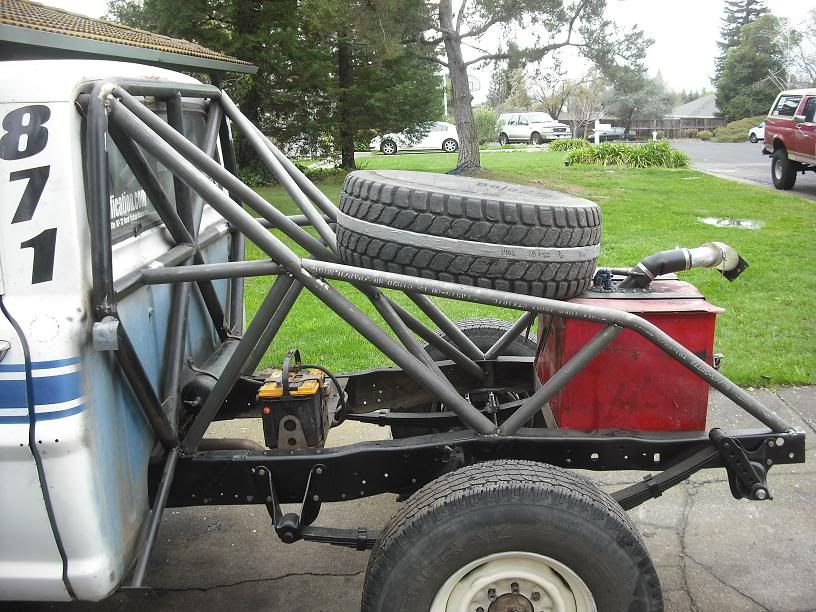
Mounted battery and such. battery in there is just mock-up. We're running an optima red.
Dad mounted the radiator today
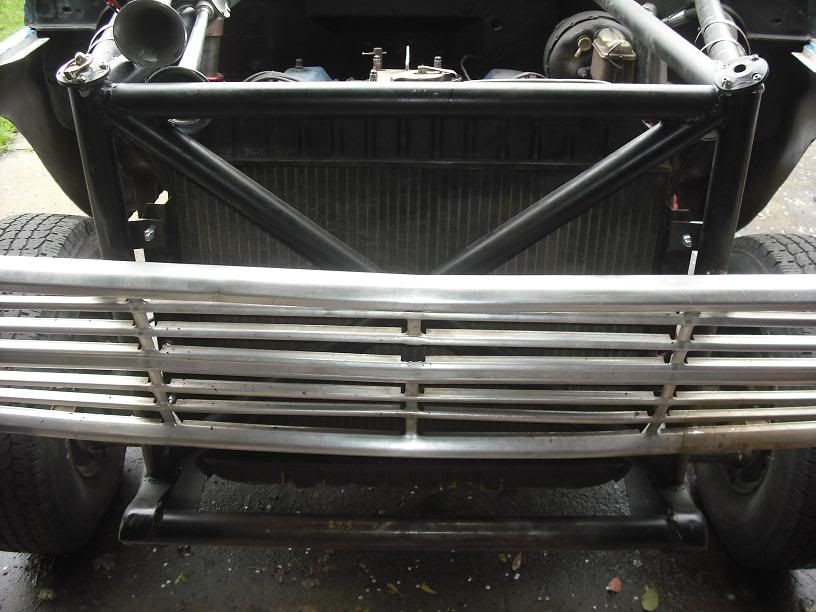
Then I got to the more serious stuff on the truck. The crucial pieces of the truck... such as the air horns.
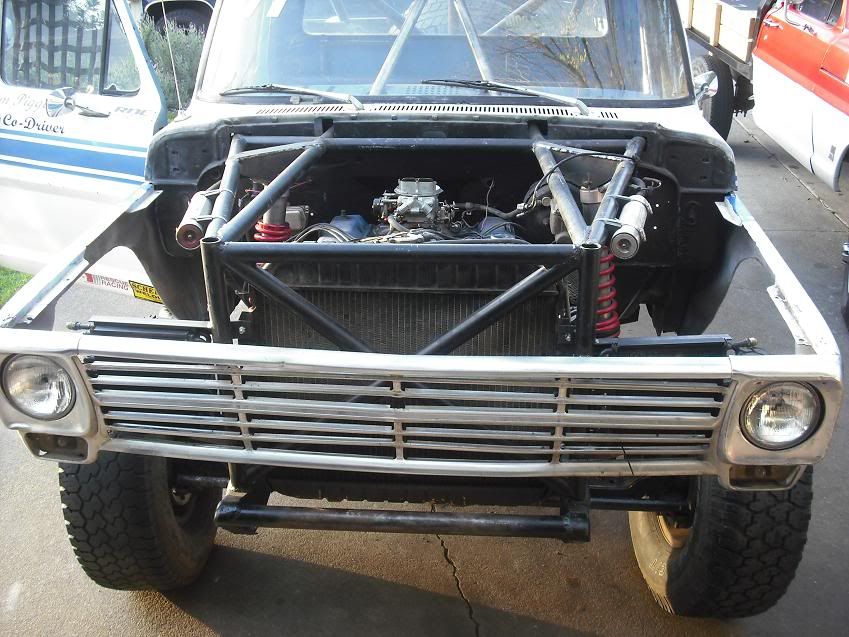
Standing in front of my truck, looking through the grill you see a Hella horn, dual air horns, and coilovers. I like!
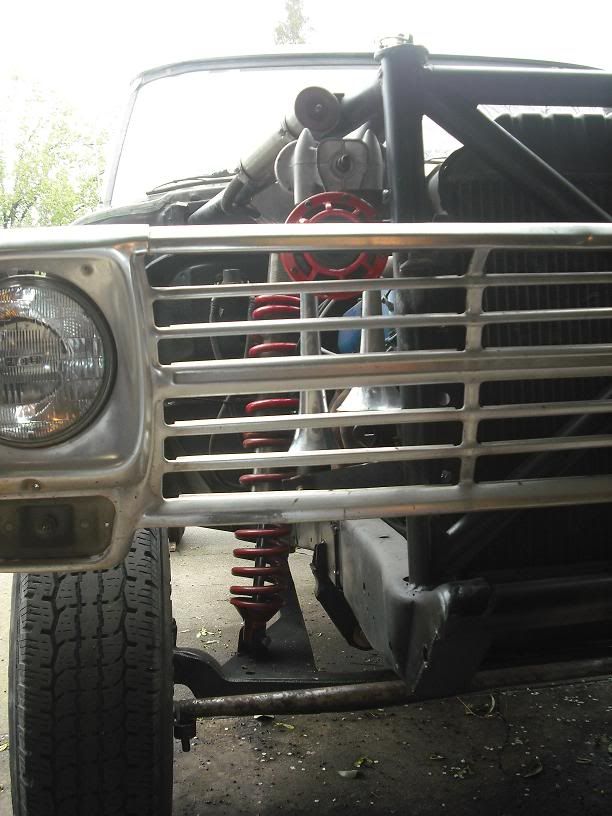
I also got the drivers side seat mounted, ground off the old seat belt harness tabs and started making the new shoulder harness mounts. They are going to be 6" higher than they were before so they arn't pulling you down in the seat and it will be MUCH better for our backs if we roll.
Pulled the stuff off the back to get a picture of the bedcage.

Notched a crossmember to hold the fuel cell nicely. I'll be running straps similiar to the ones i had before, going down to this crossmember and another piece of angle iron i'm putting in the back, then fuel cell mounting is complete.

Mounted battery and such. battery in there is just mock-up. We're running an optima red.

Dad mounted the radiator today

Then I got to the more serious stuff on the truck. The crucial pieces of the truck... such as the air horns.
Standing in front of my truck, looking through the grill you see a Hella horn, dual air horns, and coilovers. I like!

I also got the drivers side seat mounted, ground off the old seat belt harness tabs and started making the new shoulder harness mounts. They are going to be 6" higher than they were before so they arn't pulling you down in the seat and it will be MUCH better for our backs if we roll.
Last edited by 1971ford on Mon Apr 11, 2011 12:14 am, edited 3 times in total.
-Ryan
- 1971ford
- 100% FORDified!

- Posts: 5565
- Joined: Wed Jul 04, 2007 1:05 pm
- Location: Placerville CA
Re: 1971 f250 DESERT truck- 3/20 bedcage
Made slight progress 
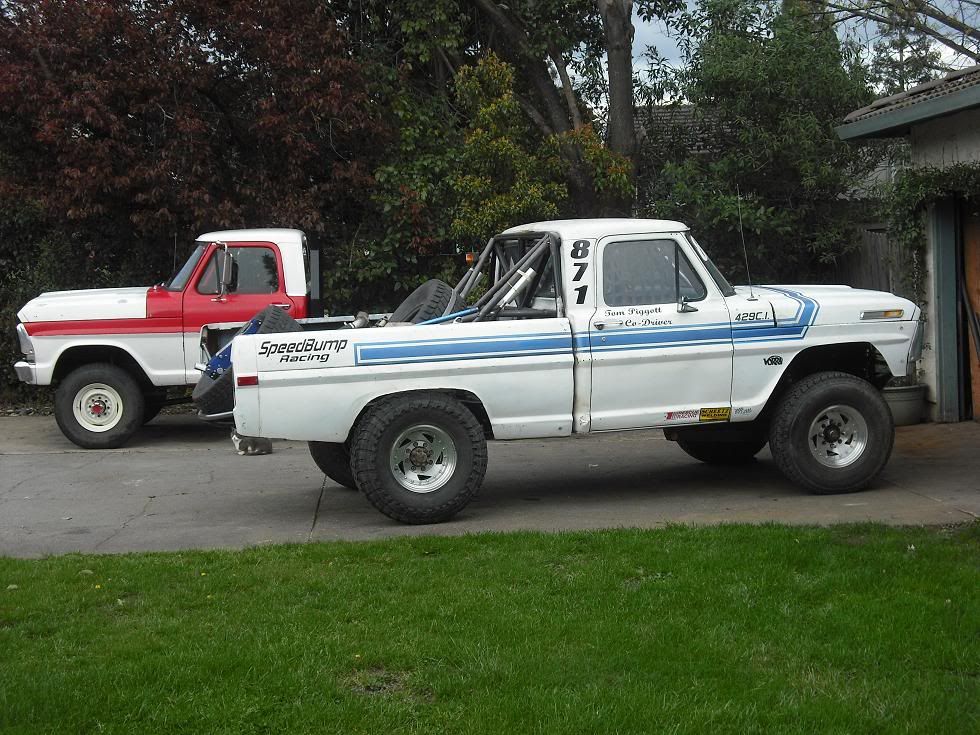
just a teaser pic as i go do other stuff then resize all the pictures and upload them and right the update, the whole process

just a teaser pic as i go do other stuff then resize all the pictures and upload them and right the update, the whole process
-Ryan
-
BiggDogg
- Blue Oval Fanatic

- Posts: 996
- Joined: Thu Mar 22, 2007 1:33 pm
- Location: California, Inland Empire
Re: 1971 f250 DESERT truck- 3/20 bedcage
Wow. Whattya gonna do with yourself once these trucks are finished? 

 Looking good as always
1970 F250 Camper Special
"Its no coincidence that man's best friend can't talk."
"Its no coincidence that man's best friend can't talk."
- 1971ford
- 100% FORDified!

- Posts: 5565
- Joined: Wed Jul 04, 2007 1:05 pm
- Location: Placerville CA
Re: 1971 f250 DESERT truck- 3/20 bedcage
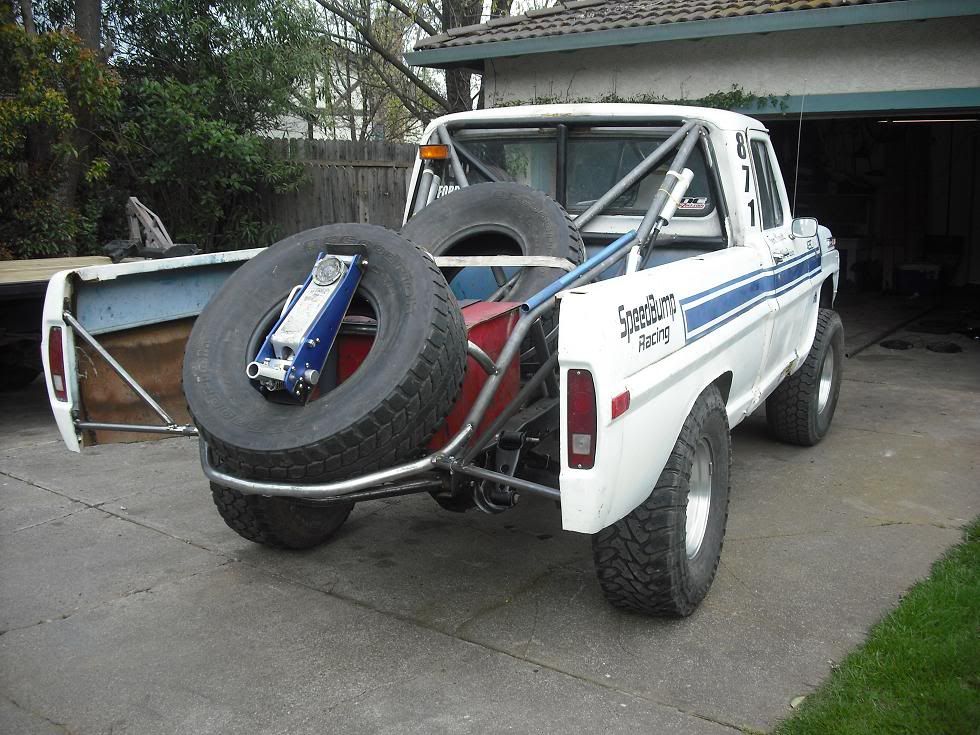
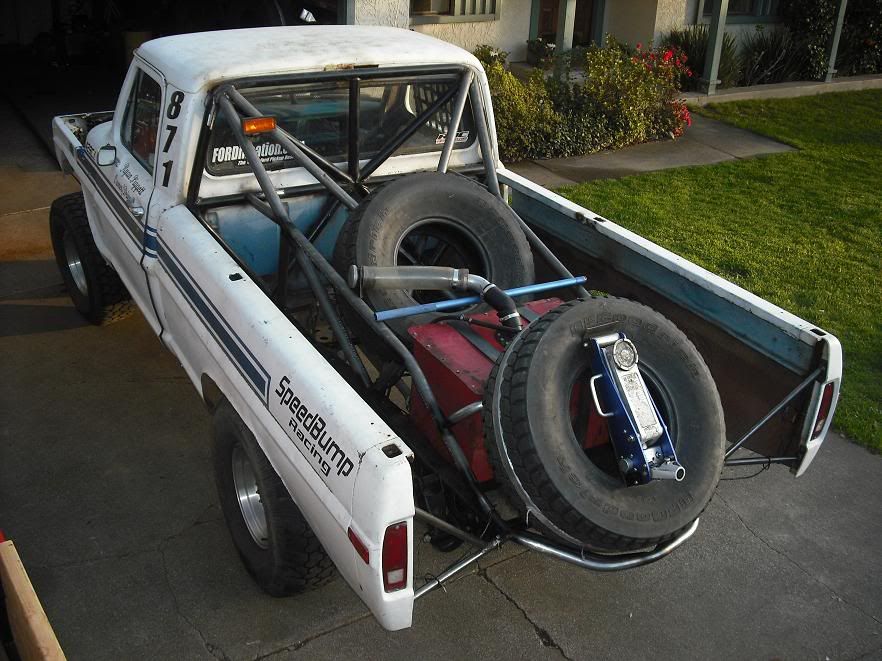
Started mocking up the spares
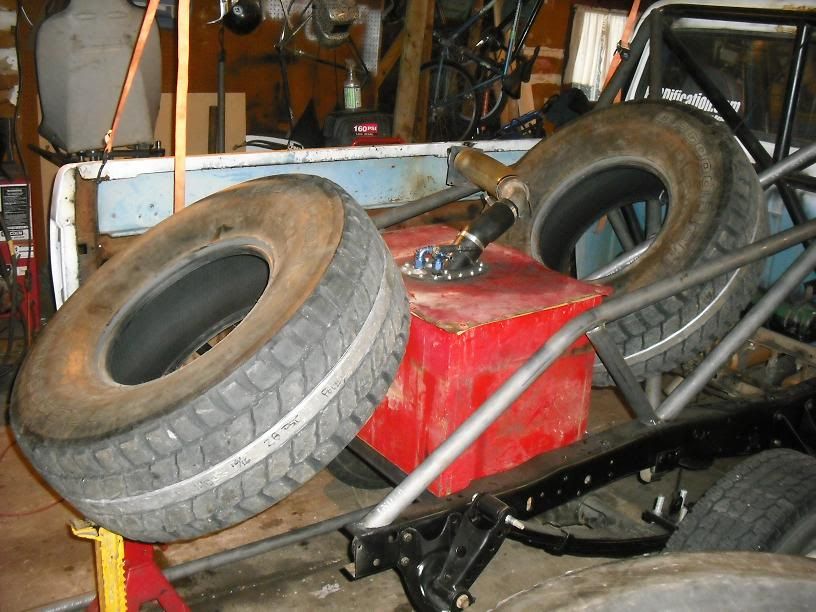
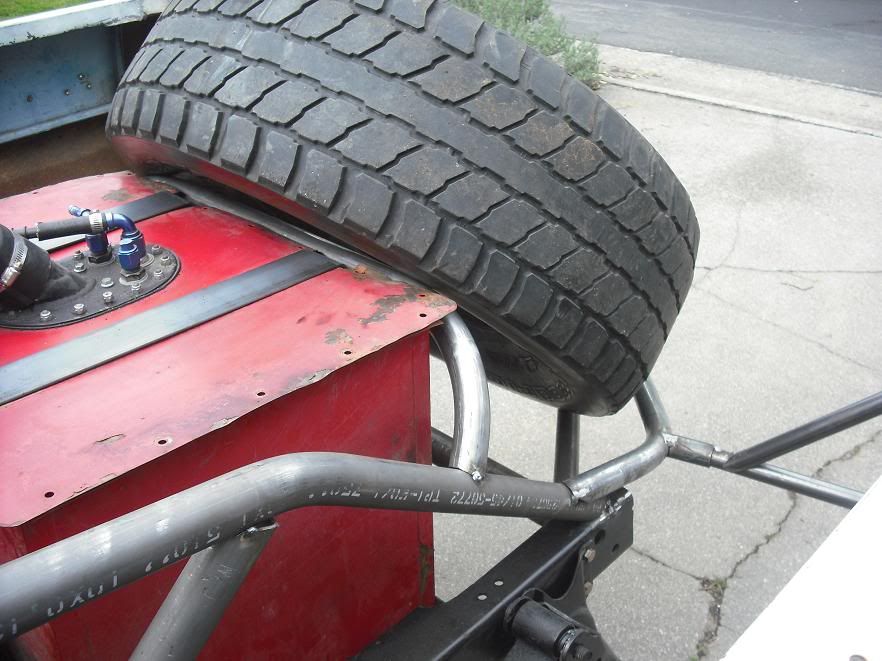
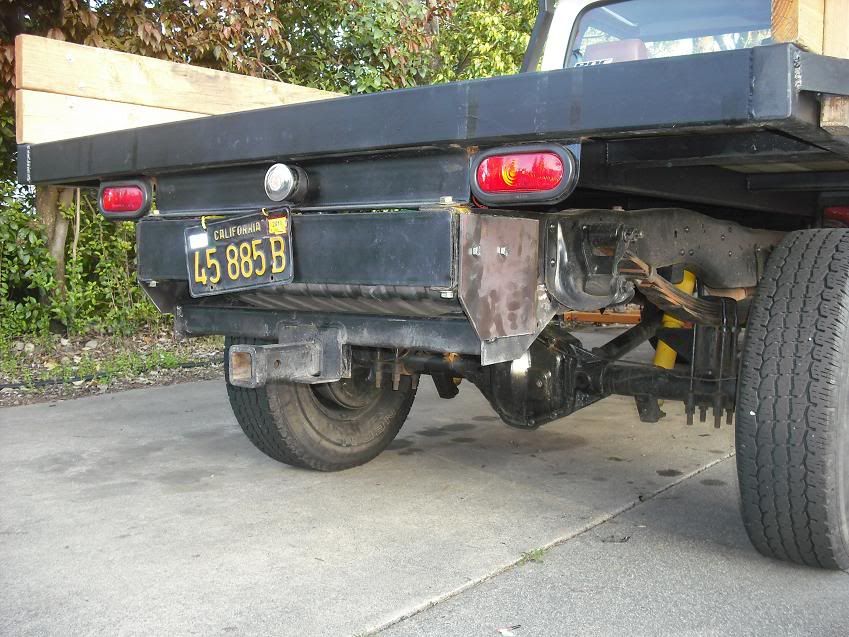
Made the rear spare holder bumper deal
Made fuel cell straps, cut heads off of bolts and tacked them to the straps. Tacked tabs to the fuel cell base. Same as before but needed to remake them because they are longer now.
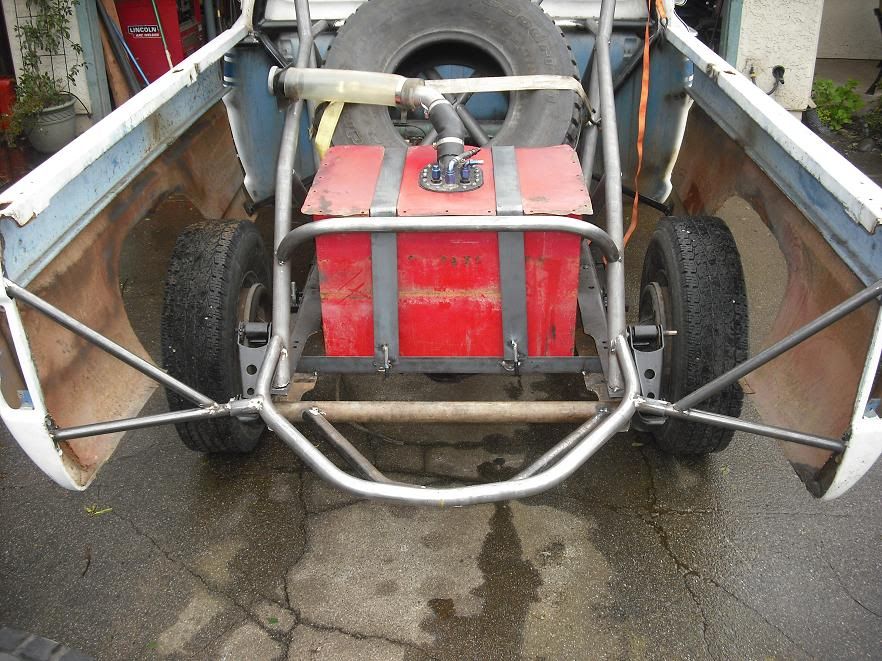
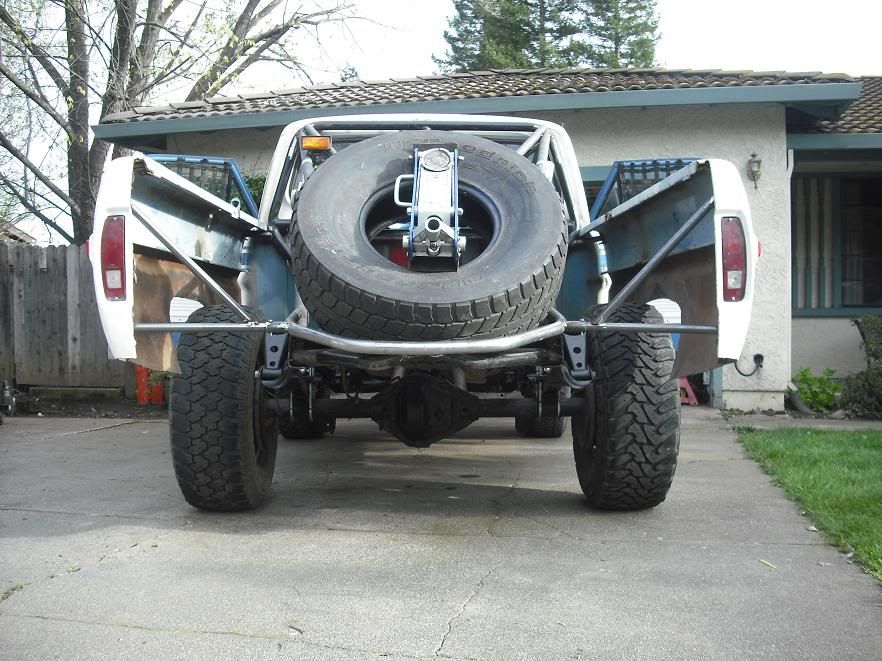
After drilling out the sleeve for the bedside mount and putting taillights/marker lights back in
Also made the rear bedside mounts. Not done yet in this picture but smaller tube slips into larger tube, with a bolt running through them so i can pull the assembly off not just the bedside. or i can unbolt just the bedside if i want. I used the original tailgate mounting holes.
Then i trimmed the bottom/rear of each bedside, I think it made them look much better. Also took an inch off of the whole wheel well opening because that inch was mangled all the way around. Still going to try to get the bedsides more smooth and they need some new paint
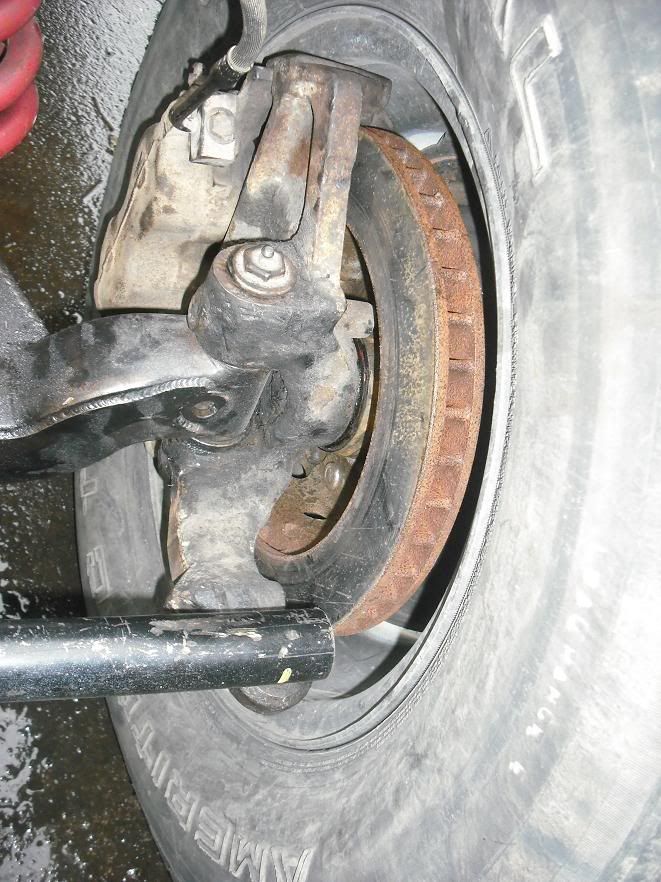
Dad went to the junkyard and pulled brake calipers and rotors for the 1" kingpin front steer spindles i got from the swapmeet and put those on so now we have true front steer spindles and brakes hooked up. I'll do the brake lines tomorrow
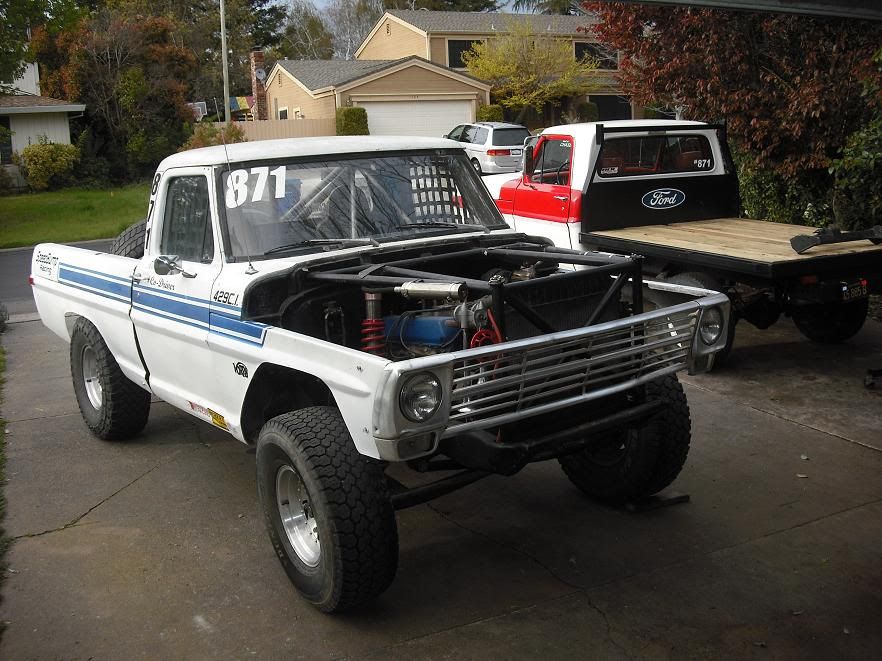
A few hood pins and the whole body is finally mounted
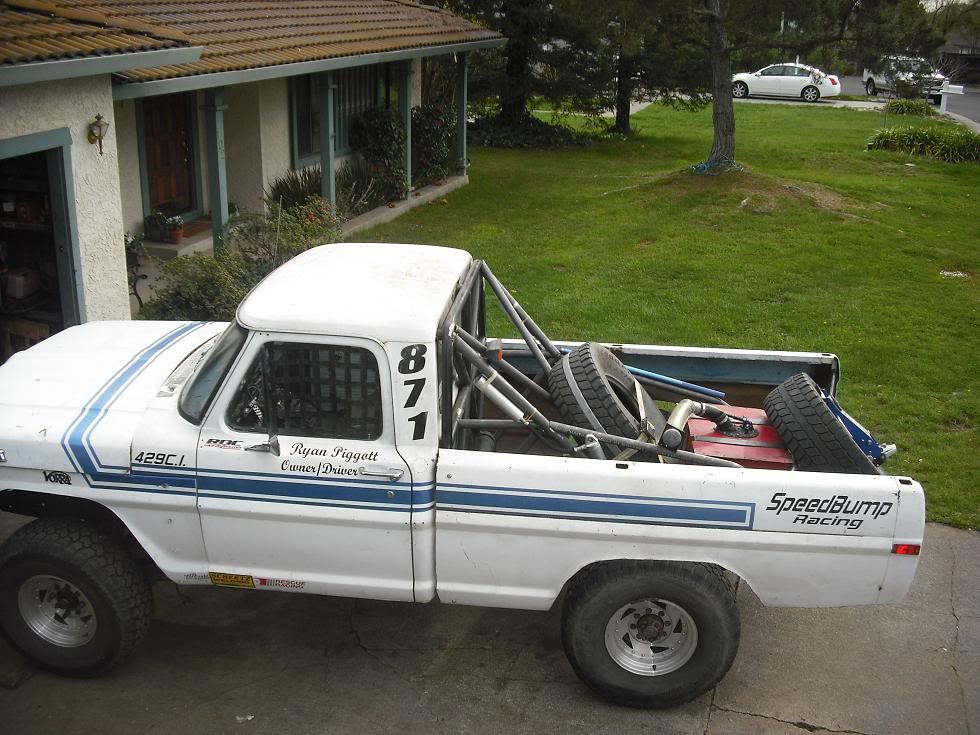
Set some things back in the interior just for fun... notched the instrument cluster so it can still be used. Original dash is the best!
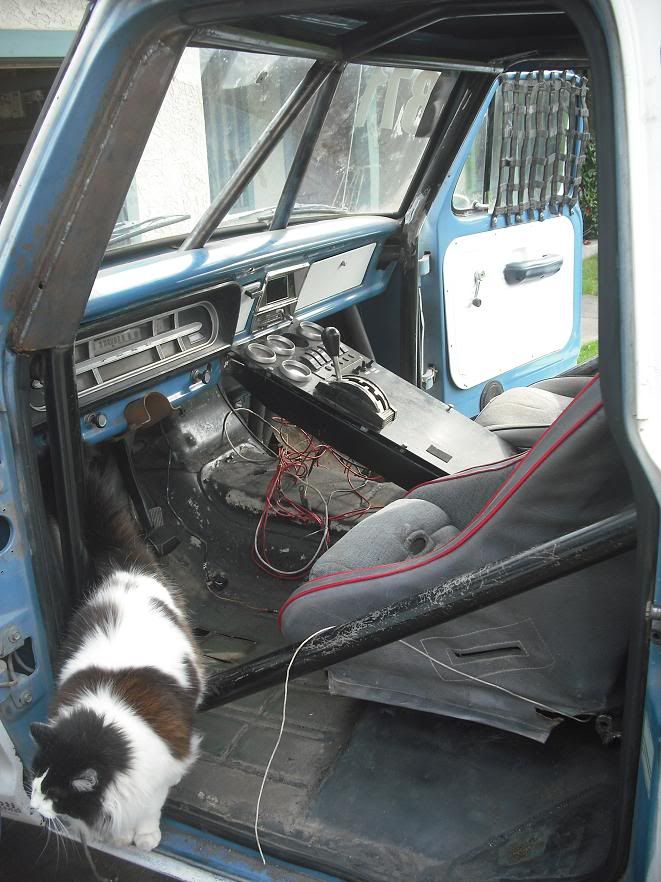
Need to figure out upper shock mounts for the FOA's again. Speaking of these shocks... I just got them back from FOA. They rebuilt them for me since one of them was having a problem and now they feel great.

Also, dad dropped the stock driveshaft and the HAD driveshaft off at a driveline shop. Getting the final driveshaft back tomorrow. Having it flipped so the slip shaft is at the rear so rocks can't ding it like it normally would.
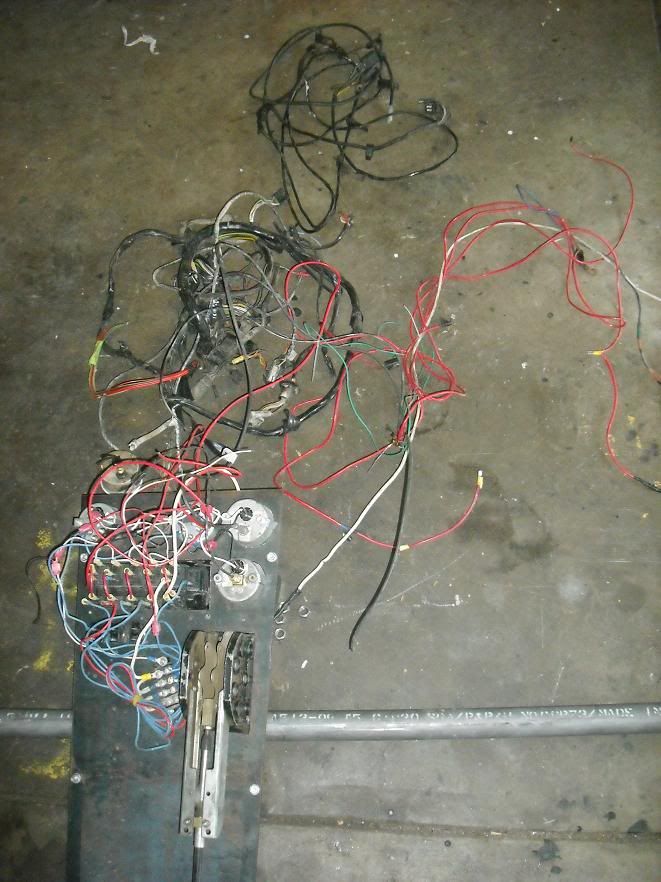
All time least favorite part of building stuff. Wiring. maybe i can get my dad to do it again. Please? I plan on ditching all original wiring since i only use a couple things from it now.
Now i just WISH that the truck was as ready-to-go as it looks like in the last couple pictures.
Still need everything to do with steering from steering wheel to wheels (except spindles now), tranny coolers/fan mounting, weld everything (everything i have done since tear down is all tack welded), all wiring, hydro bump mounting, limit straps, brake lines, passenger seat mounts, plate some of the 100 speed holes in the cab shut, install carb/wiring on engine, hood pins, complete bolt check, then some much needed urban prerunning!!!
Going to try my best to have it fully driveable by april 16. That gives me two weekends. Might not be enough since it needs all steering but i really want to drive it to the april 16 vorra short course race.

Made the rear spare holder bumper deal
Made fuel cell straps, cut heads off of bolts and tacked them to the straps. Tacked tabs to the fuel cell base. Same as before but needed to remake them because they are longer now.


After drilling out the sleeve for the bedside mount and putting taillights/marker lights back in
Also made the rear bedside mounts. Not done yet in this picture but smaller tube slips into larger tube, with a bolt running through them so i can pull the assembly off not just the bedside. or i can unbolt just the bedside if i want. I used the original tailgate mounting holes.
Then i trimmed the bottom/rear of each bedside, I think it made them look much better. Also took an inch off of the whole wheel well opening because that inch was mangled all the way around. Still going to try to get the bedsides more smooth and they need some new paint

Dad went to the junkyard and pulled brake calipers and rotors for the 1" kingpin front steer spindles i got from the swapmeet and put those on so now we have true front steer spindles and brakes hooked up. I'll do the brake lines tomorrow

A few hood pins and the whole body is finally mounted


Set some things back in the interior just for fun... notched the instrument cluster so it can still be used. Original dash is the best!

Need to figure out upper shock mounts for the FOA's again. Speaking of these shocks... I just got them back from FOA. They rebuilt them for me since one of them was having a problem and now they feel great.

Also, dad dropped the stock driveshaft and the HAD driveshaft off at a driveline shop. Getting the final driveshaft back tomorrow. Having it flipped so the slip shaft is at the rear so rocks can't ding it like it normally would.
All time least favorite part of building stuff. Wiring. maybe i can get my dad to do it again. Please? I plan on ditching all original wiring since i only use a couple things from it now.

Now i just WISH that the truck was as ready-to-go as it looks like in the last couple pictures.
Still need everything to do with steering from steering wheel to wheels (except spindles now), tranny coolers/fan mounting, weld everything (everything i have done since tear down is all tack welded), all wiring, hydro bump mounting, limit straps, brake lines, passenger seat mounts, plate some of the 100 speed holes in the cab shut, install carb/wiring on engine, hood pins, complete bolt check, then some much needed urban prerunning!!!
Going to try my best to have it fully driveable by april 16. That gives me two weekends. Might not be enough since it needs all steering but i really want to drive it to the april 16 vorra short course race.
-Ryan
- 1971ford
- 100% FORDified!

- Posts: 5565
- Joined: Wed Jul 04, 2007 1:05 pm
- Location: Placerville CA
Re: 1971 f250 DESERT truck- 3/20 bedcage
Finished?BiggDogg wrote:Wow. Whattya gonna do with yourself once these trucks are finished?

Looking good as always
is that possible?
Once the race truck is all drive-able and race ready in a couple weeks then we'll be working out bugs for a few weeks after that, breaking stuff then fixing it. Then racing, breaking BIG stuff and fixing that. Then i'll be 4linking the rear for next season. After that, it will just be a matter of fixing broken things which won't take nearly as much time as building the whole truck though. So spare time will go into the highboy, which still needs a lift, gas tanks, tool boxes, winch, 390 upgrades, np205, highpinion d44, power steering, etc.....
Between my two trucks i'll never be done!
-Ryan
-
Racer Z
Re: 1971 f250 DESERT truck- 3/20 bedcage
Race cars (or race trucks) are never finished. Even if a person finishes their "build", they are still high maintenance vehicles. Something is always wearing out or breaking, needs an adjustment or tweaking. But "finished" is never really reached. There is always the want (or need) to make part of it better, lighter, faster or more powerful. If you come in second, you want to change something so you have the edge that gets you into first place. Then the other guy has to tweak his car/truck so he can beat you and it starts all over again.1971ford wrote:Finished?BiggDogg wrote:Wow. Whattya gonna do with yourself once these trucks are finished?

Looking good as always
is that possible?
After looking at this last set of pictures, I'm left wondering, "What's left thats still stock F250 stuff?"
Maybe the instrument panel?
- 1971ford
- 100% FORDified!

- Posts: 5565
- Joined: Wed Jul 04, 2007 1:05 pm
- Location: Placerville CA
Re: 1971 f250 DESERT truck- 3/20 bedcage
^ exactly.
Even the $300,000 trucks are always being worked on. At least prepped for each race.
And yeah, not much f250 stuff left. I have started calling it an f100.
Only things that are left of an f250 are frame rail (f250 frame is barely thicker than a f100 frame), dana 60 rear, 8 lug 1" kingpin spindles and badges. When i 4-link it i'll probably go to 5 lug and a 9in. rear leaving only frame rail thickness making it an f250.
-Ryan
- rjewkes
- 100% FORDified!

- Posts: 3711
- Joined: Sun Apr 17, 2005 1:09 am
- Location: Missouri, Webb City
- Contact:
Re: 1971 f250 DESERT truck- 3/20 bedcage
Well once you got it about where you want it its finished until it breaks or needs something else you see and like added to it, but i may have to move to Folsom(sp?) let you go to town on my longbed, but just for daily driver status no racing or convert to short.
"It is better to keep your mouth shut and appear stupid than to open it and remove all doubt." - Mark Twain
'70 f250 4x4 Crew cab 460/C6 '72 F100 390/C6 9.8 MPG AVG. '89 Mercury Cougar LS Dual Exh. V6 . 18.9 MPG AVG. In Town.

I don't want to give em a heart-attack. That is what would happen if I answered the door in the buff. Heck it almost scares me to death when I step out of the shower and look in the mirror.~Mancar1~
fuelly.com
'70 f250 4x4 Crew cab 460/C6 '72 F100 390/C6 9.8 MPG AVG. '89 Mercury Cougar LS Dual Exh. V6 . 18.9 MPG AVG. In Town.

I don't want to give em a heart-attack. That is what would happen if I answered the door in the buff. Heck it almost scares me to death when I step out of the shower and look in the mirror.~Mancar1~
fuelly.com
- 1971ford
- 100% FORDified!

- Posts: 5565
- Joined: Wed Jul 04, 2007 1:05 pm
- Location: Placerville CA
Re: 1971 f250 DESERT truck- 3/20 bedcage
So close to completion of #871 2.0, yet so far...
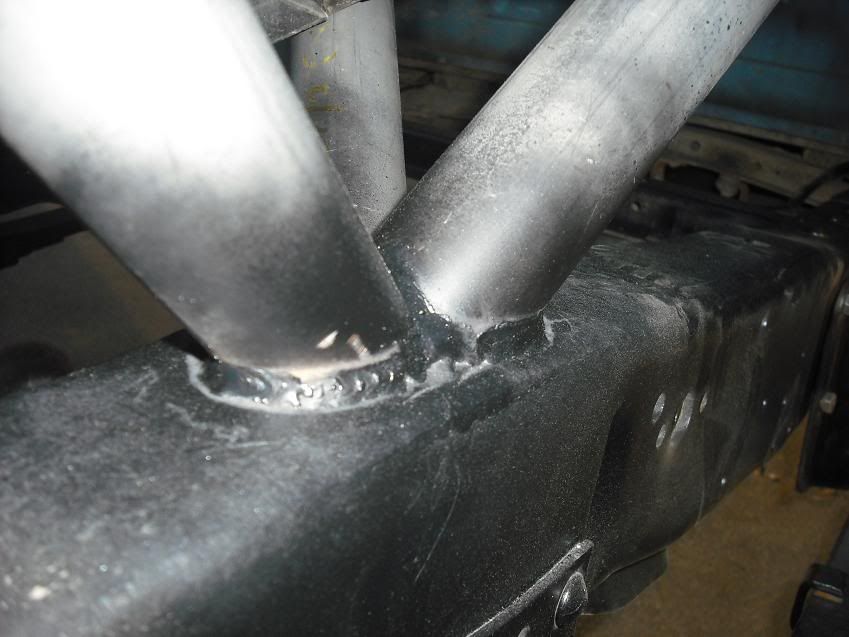
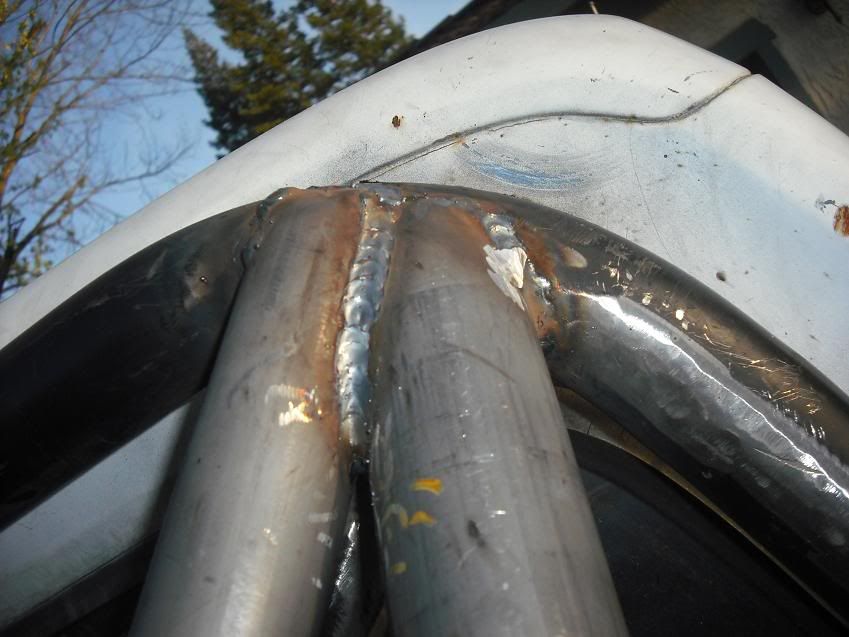
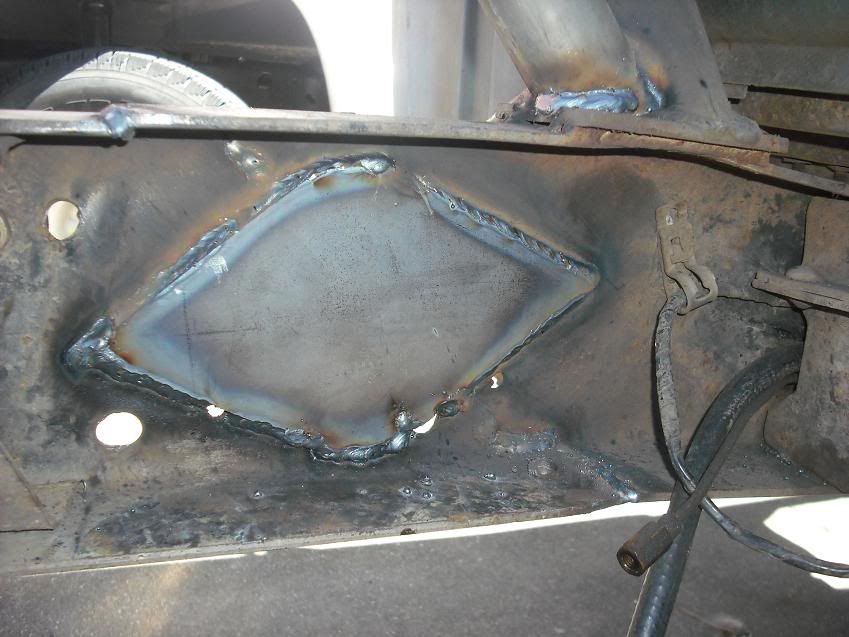
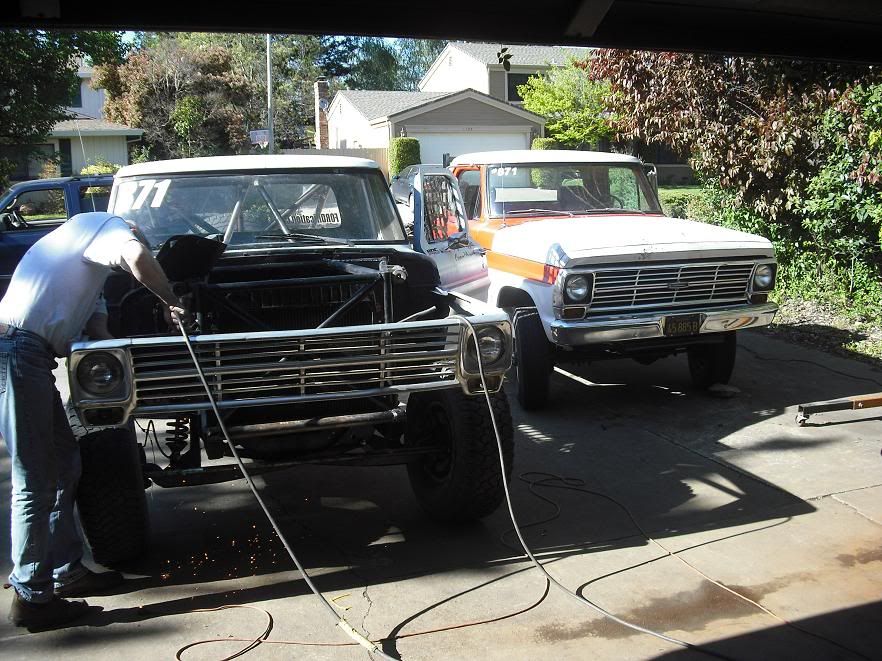
Took apart the back half of the truck and broke down a few piece of the cage and fully welded everything, then threw things back on. Can't even afford to rattle can the cage right now.
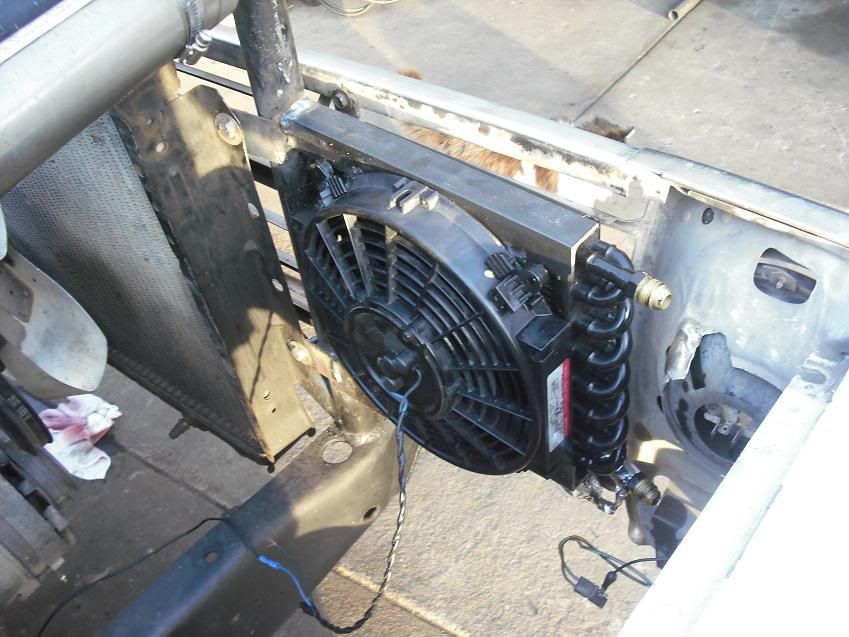
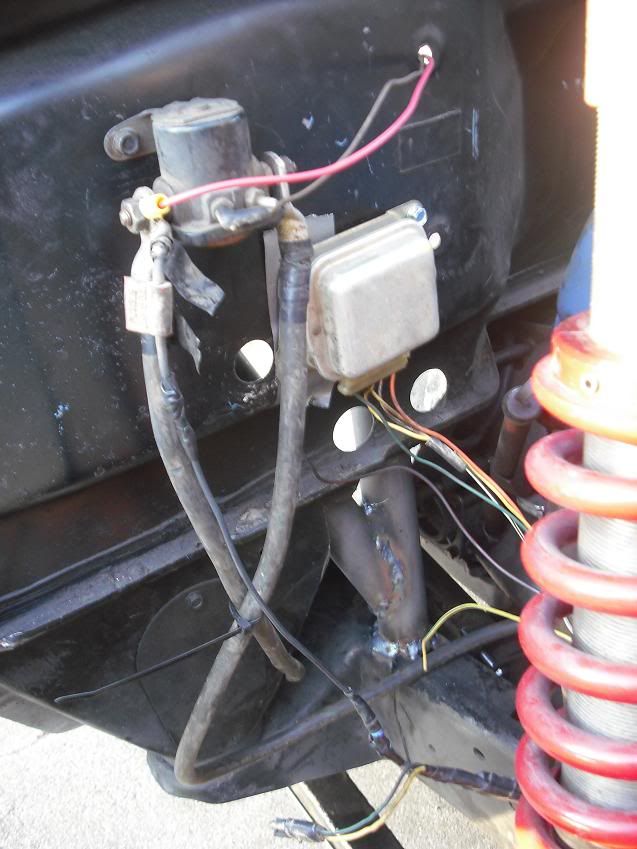
Then I moved on and welded everything else that needed to be welded, as my dad mounted the tranny coolers/fans and started re-wiring the whole truck (we're ditching the stock disaster of a wiring harness).
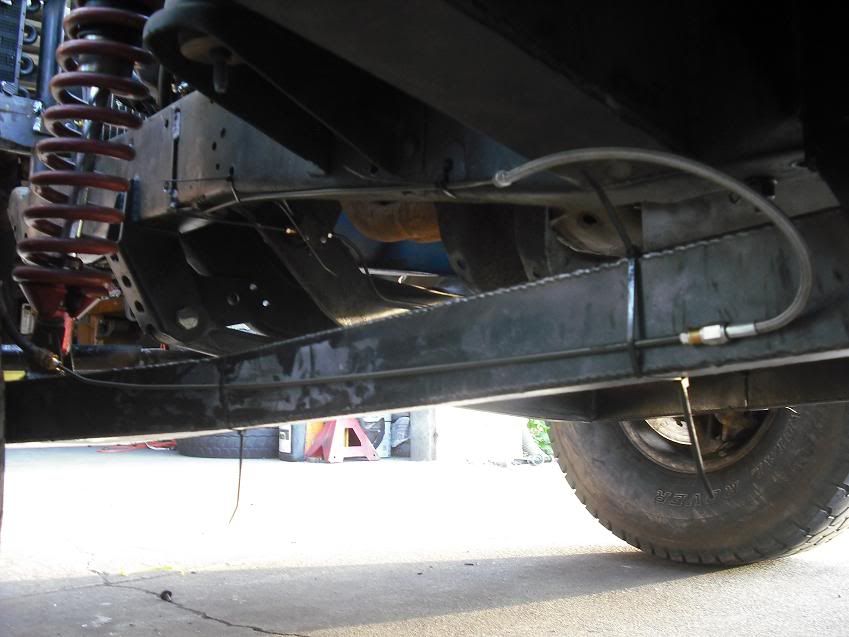
Then I did the brake lines, and Russel Anderson took care of tightening things up all around the truck.
I also ran the fuel line and got that squared away, and took the carb off my '69 4x4 and put it back on the race truck and started hooking that up.
The truck should fire right up, right now. But we can't, because there are no tranny lines right now. I am dying to hear the 429 thunder again...
Also finished welding in all harness tabs, and raised shoulder harness tabs.
Just finished welding everything
Back together, again. Needs to come apart one last time for paint though.
Need some legit clips
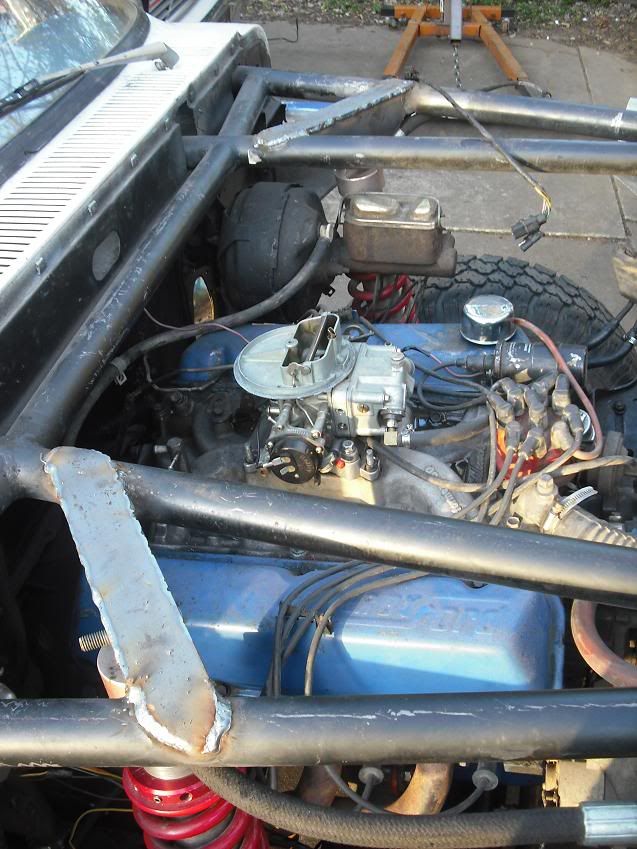
Top coilover plates welded in, carb installed
We have ignition...
Dad and Russell
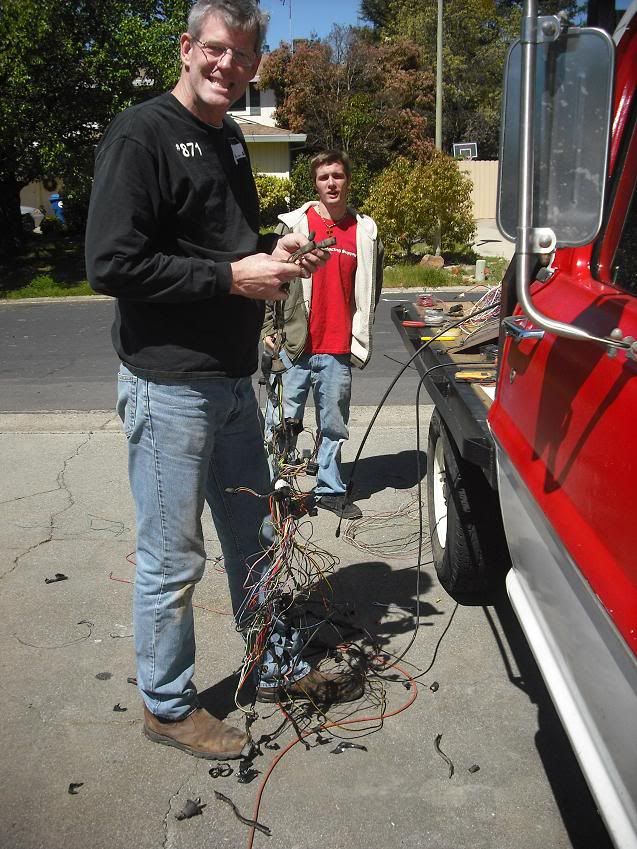
me getting rad
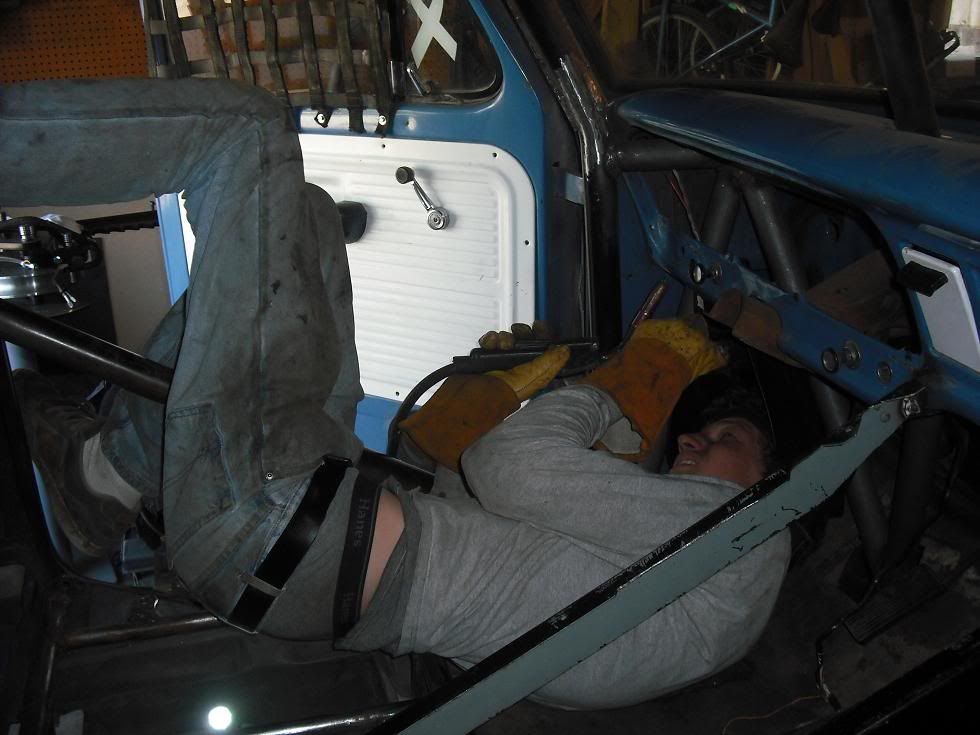
Started on tow vehicle's hitch
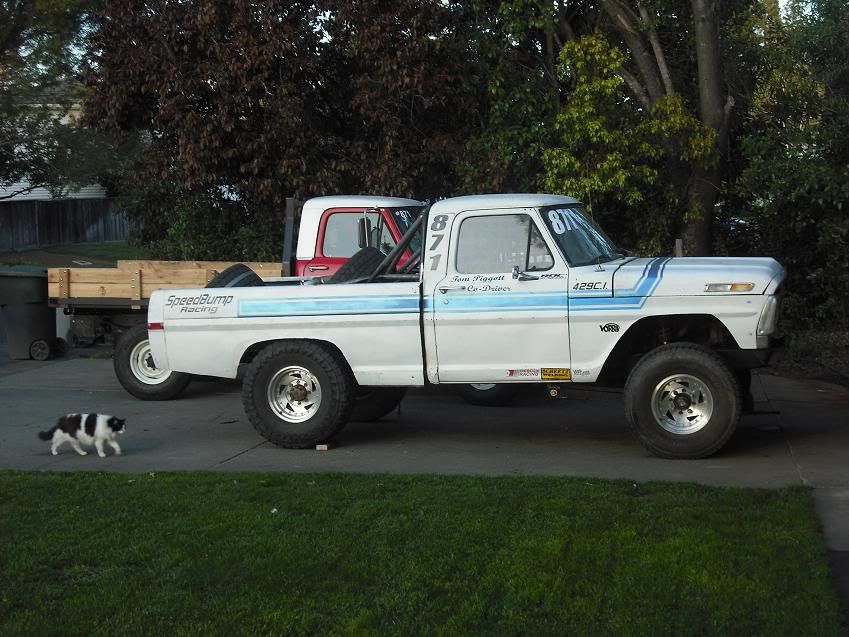
Took apart the back half of the truck and broke down a few piece of the cage and fully welded everything, then threw things back on. Can't even afford to rattle can the cage right now.
Then I moved on and welded everything else that needed to be welded, as my dad mounted the tranny coolers/fans and started re-wiring the whole truck (we're ditching the stock disaster of a wiring harness).
Then I did the brake lines, and Russel Anderson took care of tightening things up all around the truck.
I also ran the fuel line and got that squared away, and took the carb off my '69 4x4 and put it back on the race truck and started hooking that up.
The truck should fire right up, right now. But we can't, because there are no tranny lines right now. I am dying to hear the 429 thunder again...
Also finished welding in all harness tabs, and raised shoulder harness tabs.
Just finished welding everything


Back together, again. Needs to come apart one last time for paint though.


Need some legit clips

Top coilover plates welded in, carb installed

We have ignition...

Dad and Russell

me getting rad


Started on tow vehicle's hitch


-Ryan
- 67mann
- 100% FORDified!

- Posts: 1705
- Joined: Thu Feb 07, 2008 7:19 am
- Location: NY..Mt.Morris 3rdgen. homestead
Re: 1971 f250 DESERT truck- 3/20 bedcage
I've had enough and I'm not alone
http://s267.photobucket.com/albums/ii304/67mann/
http://s267.photobucket.com/albums/ii304/67mann/
- 1971ford
- 100% FORDified!

- Posts: 5565
- Joined: Wed Jul 04, 2007 1:05 pm
- Location: Placerville CA
Re: 1971 f250 DESERT truck- 3/20 bedcage
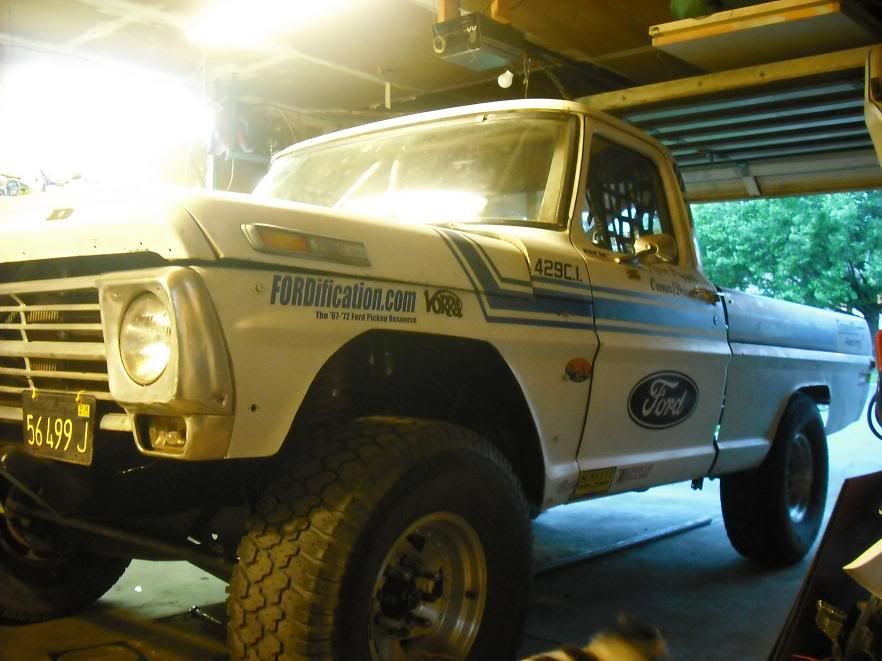
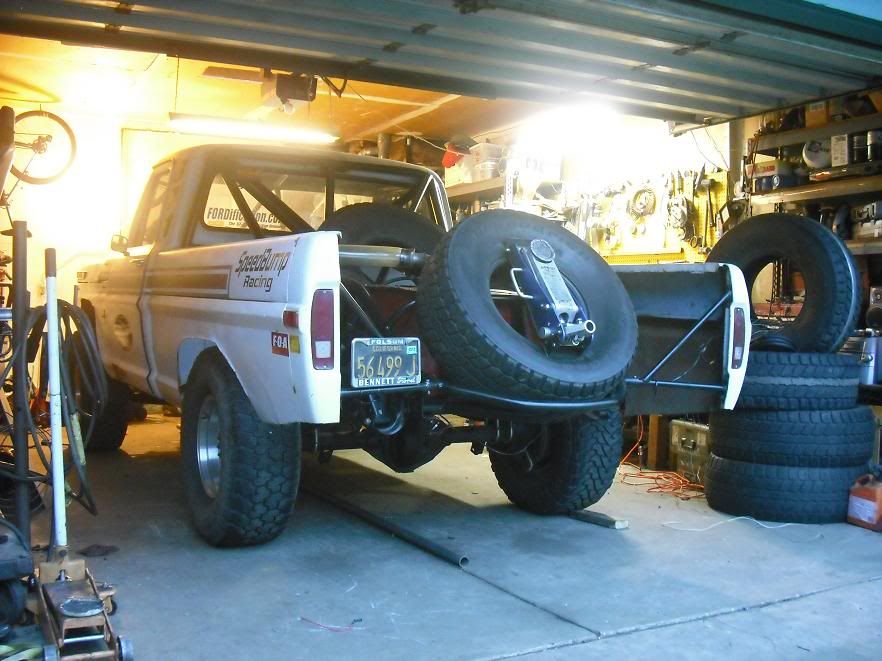
Painted cage, added a few things, and then added about 50 HP with some steeekers


-Ryan
- 67 ford f100s rule
- Preferred User

- Posts: 392
- Joined: Sun Nov 04, 2007 7:07 pm
- Location: Indiana, Richmond
- Contact:
Re: 1971 f250 DESERT truck- 3/20 bedcage
Your bump is going to be even more killer now than it was before! You are doing some awesome work on it. I cant wait to read about the races you win in that beast.
Jeff Penland
70 Ford F100 LWB "Nadine" 302/3 speed with overdrive
If you have to ask you wouldn't understand
"I shall hold the line of right as well as that of glory." English translation of the British Penland coat of arms.
70 Ford F100 LWB "Nadine" 302/3 speed with overdrive
If you have to ask you wouldn't understand
"I shall hold the line of right as well as that of glory." English translation of the British Penland coat of arms.
- 1971ford
- 100% FORDified!

- Posts: 5565
- Joined: Wed Jul 04, 2007 1:05 pm
- Location: Placerville CA
Re: 1971 f250 DESERT truck- 3/20 bedcage
Thanks! Pretty excited!
Bolted/tightened a lot of things all around the truck. I left everything loose so it was time to go tighten everything up... I guess i'll find out what we forgot to tighten soon enough!
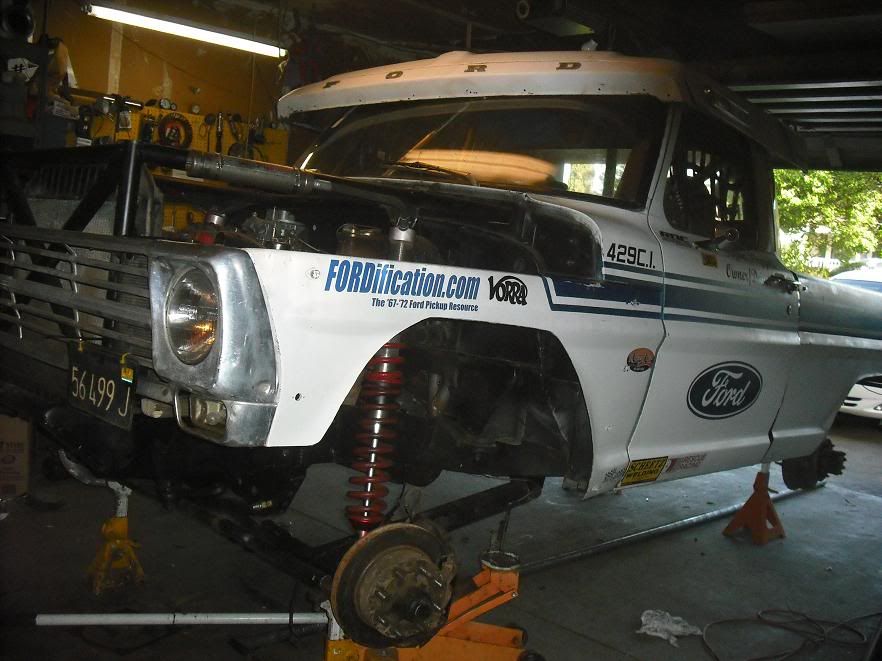
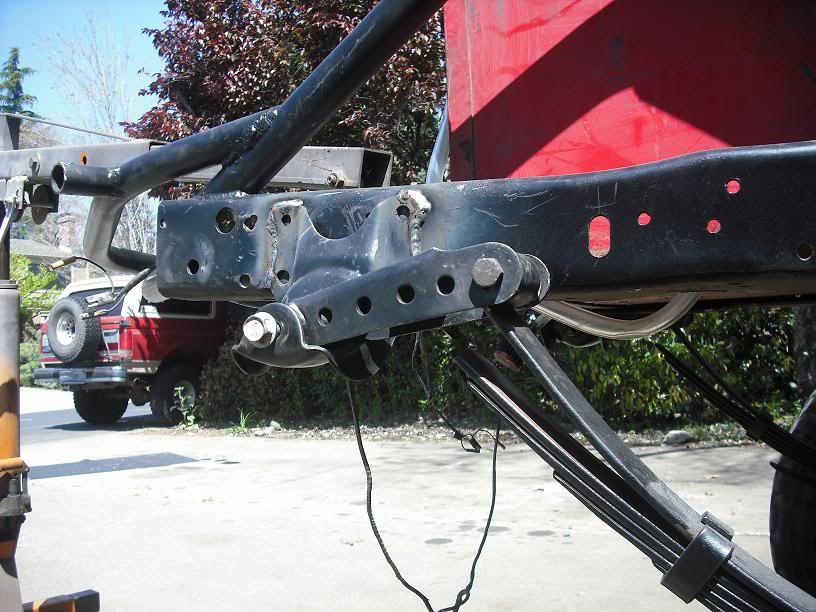
Then I re-positioned the rear hangers for a better shackle angle at ride height, and more droop. 14" of travel with these springs. Quite a bit less than the chevy springs but i think these will work better. This is full droop. Springs start to separate but i'm not worrying about it.
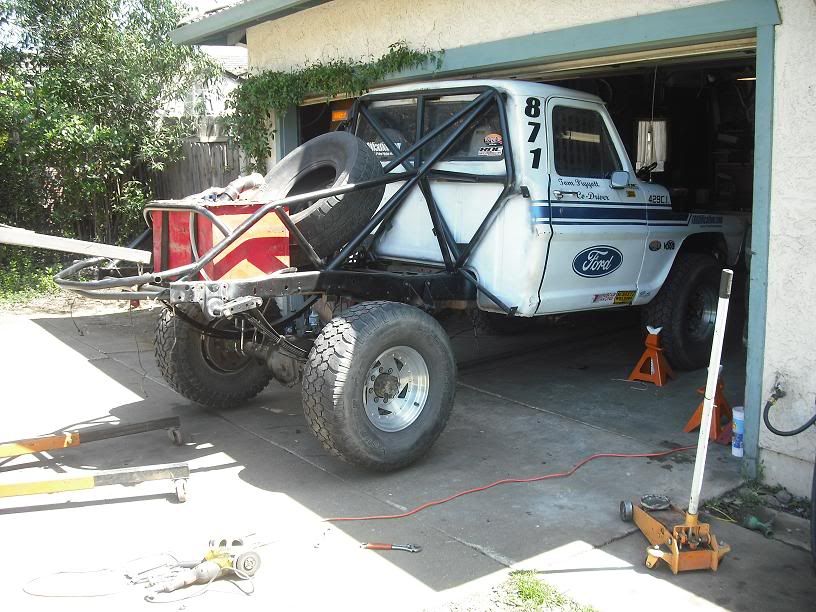
Rear droop is lame compared to the front. It's going to look funny when airborne. I'm going to strap the front short though.
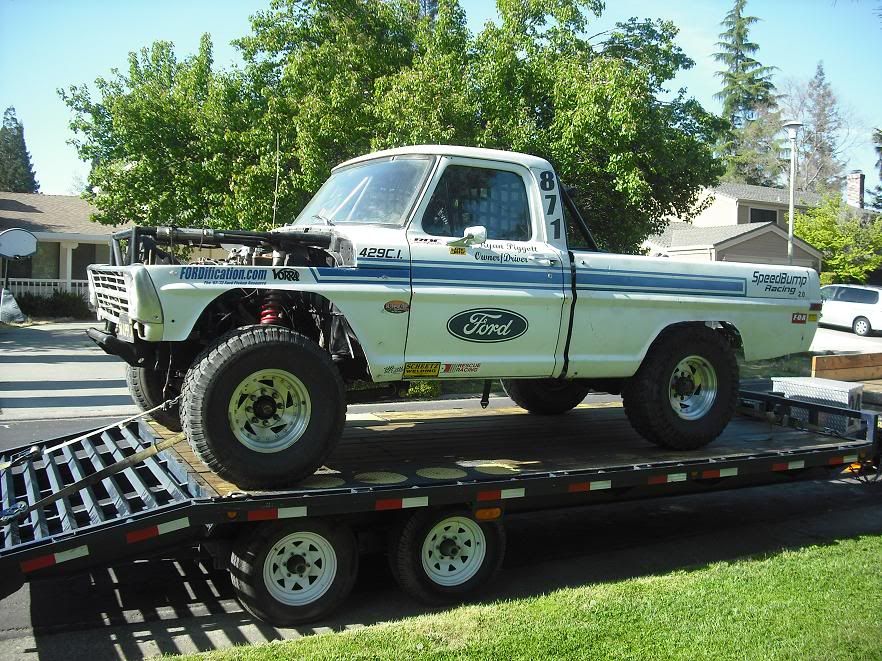
95% done
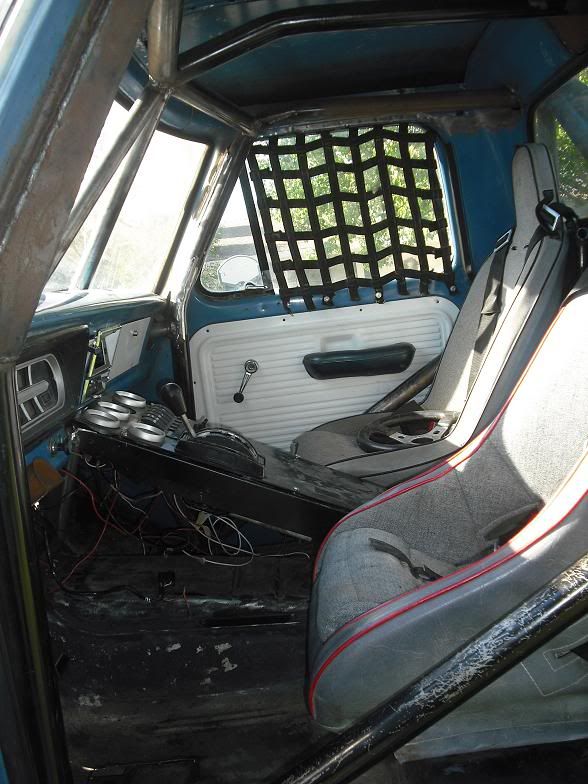
Bled the brakes, made the passenger seat mounts and started bolting in the harness/seats/center console, put the original dash back together, dad worked on wiring more stuff, I drove around aimlessly on random highways with a truck load of 35's wasting $50 gas money (could of gone to race truck) because i'm an idiot and can't read signs, routed fuel cell vent, routed tranny cooler lines, other stuff, loaded it up and cruised around the neighborhood and everything is good to go.
Time for steering... Planning on driving it home from Mike's house after steering is done... cross your fingers.
Bolted/tightened a lot of things all around the truck. I left everything loose so it was time to go tighten everything up... I guess i'll find out what we forgot to tighten soon enough!

Then I re-positioned the rear hangers for a better shackle angle at ride height, and more droop. 14" of travel with these springs. Quite a bit less than the chevy springs but i think these will work better. This is full droop. Springs start to separate but i'm not worrying about it.

Rear droop is lame compared to the front. It's going to look funny when airborne. I'm going to strap the front short though.

95% done


Bled the brakes, made the passenger seat mounts and started bolting in the harness/seats/center console, put the original dash back together, dad worked on wiring more stuff, I drove around aimlessly on random highways with a truck load of 35's wasting $50 gas money (could of gone to race truck) because i'm an idiot and can't read signs, routed fuel cell vent, routed tranny cooler lines, other stuff, loaded it up and cruised around the neighborhood and everything is good to go.
Time for steering... Planning on driving it home from Mike's house after steering is done... cross your fingers.
-Ryan