Since I've decided to go ahead and use the factory A/C setup, and therefore needed to use the '68-up heater control setup, I had to get the dash of the '67 cut out to accept the patch panel I cut last week. I went ahead and mocked it up to make sure it would fit flush and would look OK. Here's what that looks like:

There are three small sheetmetal screws holding the top of the panel, but these will be hidden under the edge of the dashpad. On the bottom it's held in by the regular dash support brace and another screw, both of which will also be hidden by the installation of the underdash unit. Once this panel is cleaned up and painted the same color as the rest of the dash, it'll be almost invisible.
I then got started cutting the top firewall hole for the A/C lines. Didn't have the right size hole saw so I just drilled a large hole and then widened it out with the diegrinder, and drilled two holes for the gasket retainer, so now that part's ready for the new A/C hoses. I then popped some body plugs into the standard heater hose holes (since they're no longer needed), and drilled new holes down lower on the firewall, which is where they're needed for the factory A/C setup. There was already two dimples where the holes needed to be drilled, so it was a no-brainer. I installed two body plugs into these holes and then drilled through them just enough to that the hoses would be a tight fit.
I then got started sanding down the areas on the cab that needed a little body filler. There were three small dings in the cab roof, two along the driver's door pillar and one on the back of the cab....in addition to the touch-up that needed done around the rear window to smooth out the holes I welded up last weekend, as well as finishing up the fuel tank filler hole. Once the metal was cleaned and prepped, I mixed up the filler and applied it as needed. The first batch I mixed up I found I used a little too much activator, as it was drying on my pallette within minutes, so I just threw it away and started over. The next time around was better.
While it was drying I cleaned all the black goopy windshield sealer out from around the windshield area. I found that the POR-15 MarineClean works really well for this. Here's a shot of the cleaned-up windshield area taken while the filler around the back window was drying:

There's a few more pictures taken, I'll get those posted to a new project update page within the next day or two. When I get back to the shop next weekend, I'll be spending the day sanding the cab, since I'm basically ready to start painting it. I'll be also doing any bodywork needed on the rest of the frontend sheetmetal (doors/fenders/hood), since I want to have them all ready so that they can be sprayed at the same time. I'll probably spend the next week doing final research into paint products....
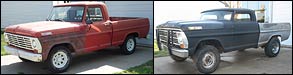
...but just to let you all know, I believe I've decided to go with black. I might add some accents later, either blue or silver, but black will probably be the main color coat. I think although it'll require a little extra time making sure that everything's nice and smooth, it'll be worth it in the long run.