MLJJONES67 PROJECT CUMMINS put away for winter
Moderator: FORDification
-
mljjones67
- Blue Oval Guru

- Posts: 1341
- Joined: Sun Aug 06, 2006 5:41 pm
- Location: Utah, Springville
- Contact:
Re: MLJJONES67 PROJECT CUMMINS
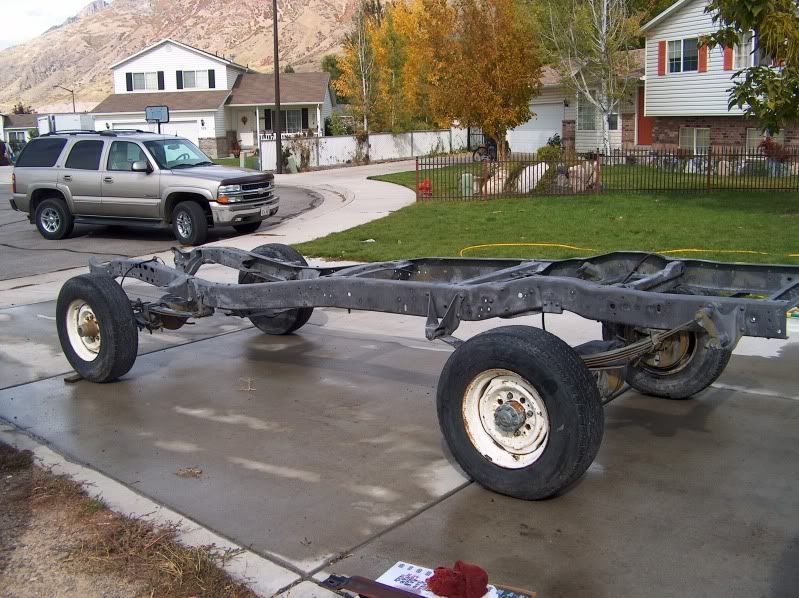
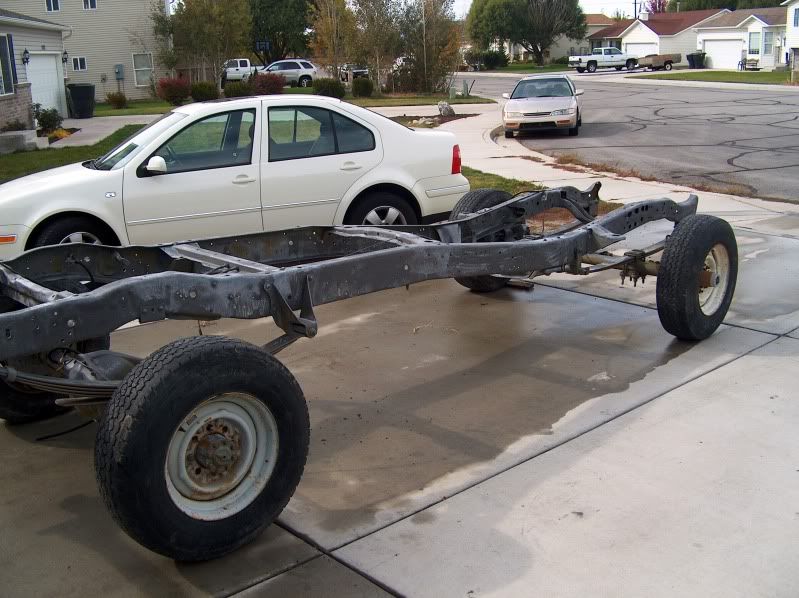
Finally got the frame back from the sandblaster. They did a real good job. I will get some pics up tomorrow. I will be etching it tomorrow with the metal prep I bought from Silver Bullet. I will probably wait to paint it until the spring unless we get a good day in the seventies here.
-
mljjones67
- Blue Oval Guru

- Posts: 1341
- Joined: Sun Aug 06, 2006 5:41 pm
- Location: Utah, Springville
- Contact:
Re: MLJJONES67 PROJECT CUMMINS
Blasted frame and metal etched ready for some rust bullet.
Before,

After,
Before,

After,


-
mljjones67
- Blue Oval Guru

- Posts: 1341
- Joined: Sun Aug 06, 2006 5:41 pm
- Location: Utah, Springville
- Contact:
Re: MLJJONES67 PROJECT CUMMINS
Working on the bottom of the cab. I have most of the paint and rust off. I just have the creases to clean up, then I can paint. Then the next step will be painting the frame and mounting the cab to the frame so I can get the Cummins mocked up and motor mounts made.
Pictures to come.
Pictures to come.
-
James72
- Preferred User

- Posts: 310
- Joined: Tue Oct 09, 2007 10:37 pm
- Location: Vernon BC
Re: MLJJONES67 PROJECT CUMMINS
I like this project and I've checked in from time to time, I have done some research on the 12 V Cummins and this "killer dowel" thing keeps coming up
Have you ever heard of it?
There is supposed to be a dowel behind or for the front cover that can fall out and get caught up in the geartrain, probably ruin your day pretty quick
I hear it's an easy fix, especially if you have the engine out already, I didn't see anything about it here, just thought I'd throw it out there
'05 Mustang GT
'72 crew 4x4
'07 KTM 450 xcw
2006 F350 CC Diesel 4x4 Lariat
'72 crew 4x4
'07 KTM 450 xcw
2006 F350 CC Diesel 4x4 Lariat
-
mljjones67
- Blue Oval Guru

- Posts: 1341
- Joined: Sun Aug 06, 2006 5:41 pm
- Location: Utah, Springville
- Contact:
Re: MLJJONES67 PROJECT CUMMINS
Yep but it was supposed to be fixed by 92'. But there is a lot out there that have come out and caused a lot of damage. There are some videos on how to fix the problem. I will be putting a tab over mine just in case. The pin on mine is pressed in and pretty tight. thanks for the heads up!!
- averagef250
- 100% FORDified!

- Posts: 4387
- Joined: Fri Mar 17, 2006 12:58 am
- Location: Oregon, Beavercreek
Re: MLJJONES67 PROJECT CUMMINS
It can happen on any engine through 2002. I just sent a 94 engine to scrap yesterday for losing the pin.
It's not that common. Thew newer, say 98 and newer timing covers have a stepped bore for the dowel pin. Even with this though some motors just have wierd vibrations and rattle that pin loose, through the timing cover and into the engine. Say 10% of engines that pin is loose, but hasn't gone anywhere yet.
IMO, make your own KDP tab. The Cummins tab is cheezball and doesn't fit any but the oldest timing cover castings well. I just grind a 1/16" thick fender washer down to fit where needed and stick under the bolt.
Also, use blue loctite on all the timing cover bolts, oil pump and cam retainer bolts. I've pulled down engines to find all these bolts loose.
1970 F-250 4x4 original Willock swivel frame chassis '93 5.9 Cummins/Getrag/NP205/HP60/D70
-
mljjones67
- Blue Oval Guru

- Posts: 1341
- Joined: Sun Aug 06, 2006 5:41 pm
- Location: Utah, Springville
- Contact:
Re: MLJJONES67 PROJECT CUMMINS
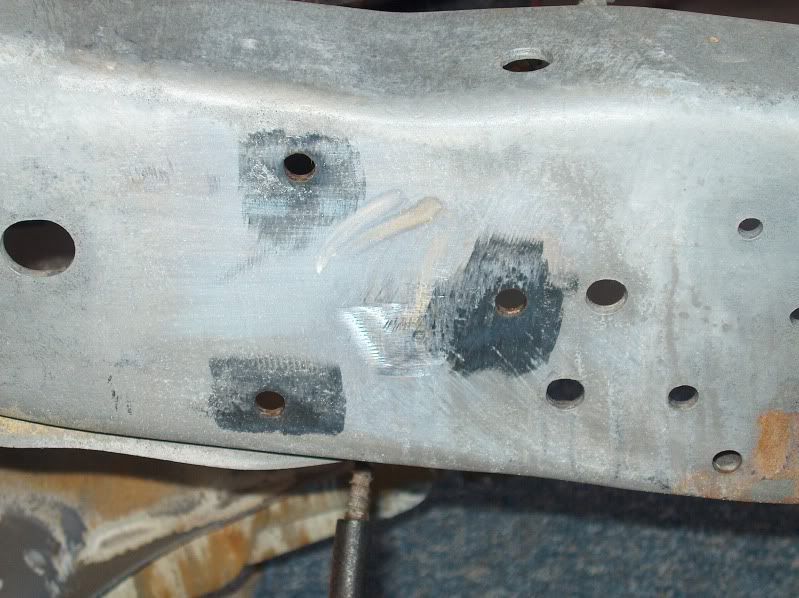
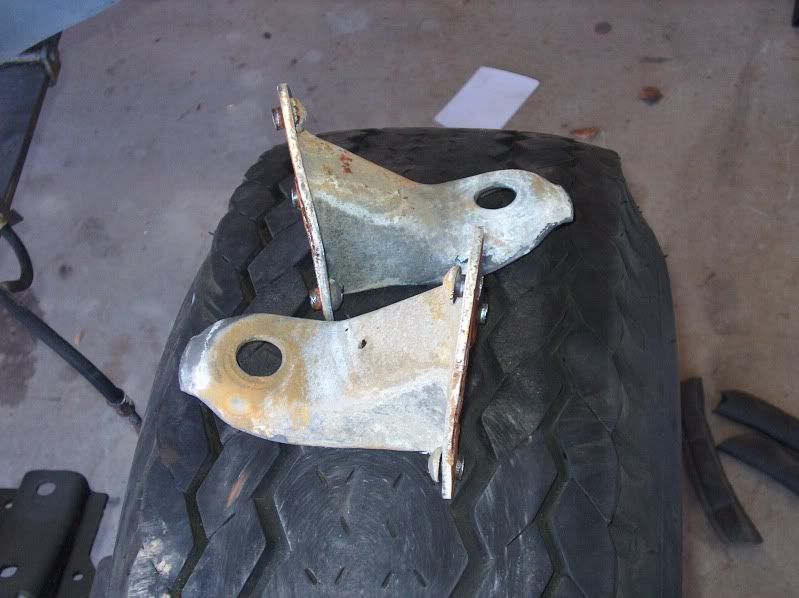
Little update. I pulled the rear upper shock mounts yesterday because there was a ton of rust inside that I couldn't get to. I am glad I did because between the bracket and frame was pretty rusty. I cleaned up the frame were the brackets were. Since I pulled these brackets off I am worried about the spring mounts and the cab mounts. The rust was pretty significant behind the shock brackets. It would be a real pain to have to grind off all the rivets and drill them out. I wonder if the rust bullet will seal all the bracket edges to keep the moisture out so it will stop the rust underneath??



-
mljjones67
- Blue Oval Guru

- Posts: 1341
- Joined: Sun Aug 06, 2006 5:41 pm
- Location: Utah, Springville
- Contact:
Re: MLJJONES67 PROJECT CUMMINS
The next thing before paint will be fixing the drivers side frame where the bumper mounts to it. It was hit and bent so the holes dont line up to mount the bumper. I need to figure out what the best method would be to move it back into place. I don't have a torch to heat it up so I will end up using a sledge hammer. If I cant persuade it back without the heat I might have to haul it my grandpa's and use his torch to heat it up. I have pictures of both sides for comparison.
Bent drivers side:

Straight drivers side:
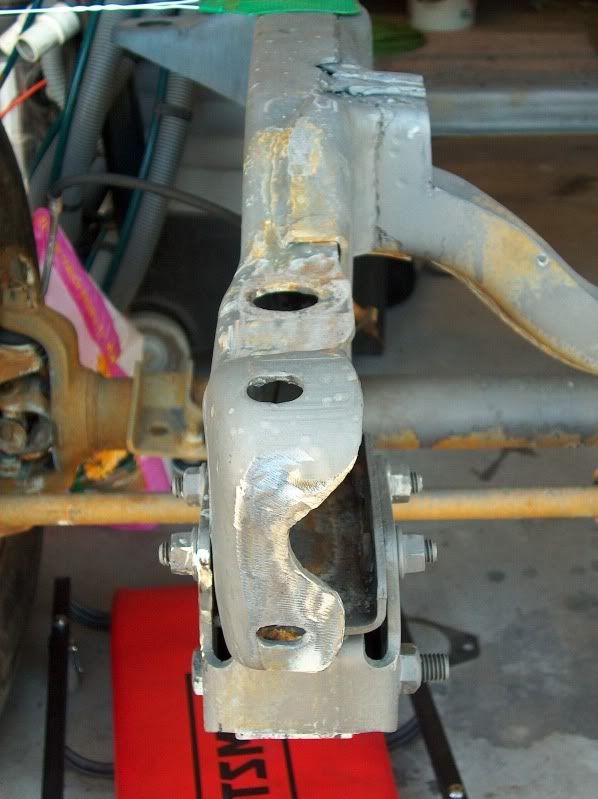
Bent drivers side:

Straight drivers side:

-
mljjones67
- Blue Oval Guru

- Posts: 1341
- Joined: Sun Aug 06, 2006 5:41 pm
- Location: Utah, Springville
- Contact:
Re: MLJJONES67 PROJECT CUMMINS
Next I need to figure out a way to get the rust bullet into the frame up front.
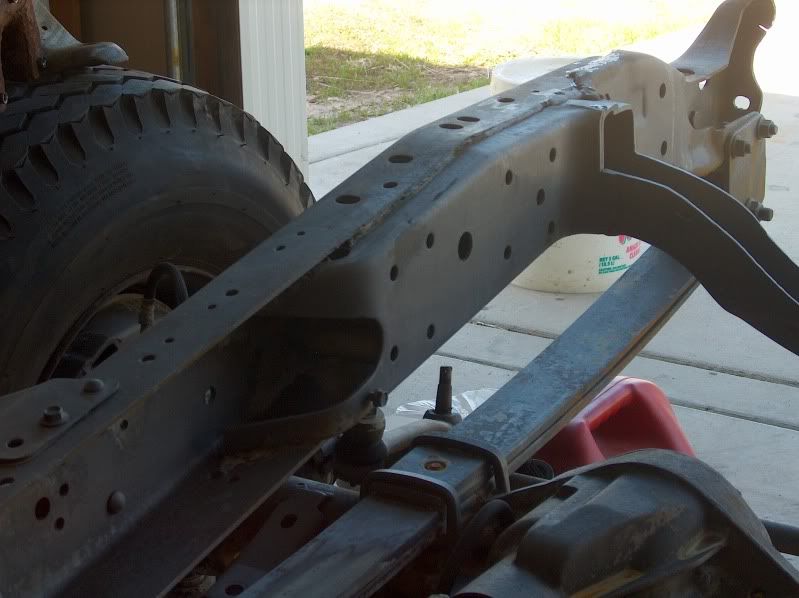

- robroy
- 100% FORDified!

- Posts: 3768
- Joined: Sun Jul 06, 2008 4:36 pm
- Location: California, Salinas
Re: MLJJONES67 PROJECT CUMMINS 3 updates 4/20/10
Good day Mike!
When I sprayed Rust Bullet Automotive and Rust Bullet Black Shell in that area of my frame, I just did my best to blast it in there blindly. It turned out OK. I know that doesn't solve your problem, but since we used the same product I figured I'd speak up.
Here's a photo of how it looked after being sprayed. IMG_6184s.JPG.
Robroy
-
mljjones67
- Blue Oval Guru

- Posts: 1341
- Joined: Sun Aug 06, 2006 5:41 pm
- Location: Utah, Springville
- Contact:
Re: MLJJONES67 PROJECT CUMMINS 3 updates 4/20/10
Thanks Robroy. I plan on using paint brushes and rollers for the frame. The black shell you put on last you put on when the silver was tacky right??
- robroy
- 100% FORDified!

- Posts: 3768
- Joined: Sun Jul 06, 2008 4:36 pm
- Location: California, Salinas
Re: MLJJONES67 PROJECT CUMMINS 3 updates 4/20/10
Good afternoon Mike!
Based on this, I have a strong suspicion that I waited about 24 hours between the Rust Bullet Automotive and Rust Bullet Black Shell.
While they're both made by Rust Bullet, as you probably know, the Black Shell product sprays on in an entirely different way--I think it's a rather different product. So I'm guessing that it falls under the category of a "topcoat," not another coat of Rust Bullet Automotive.
All that said, if you give them a call I'm sure they'd tell you exactly how long to wait between these paint types!
Another thing to note, is that if the directions aren't followed super carefully, you can wind up topcoating with Black Shell and later, you'll see a bunch of ugly gas bubbles in the finish. That's because the previous coats of either Rust Bullet or Black Shell (I forget exactly which) give off certain gasses during their curing process, and those gasses can form bubbles that get stuck in the Black Shell. It's ugly and negates a lot of the effort invested in this finish, so that's something to watch out for!
One final note: you're aware that the Rust Bullet products have deadly isocyanates in them right? A top quality charcoal canister respirator is an absolute must, as I understand it. Not to mention the ungodly things this paint does if you get it anywhere on your skin!
Mike, I wish you the best fortune with these paints! Let me know if I can find anything out for you, or if you'd like some better photos.
Robroy
I see! I can understand why you'd be concerned about getting the pain in there then.mljjones67 wrote:I plan on using paint brushes and rollers for the frame.
It has been so long now that I can't say for sure, but I tend to follow the directions super carefully. I have a can of Rust Bullet Automotive in front of me right now, and I'm reading, "Optimum drying time between coats is 2 to 4 hours." Later in the same directions I see, "The final coat of Rust Bullet may be topcoated after 24 hours almost any paint if a different color is needed or desired."mljjones67 wrote:The black shell you put on last you put on when the silver was tacky right??
Based on this, I have a strong suspicion that I waited about 24 hours between the Rust Bullet Automotive and Rust Bullet Black Shell.
While they're both made by Rust Bullet, as you probably know, the Black Shell product sprays on in an entirely different way--I think it's a rather different product. So I'm guessing that it falls under the category of a "topcoat," not another coat of Rust Bullet Automotive.
All that said, if you give them a call I'm sure they'd tell you exactly how long to wait between these paint types!
Another thing to note, is that if the directions aren't followed super carefully, you can wind up topcoating with Black Shell and later, you'll see a bunch of ugly gas bubbles in the finish. That's because the previous coats of either Rust Bullet or Black Shell (I forget exactly which) give off certain gasses during their curing process, and those gasses can form bubbles that get stuck in the Black Shell. It's ugly and negates a lot of the effort invested in this finish, so that's something to watch out for!
One final note: you're aware that the Rust Bullet products have deadly isocyanates in them right? A top quality charcoal canister respirator is an absolute must, as I understand it. Not to mention the ungodly things this paint does if you get it anywhere on your skin!
Mike, I wish you the best fortune with these paints! Let me know if I can find anything out for you, or if you'd like some better photos.
Robroy
-
mljjones67
- Blue Oval Guru

- Posts: 1341
- Joined: Sun Aug 06, 2006 5:41 pm
- Location: Utah, Springville
- Contact:
Re: MLJJONES67 PROJECT CUMMINS 3 updates 4/20/10
Thanks again Robroy. I appreciate the input. I wont be using the black top shell on my frame because I really like the silver color. The reason I asked about it is on another forum a guy put it on 2 days after and it was real brittle. Any thing would ding and chip the paint. I will get a charcoal breather before I paint. I need to fix the few things before I paint. But hopefully soon I can paint and move on the cab floor and cab corners.
- robroy
- 100% FORDified!

- Posts: 3768
- Joined: Sun Jul 06, 2008 4:36 pm
- Location: California, Salinas
Re: MLJJONES67 PROJECT CUMMINS 3 updates 4/20/10
Good evening Mike, you're most welcome!
I'm not sure about what would cause Black Shell to become brittle, but it doesn't shock me to hear that it's possible. Chemistry's mysterious stuff!
I'm glad to hear that you'll be wearing a quality respirator, and I like the idea of leaving your frame silver! I think the silver color is beautiful also, and really highlights the meticulous metal preparation job you're doing--it lets you see the cleanliness of it all better. I was tempted to leave mine silver, but decided to go with Black Shell at the last minute.
Have a great evening Mike!
Robroy
- OldRedFord
- Blue Oval Guru

- Posts: 1314
- Joined: Tue Jan 29, 2008 11:37 pm
- Location: Hull GA
- Contact:
Re: MLJJONES67 PROJECT CUMMINS 3 updates 4/20/10
Looking good! I have that same Craftsman creeper. 
Tim
1972 F350 flatbed drw c6/390
1967 F600 project truck
1972 F350 flatbed drw c6/390
1967 F600 project truck