4X4X4 roof console and dakota digital dash
Moderator: FORDification
-
cw4rdmn
- New Member

- Posts: 41
- Joined: Wed Apr 22, 2009 7:03 pm
Re: 4X4X4 LET THE GAMES BEGIN!
Dood!! This thing is sooo cool!  I'm lovin' this truck!
These trucks are SICK!!
1970 F-100 4x4 (Mine)
1972 F-100 (Dads)
1970 F-100 4x4 (Mine)
1972 F-100 (Dads)
-
RedneckTexan

- Blue Oval Guru

- Posts: 1102
- Joined: Tue Apr 03, 2007 6:58 pm
- Location: The backwoods of TEJAS!
Re: 4X4X4 LET THE GAMES BEGIN!
Thats gunna be one Bad Ass truck!  Very, Very Nice!
-
rattlecan
- New Member
- Posts: 120
- Joined: Fri Jul 21, 2006 10:59 am
- Location: Tacoma, Washington
Re: 4X4X4 LET THE GAMES BEGIN!
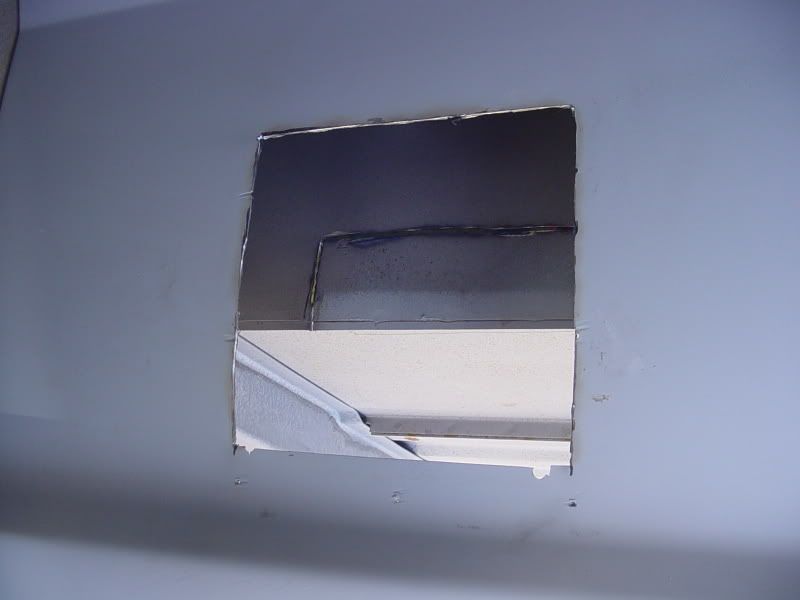
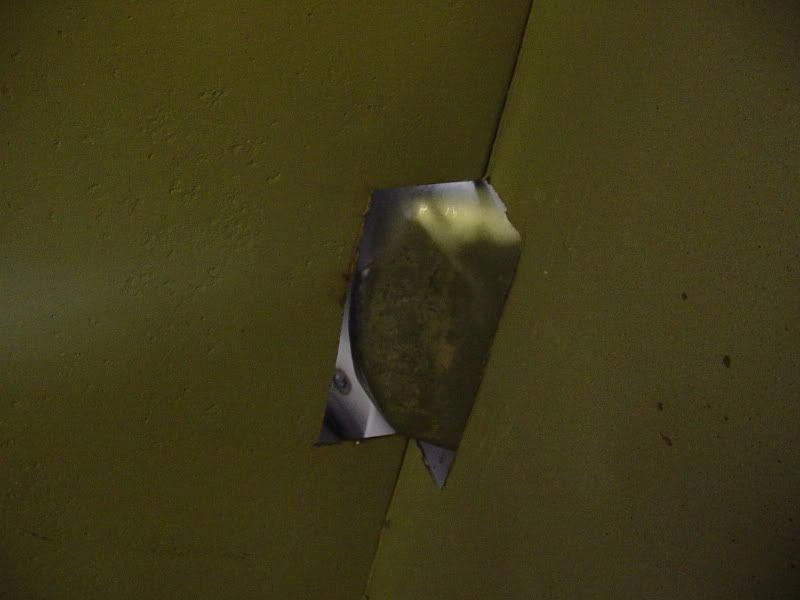
Spent some time cutting in the new saddle tank. I didn't like the look of the factory door so I decided to put a late model (92-99) f-150 fuel door in the side of the bed to hide the fuel filler neck. The top part of the filler neck bowl intruded into the bed so I had to fab a small cover inside the bed. Luckily the filler neck lined up perfectly.
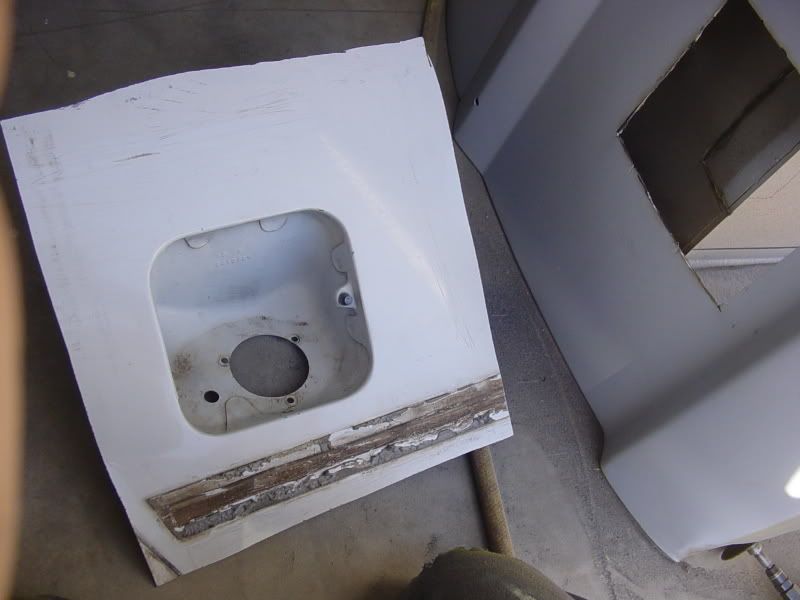
The hole where the stock aluminum door was riveted to the bedside
the late model filler door
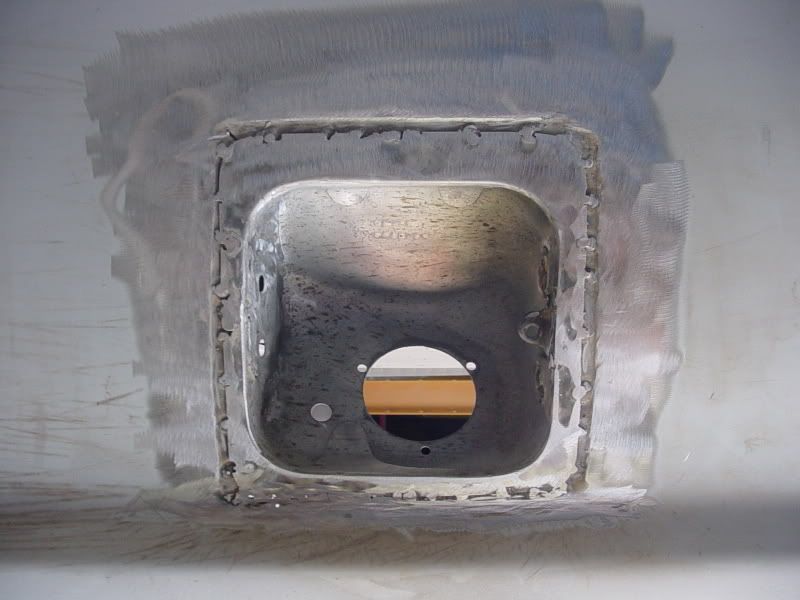
starting to clearance the bed
test fit
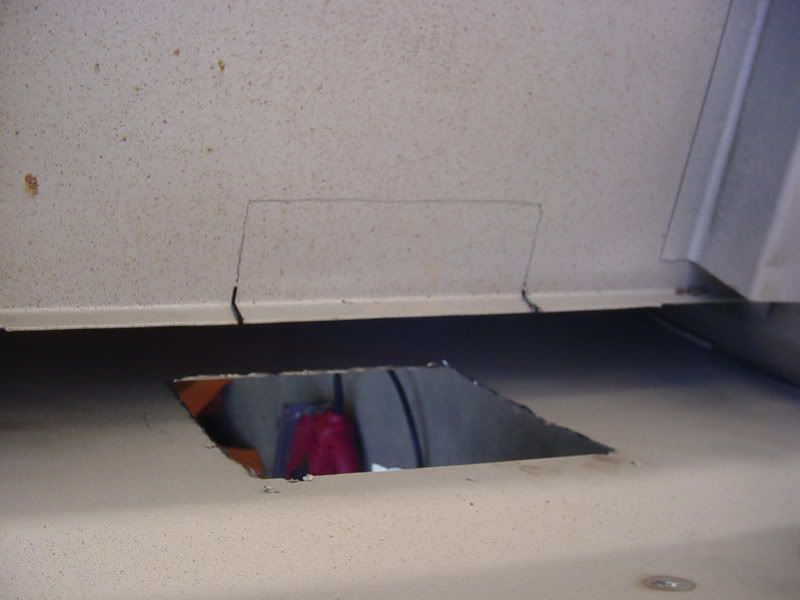
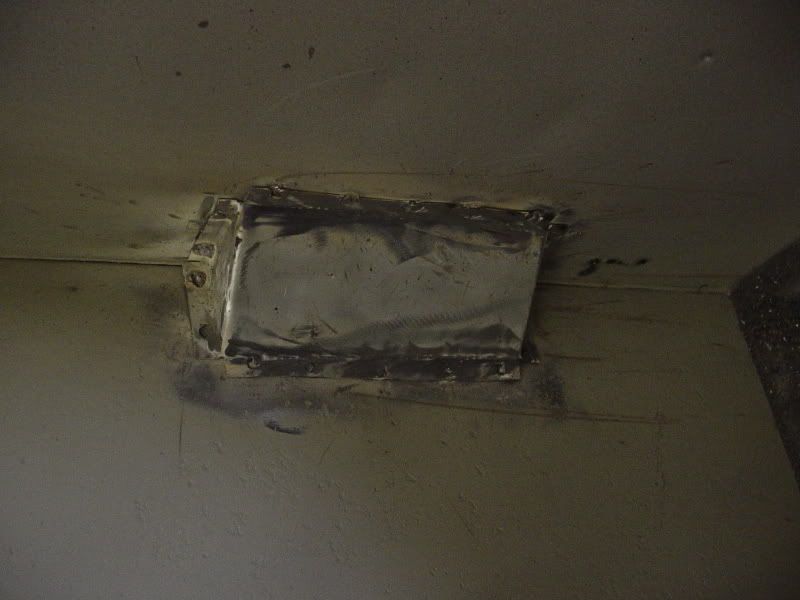
the fabricated cover

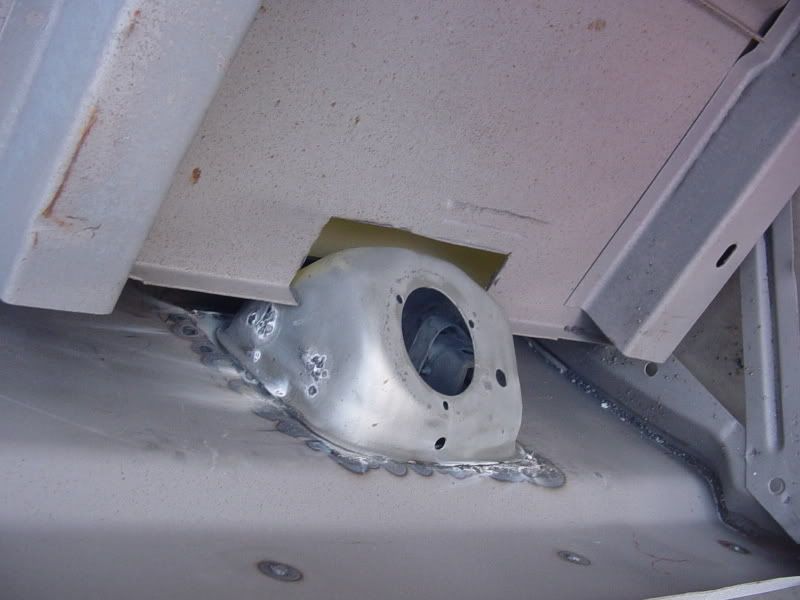
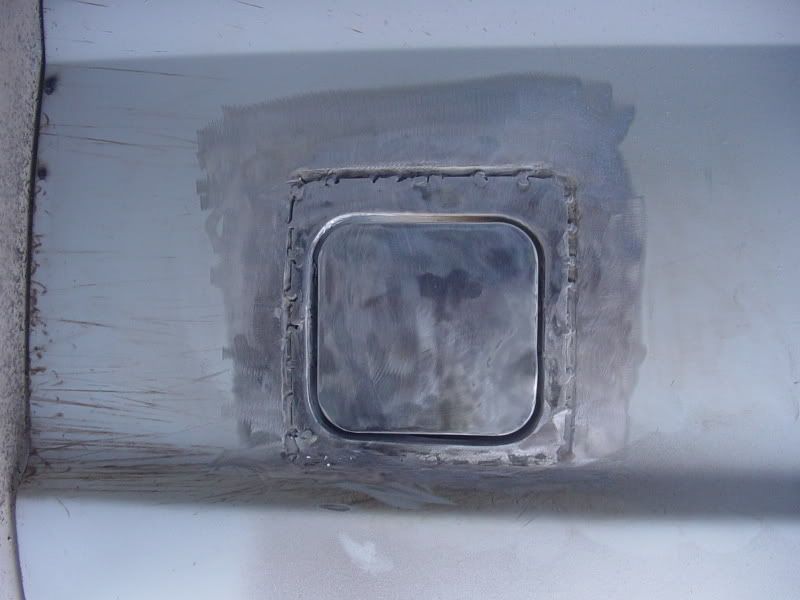
welded in the housing and attached the door
The hole where the stock aluminum door was riveted to the bedside
the late model filler door
starting to clearance the bed
test fit
the fabricated cover
welded in the housing and attached the door
Last edited by rattlecan on Sun Dec 20, 2009 1:54 pm, edited 1 time in total.
anything worth doing is worth doing in EXCESS!! - Carroll Shelby
70 F-350 4X4 crew
70 F-350 4X4 crew
-
marvin2

- Blue Oval Fan

- Posts: 536
- Joined: Fri Jan 23, 2009 11:25 am
Re: 4X4X4 LET THE GAMES BEGIN!
Looks good.

1970 F100 "Marvin 2" - Crown Vic IFS, 302, C4 (work in progress)
1970 F250 "Leonard" - 302, C6 (project in waiting)
1971 F100 "Walt" - 302, 3-speed on the column (Sunday driver)
2004 Mustang GT "Horse With No Name" - 4.6L, 5 speed (Retired daily driver / Friday driver)
-
AK F100

- Preferred User

- Posts: 337
- Joined: Fri Mar 30, 2007 12:43 pm
- Location: Eagle River, AK
Re: 4X4X4 LET THE GAMES BEGIN!
I really like the idea of the modern fuel filler door. Great job!!!!!
GPBFD Pyro Maniac
Daily Driver: 1974 F100 4x4 (ride'n on 8-Luggers) Build in progress
1997 F-350 Crew Cab 4x4, 7.3L Diesel SOLD
Pile-O-Parts: 1968 F100 - 2WD Shorty SOLD
Looking for a new project 57-60 Ford Truck
Daily Driver: 1974 F100 4x4 (ride'n on 8-Luggers) Build in progress
1997 F-350 Crew Cab 4x4, 7.3L Diesel SOLD
Pile-O-Parts: 1968 F100 - 2WD Shorty SOLD
Looking for a new project 57-60 Ford Truck
-
1971ford

- 100% FORDified!

- Posts: 5565
- Joined: Wed Jul 04, 2007 1:05 pm
- Location: Placerville CA
Re: 4X4X4 LET THE GAMES BEGIN!
sooooo where can i get one of those covers for the fuel filler update.. ive been delaying making one 
-Ryan
-
rattlecan
- New Member
- Posts: 120
- Joined: Fri Jul 21, 2006 10:59 am
- Location: Tacoma, Washington
Re: 4X4X4 LET THE GAMES BEGIN!
I went hunting at a wrecking yard and found a 95 F-150 that had the filler door in good shape. I cut the whole thing out of the bedside (gas tank was already pulled out...whew!) that was the easy part. I know all F series trucks from 85 to 96 and rangers from about the same era had the same fuel filler door. mine cost me $20.
Rob
Rob
anything worth doing is worth doing in EXCESS!! - Carroll Shelby
70 F-350 4X4 crew
70 F-350 4X4 crew
-
1971ford
- 100% FORDified!
- Posts: 5565
- Joined: Wed Jul 04, 2007 1:05 pm
- Location: Placerville CA
Re: 4X4X4 LET THE GAMES BEGIN!
i know, i already did the actual dentside gas door swap a month ago. I was talking about the little cover in the bedrattlecan wrote:I went hunting at a wrecking yard and found a 95 F-150 that had the filler door in good shape. I cut the whole thing out of the bedside (gas tank was already pulled out...whew!) that was the easy part. I know all F series trucks from 85 to 96 and rangers from about the same era had the same fuel filler door. mine cost me $20.
Rob
http://www.fordification.com/forum/view ... de#p370258
Im at the part where ive got that identical slot cut out of hte inside of my bed and need to fab a cover like you did. But im too lazy to do so. How long did it take you to make yours?
-Ryan
-
rattlecan
- New Member
- Posts: 120
- Joined: Fri Jul 21, 2006 10:59 am
- Location: Tacoma, Washington
Re: 4X4X4 LET THE GAMES BEGIN!
Hey Ryan,
 I getcha now. It took me about an hour to fab up this cover, all I did was take a rough measurement on the size of the metal piece and made the corner bends and cut the tabs for the weld spots, I made sure the 45 degree cuts were close, checked the fit on the bed, made a few adjustments to my weld tabs and let er rip. I then applied seam sealer around the cover. It sure isn't perfect but it got the job done. Nice work on your door, nice skillzzz Did you have any problems with warping the bedside? I did a spot and let it cool and went on to the next spot, took forever but I had very little warping of the metal.
anything worth doing is worth doing in EXCESS!! - Carroll Shelby
70 F-350 4X4 crew
70 F-350 4X4 crew
-
rjewkes

- 100% FORDified!
- Posts: 3711
- Joined: Sun Apr 17, 2005 1:09 am
- Location: Missouri, Webb City
- Contact:
Re: 4X4X4 LET THE GAMES BEGIN!
I had a cover from a bump for the inside of the bed this thing was shaped right to go in any corner to cover a fuel tube. left it in the crew when i sold it.
"It is better to keep your mouth shut and appear stupid than to open it and remove all doubt." - Mark Twain
'70 f250 4x4 Crew cab 460/C6 '72 F100 390/C6 9.8 MPG AVG. '89 Mercury Cougar LS Dual Exh. V6 . 18.9 MPG AVG. In Town.

I don't want to give em a heart-attack. That is what would happen if I answered the door in the buff. Heck it almost scares me to death when I step out of the shower and look in the mirror.~Mancar1~
fuelly.com
'70 f250 4x4 Crew cab 460/C6 '72 F100 390/C6 9.8 MPG AVG. '89 Mercury Cougar LS Dual Exh. V6 . 18.9 MPG AVG. In Town.
I don't want to give em a heart-attack. That is what would happen if I answered the door in the buff. Heck it almost scares me to death when I step out of the shower and look in the mirror.~Mancar1~
fuelly.com
-
1971ford
- 100% FORDified!
- Posts: 5565
- Joined: Wed Jul 04, 2007 1:05 pm
- Location: Placerville CA
Re: 4X4X4 LET THE GAMES BEGIN!
well ill have to try to replicate it in the next few days. looks real good.
As far as weldning things up and metal warping, I welded in the door patch panel, the dentside filler door, both bed seams, and a 2 ft section or bump on the bed in and i got very little warping. I was also doing 1/2" beads for it all. I sometimes used a wet rag but i dont think it made a huge difference. I started out scared to heck about warping from what i heard but it wasn't bad.
As far as weldning things up and metal warping, I welded in the door patch panel, the dentside filler door, both bed seams, and a 2 ft section or bump on the bed in and i got very little warping. I was also doing 1/2" beads for it all. I sometimes used a wet rag but i dont think it made a huge difference. I started out scared to heck about warping from what i heard but it wasn't bad.
-Ryan
-
rattlecan
- New Member
- Posts: 120
- Joined: Fri Jul 21, 2006 10:59 am
- Location: Tacoma, Washington
Re: 4X4X4 LET THE GAMES BEGIN!
Well it has been awhile since posting any progress. My computer found a virus and started to disintegrate. 3 months to get it fixed and I lost some progress photos  but I will get back into the groove
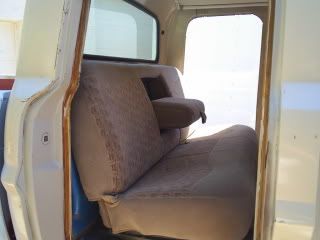
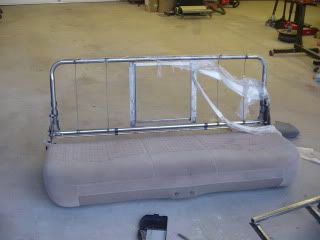
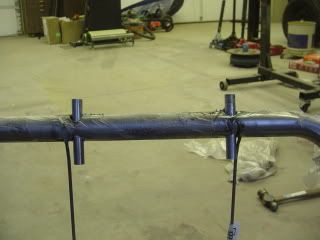
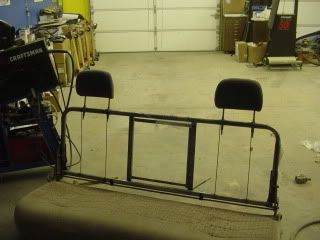
My last progress report was my fuel door in the bed. I have since put one in the cab corner (pics to come) and have tricked out my rear bench seat with head rests, a very easy install. I am painting the rest of the cab tomorrow and will reinstall the bed on sunday.
Here is the seats getting fitted in the cab. rear is from a 2003 crew and fronts from a 95 150.

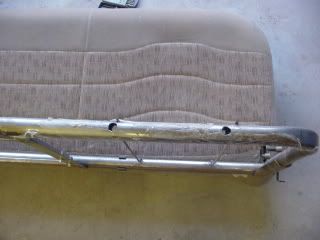
stripped the fabric and cushion, drilled a pair of holes for the sleeves.
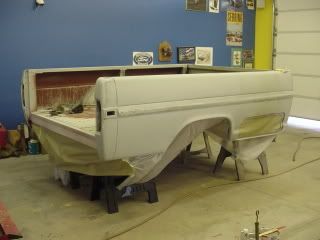
Painting the bottom of the bed
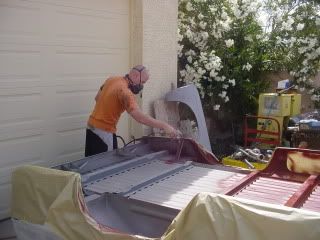
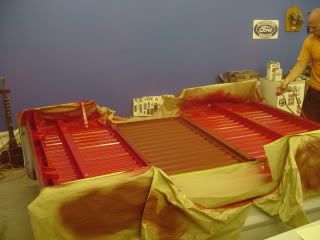
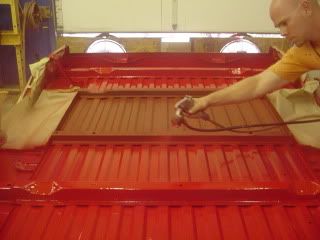
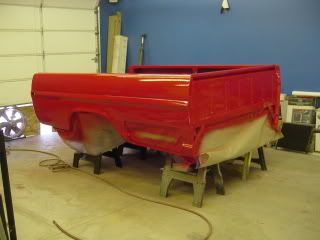
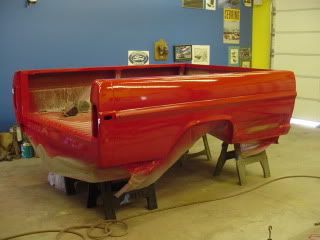
Then painting the outside bed
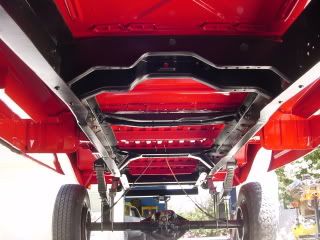
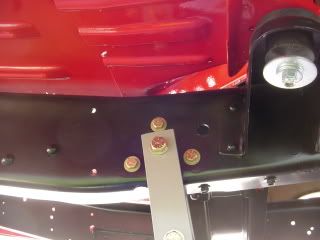
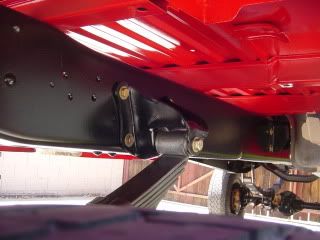
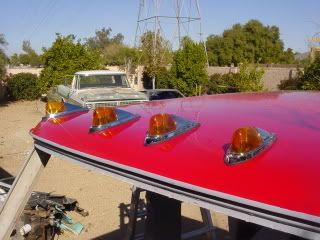
a few shots of the underneath
fitting cab lights prior to paint
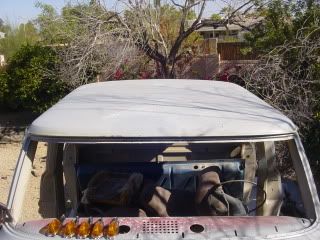
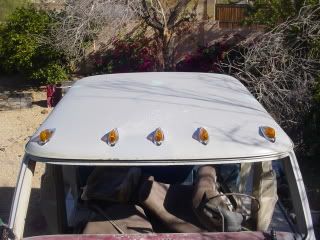
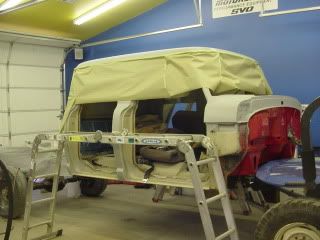
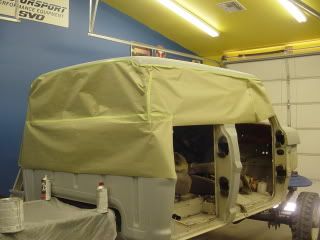
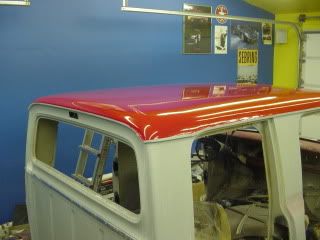
painting the top of the cab first


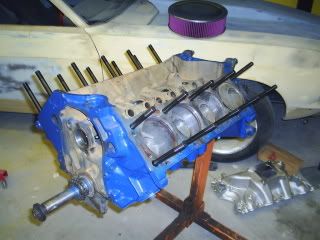
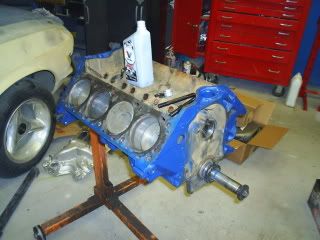
build up of the big block
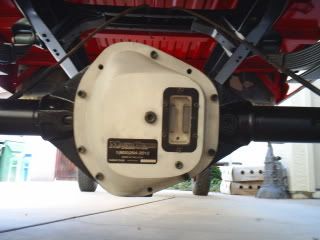
installing the very rare magna-guard extra capacity differential cover
My last progress report was my fuel door in the bed. I have since put one in the cab corner (pics to come) and have tricked out my rear bench seat with head rests, a very easy install. I am painting the rest of the cab tomorrow and will reinstall the bed on sunday.
Here is the seats getting fitted in the cab. rear is from a 2003 crew and fronts from a 95 150.
stripped the fabric and cushion, drilled a pair of holes for the sleeves.
Painting the bottom of the bed
Then painting the outside bed
a few shots of the underneath
fitting cab lights prior to paint
painting the top of the cab first
build up of the big block
installing the very rare magna-guard extra capacity differential cover
Last edited by rattlecan on Sun Dec 20, 2009 2:04 pm, edited 2 times in total.
anything worth doing is worth doing in EXCESS!! - Carroll Shelby
70 F-350 4X4 crew
70 F-350 4X4 crew
-
sopikp1
- New Member
- Posts: 76
- Joined: Tue Dec 08, 2009 9:24 pm
- Location: Papillion, NE
Re: 4X4X4 LET THE GAMES BEGIN!
This is the greatest thread ever, keep the pics coming. What a killer truck. Getting geared up to do the exact same thing to a 72 F-250, 4x4.
Kevyn
Papillion, NE
Kevyn
Papillion, NE
Kevyn
1972 F-250 4x4, 390, Dana 44, 24, 60
1972 F-250 4x4, 390, Dana 44, 24, 60
-
tybob81

- Blue Oval Fanatic

- Posts: 840
- Joined: Thu Mar 23, 2006 2:53 am
- Location: Murphysboro IL
- Contact:
Re: 4X4X4 LET THE GAMES BEGIN!
1968 swb hydroboost, ididit tilt column, Saginaw p/s pump with F series serpentine, all led lights, Vintage Air and painless wiring. 393w, tko600. CV front suspension w/c5 calipers and gt500 rotors. Stock Flexomatic leaf springs with 01 CV 8.8, 3.90 gears and Auburn locker. Custom wood bed floor. Full frame off resto-mod.
-
papabug71

- 100% FORDified!
- Posts: 2002
- Joined: Mon Oct 13, 2008 11:31 pm
- Location: McAlester, Oklahoma
Re: 4X4X4 LET THE GAMES BEGIN!
Man that truck is going to be MASSIVE !!
Very nice work !
Very nice work !

Matt
1971 F-100 Sport Custom - My grandpaws truck
Been in the family since 10/3/'71 (Brand spankin' new)
Mine since 5/7/'94
302 / 3 speed / 3:25's
--Currently undergoing full frame off resto/mod--