Project "Uncle Fester"- 9/21 Interior almost finished

Post progress reports on your project truck(s)

Moderator: FORDification

Post Reply
User avatar
72stepside
Blue Oval Fan
Blue Oval Fan
Posts: 537
Joined: Tue May 09, 2006 10:31 pm
Location: Florida, Milton
Contact:

re: Project "Uncle Fester"-7/27 Small Update

Post by 72stepside »

Well, alot has been going on, with some truck work mixed in there. Big thanks to my father for handling most of the body work by himself.

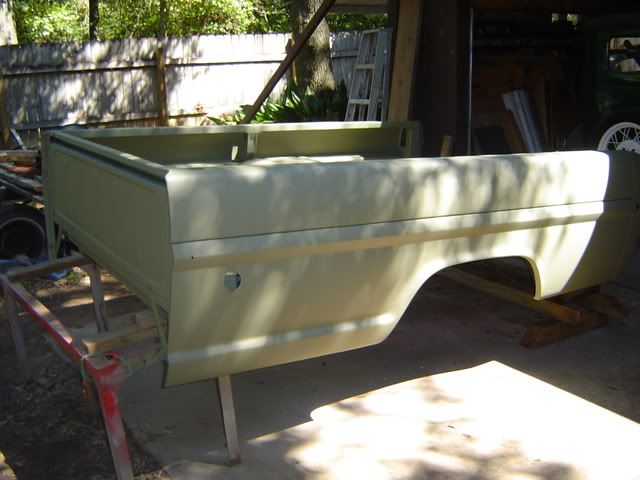
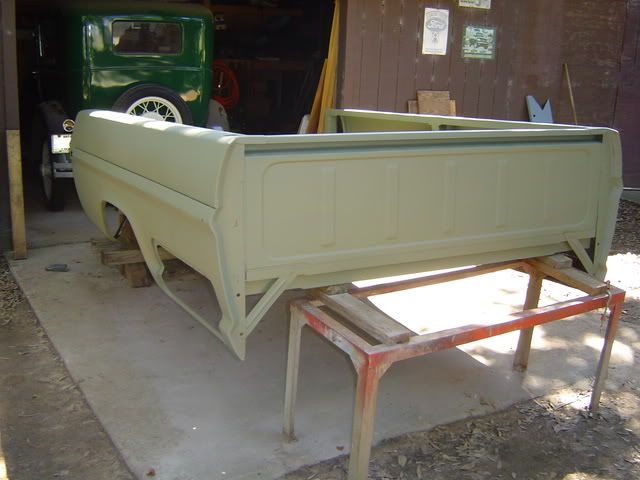
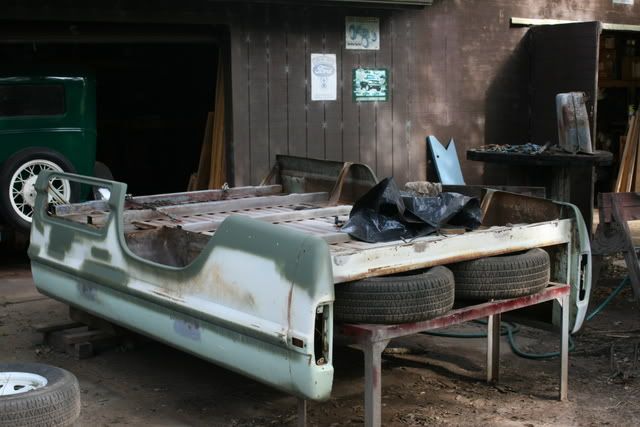
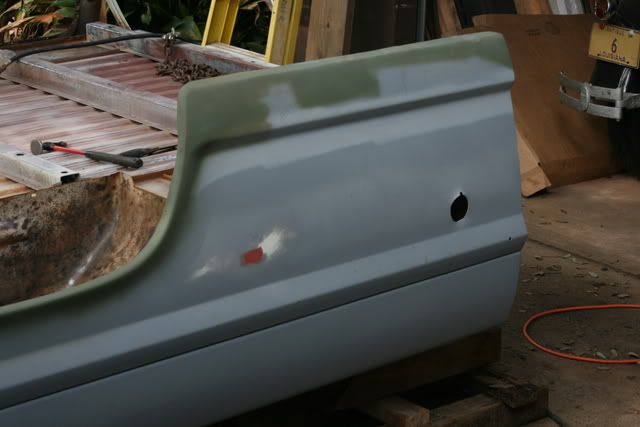
Here's an overall of where the bed stands. All the holes patched, dents hammered out then filled, seams cleaned out and POR15'ed.
Image

Here's that side that was completely rotten.
Image

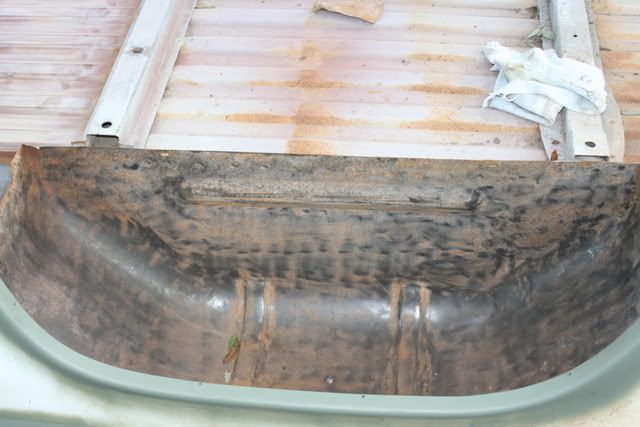
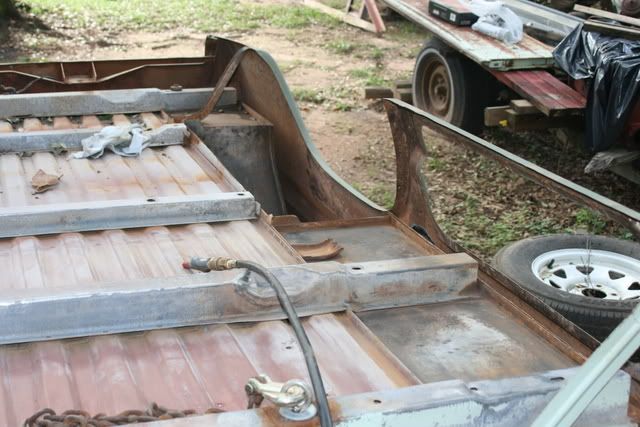
Cleaning of the bottom has begun so the POR15 can be applied.
Image

Image

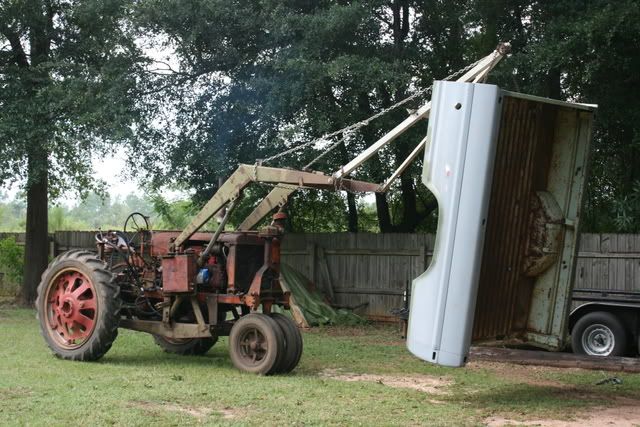
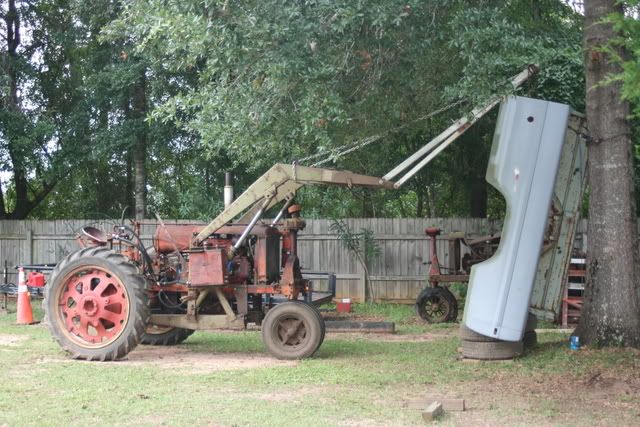
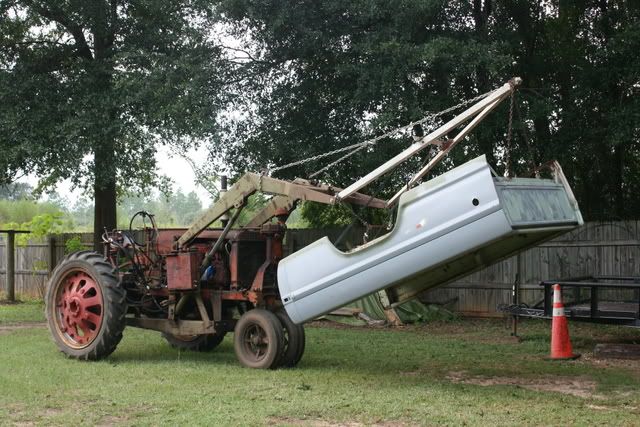
It got to the point that we can't manhandle the bed anymore for fear of screwing up some of the completed body work. So, the services of the F-20 have been enlisted...
Image

Image

Image

Image

The rust between the box and the outer body panels is pretty hard to get to. Most of the cleaning there took place with 60 grit sand paper by hand. It's not shiny metal, but the POR15 can says seasoned metal is better. Well, this is seasoned all right. Should be able to get some POR15 spread around in there this week.
Chris
72 F100 Stepside w/ 78 300 CID
Hedman Headers
Disc Brakes
Power Steering with 3 STILL on the tree
Comfy Crown Vic Seats

71 F250 PS, PB, AC, Auto, 390
Loooong way to go on this one!

ImageImage
ImageImage
User avatar
72stepside
Blue Oval Fan
Blue Oval Fan
Posts: 537
Joined: Tue May 09, 2006 10:31 pm
Location: Florida, Milton
Contact:

re: Project "Uncle Fester"-9/2 Bed bodywork update

Post by 72stepside »

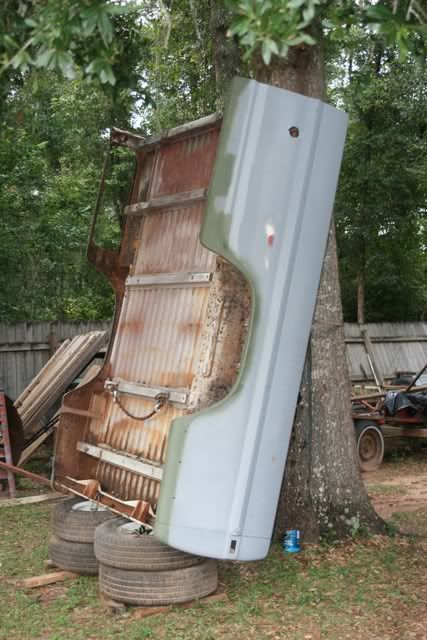
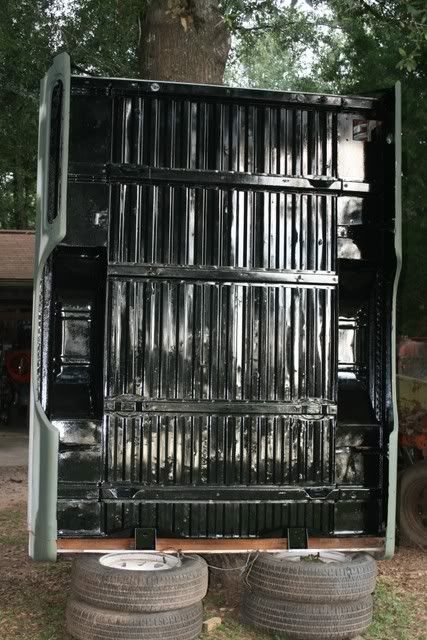
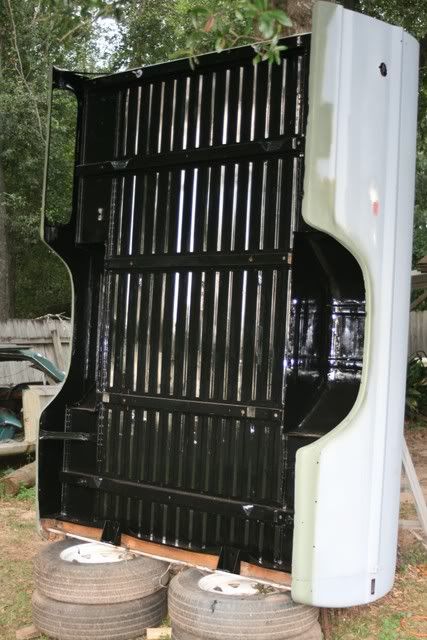
Finally got the underside of the bed all cleaned up and ready for POR-15. Took a few hours to find all the dents in the bedfloor and knock them out. Alot of hand sanding between the box and the outer 'fenders' to knock the mud and loose rust scale off. Applying the coating was a bit of a challenge as well. We used a 3ft long 1x1 board as a handle for the "throw away" paint brushes. We ended up using screws to hold the brushes to the handle at various angles to get it painted. Some areas could be reached with a small foam roller. All in all, it turned out pretty well and is far better than it was. I'll apply POR to the rear edge under the bed at a later date. All the dirt and crud from the upper portion accumulated there during the cleaning and wasn't coming out with the bed leaned against the tree.

Image

Image

Now the bed won't have to be turned upside down again. It is on tires and sawhorses for the box cleaning. Spent some time yesterday digging old seam sealer out of the cracks in the floor and the interior bed walls. After 37 years, most of it had held up pretty good.

We're experiencing far outer rain bands from Hurricane Ike today so I doubt much will get done today, other than what I'm sure my father has already completed.

Later...
Chris
72 F100 Stepside w/ 78 300 CID
Hedman Headers
Disc Brakes
Power Steering with 3 STILL on the tree
Comfy Crown Vic Seats

71 F250 PS, PB, AC, Auto, 390
Loooong way to go on this one!

ImageImage
ImageImage
User avatar
1971ford
100% FORDified!
100% FORDified!
Posts: 5565
Joined: Wed Jul 04, 2007 1:05 pm
Location: Placerville CA

Post by 1971ford »

suh-wheet! :thup:
i just got my metal ready today so i can paint my bed this weekend just like you did.
looks totally spiffy 8) cant wait to see more!
-Ryan
User avatar
Joshpow
100% FORDified!
100% FORDified!
Posts: 1790
Joined: Fri Jan 21, 2005 10:43 am
Location: Virginia
Contact:

re: Project "Uncle Fester"-9/10 POR under the bed

Post by Joshpow »

Looking good. That's a lot of good work done on the bed. You got it right though. I got to do the seams on my 72 swb. I guess I need to invest in some POR 15 for it. Like the handling system for the Farmall. That's one good way to keep down a hurt back. Keep us posted.
Josh

72 F-100 Ranger XLT SWB
71 F-100 Custom SWB
67 F-350 Dually Dump
02 F-250 Stroke
http://www.cardomain.com/ride/2972100
User avatar
72stepside
Blue Oval Fan
Blue Oval Fan
Posts: 537
Joined: Tue May 09, 2006 10:31 pm
Location: Florida, Milton
Contact:

Re: Project "Uncle Fester"-9/10 POR under the bed

Post by 72stepside »

It was sure good to get the bed flipped right side up and not have to worry about flipping it over again to work underneath.

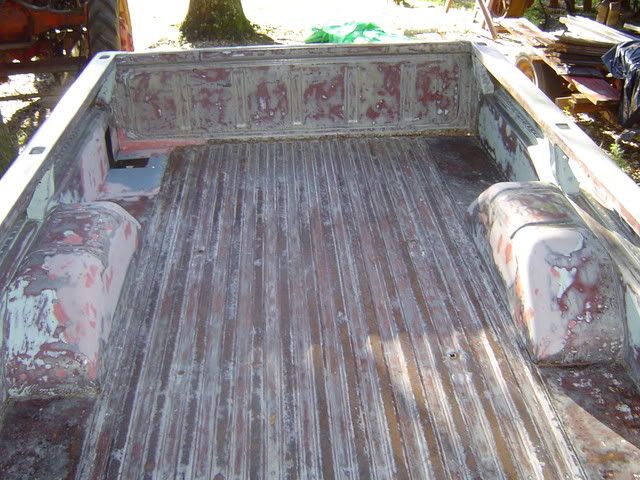
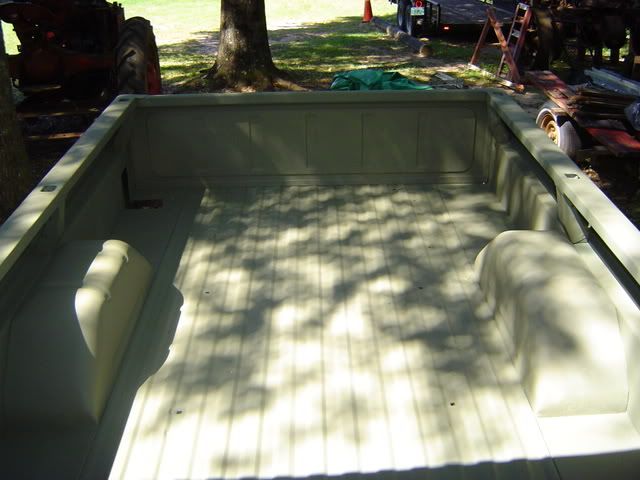
My father (mostly) and I sanded, and scrubbed and scraped and finally got the interior to a place where etching primer could be applied. A 'Mouse' sander and a DA sander did all the work. The mouse sander did pretty well with 50 grit pads. I didn't want to blast due to the mess and I'm not real keen on chemical strippers, although we did use a little naval jelly in a place or two.

Here are a couple of before and after pics.

Image

Image

Remember, the lower portion below the gas filler hole was gone.
Image

Image

Tomorrow, I'm gonna get the seam sealer applied to all the floor seams and the side seams. I sealed the side seams up with POR-15, and primed while tacky. I had too much in there the first time and it bubbled up. I dug it all out and put a very thin coat of POR-15. Perfect, no bubbles !
Chris
72 F100 Stepside w/ 78 300 CID
Hedman Headers
Disc Brakes
Power Steering with 3 STILL on the tree
Comfy Crown Vic Seats

71 F250 PS, PB, AC, Auto, 390
Loooong way to go on this one!

ImageImage
ImageImage
User avatar
1971ford
100% FORDified!
100% FORDified!
Posts: 5565
Joined: Wed Jul 04, 2007 1:05 pm
Location: Placerville CA

Re: Project "Uncle Fester"-9/28 Bed Sealed !

Post by 1971ford »

WOW
that is unbelievable knowing that the lower section of the bed used to not be there due to rust :eek:

great idea on the bed seam, ill do that with mine next time ive got the POR out :thup:

BTW: i think you have passed my lazy butt :lol:
-Ryan
User avatar
72stepside
Blue Oval Fan
Blue Oval Fan
Posts: 537
Joined: Tue May 09, 2006 10:31 pm
Location: Florida, Milton
Contact:

Re: Project "Uncle Fester"-9/28 Bed Sealed !

Post by 72stepside »

1971ford wrote:
BTW: i think you have passed my lazy butt :lol:
Nah, you're working on two trucks now, only one for me. :D
Chris
72 F100 Stepside w/ 78 300 CID
Hedman Headers
Disc Brakes
Power Steering with 3 STILL on the tree
Comfy Crown Vic Seats

71 F250 PS, PB, AC, Auto, 390
Loooong way to go on this one!

ImageImage
ImageImage
User avatar
JWW
Blue Oval Fanatic
Blue Oval Fanatic
Posts: 793
Joined: Wed Apr 11, 2007 7:57 pm
Location: Tennessee

Re: Project "Uncle Fester"-9/28 Bed Sealed !

Post by JWW »

That bed looks great! Great post with pics, will come in handy. :thup:
JWW
1967 F100 Ranger, Auto, 240ci
2004 F150 Crew Cab
My project: http://www.fordification.com/forum/view ... &sk=t&sd=a
User avatar
67mann
100% FORDified!
100% FORDified!
Posts: 1705
Joined: Thu Feb 07, 2008 7:19 am
Location: NY..Mt.Morris 3rdgen. homestead

Re: Project "Uncle Fester"-9/28 Bed Sealed !

Post by 67mann »

:thup: :clap: Nice job on the box--wish my floor would've that solid,but I guess I didn't have to do much on my box sides :D
I've had enough and I'm not alone
http://s267.photobucket.com/albums/ii304/67mann/
User avatar
72stepside
Blue Oval Fan
Blue Oval Fan
Posts: 537
Joined: Tue May 09, 2006 10:31 pm
Location: Florida, Milton
Contact:

Re: Project "Uncle Fester"-Taking a break

Post by 72stepside »

Just taking a little break guys. Been spending alot of time with my daughter, went to a shuttle launch two weeks ago, and am riding the Suzuki Bandit that I got back in September.

The bed is all primed and in the barn with a tarp stretched/suspended over it.

I'll probably start taking the interior and the front apart around Christmas time. I plan to take two weeks off around then so I should have some time.
Chris
72 F100 Stepside w/ 78 300 CID
Hedman Headers
Disc Brakes
Power Steering with 3 STILL on the tree
Comfy Crown Vic Seats

71 F250 PS, PB, AC, Auto, 390
Loooong way to go on this one!

ImageImage
ImageImage
User avatar
72stepside
Blue Oval Fan
Blue Oval Fan
Posts: 537
Joined: Tue May 09, 2006 10:31 pm
Location: Florida, Milton
Contact:

Re: Project "Uncle Fester"-Taking a break

Post by 72stepside »

FINALLY... I'm back at it.

The weather was great this evening when I got home and we get that extra hour of daylight, soooooooooooooooo no more excuses.

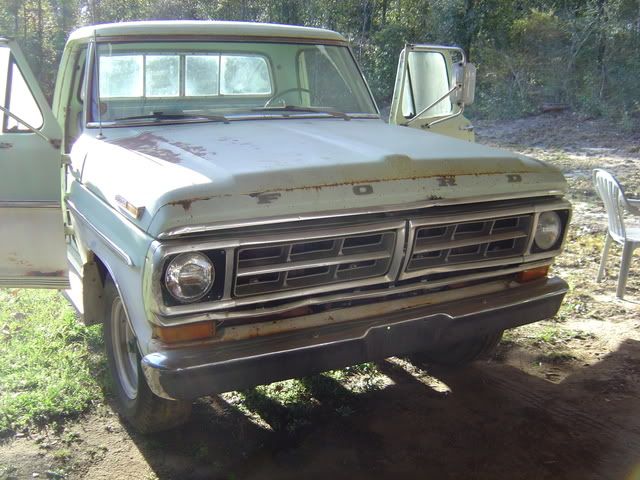
I spent an hour or two and took the grill and stone deflector off.

Before...

Image

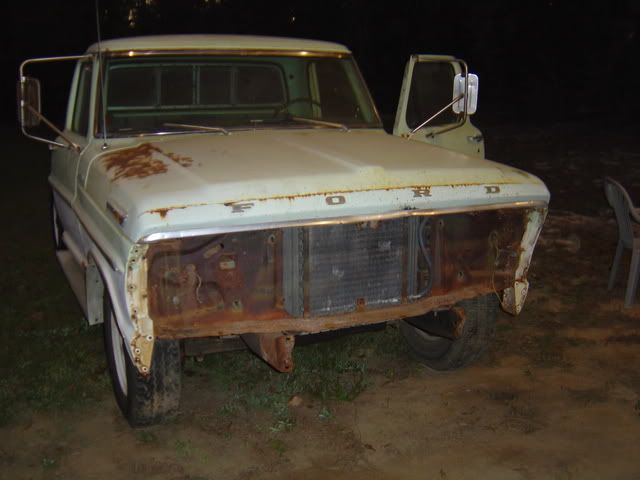
After...

Image


I love my Craftsman impact wrench. It makes short order of all those 1/2" bolts that hold everything together. Well, all except for the 'thank you' bolt that Ford put at the very tip top of the inner fender. Had to use one of my ratcheting box ends for those.

Also, why on earth would they put a screw behind the aluminum trim on the 71 grill inserts? Good thing I'm not re-using the plastic cause those little clips are broke off. Guess I should have posed a question or reseached on here before I snapped them off.

Anyway... onward we go!
Chris
72 F100 Stepside w/ 78 300 CID
Hedman Headers
Disc Brakes
Power Steering with 3 STILL on the tree
Comfy Crown Vic Seats

71 F250 PS, PB, AC, Auto, 390
Loooong way to go on this one!

ImageImage
ImageImage
User avatar
1971ford
100% FORDified!
100% FORDified!
Posts: 5565
Joined: Wed Jul 04, 2007 1:05 pm
Location: Placerville CA

Re: Project "Uncle Fester"- Back at it !

Post by 1971ford »

NIce!

I think behind the trim is a great place to hid support screws. I found them before breaking them off luckily :D

I look forward to seeing more progress!
-Ryan
User avatar
72stepside
Blue Oval Fan
Blue Oval Fan
Posts: 537
Joined: Tue May 09, 2006 10:31 pm
Location: Florida, Milton
Contact:

Re: Project "Uncle Fester"- Front clip is OFF!

Post by 72stepside »

Allright!!!! Finally got that core support off. I didn't realize the metal part of the bushing assembly went through the bolt hole. That is what was all fused together.

After a good bit of PB Blaster, on the driver side I grabbed the bottom (what I thought was just a) washer then turned the bolt with the breaker bar to free up the bolt. That side came right out.

The passenger side bolt finally broke, leaving the bushing assembly/bolt still attached to the frame. Some pounding with the 3 pound persuasion tool and a chisel, mixed with the light touch of a sawzall got it removed.

Image

I then moved on to getting the wiring harness loose from the inner fenders and took out the bolts holding them to the rubber strap to the cab, then they were off.

Image

The core support is pretty bad now that I got a good all around look at it. I need to examine the one from my red parts truck to see how it looks before I start the massive patch job that it would take to fix this one.

Cleaning out the cab and removing it is next.

Stay tuned...
Chris
72 F100 Stepside w/ 78 300 CID
Hedman Headers
Disc Brakes
Power Steering with 3 STILL on the tree
Comfy Crown Vic Seats

71 F250 PS, PB, AC, Auto, 390
Loooong way to go on this one!

ImageImage
ImageImage
f100fordtruck
New Member
New Member
Posts: 230
Joined: Wed May 06, 2009 6:55 pm

Re: re: Project "Uncle Fester" (update 8/25/07)

Post by f100fordtruck »

72stepside wrote:
trukcrazy wrote:Looks great. Interested in doing the brakes on my crews? :thup:
You and I need to meet up somewhere and look at one another's trucks being that we live in the SAME county!!
Ha, just wait and let me get my truck running then we can just all meet up somewhere :thup:
I'll get it one piece at a time and it wont cost me a dime...
Image
f100fordtruck
New Member
New Member
Posts: 230
Joined: Wed May 06, 2009 6:55 pm

Re: re: Project "Uncle Fester" (update 8/25/07)

Post by f100fordtruck »

72stepside wrote:
trukcrazy wrote:Looks great. Interested in doing the brakes on my crews? :thup:
You and I need to meet up somewhere and look at one another's trucks being that we live in the SAME county!!
Ha, just wait and let me get my truck running then we can just all meet up somewhere, since i also live in Santa Rosa :thup:
I'll get it one piece at a time and it wont cost me a dime...
Image
Post Reply