|


|

|
|
|
How
to Resize Graphics for Posting |
|
 |
|
One
of the more frequently-asked questions from
FORDification
forum members and those wishing to post pictures of their
truck in the
Photo Galleries here is..."How do I resize my pictures?"
FORDification.com currently limits a picture's pixel width and
total filesize, to help keep the the site's bandwidth usage and
server space down. Since many of you are taking pictures with
digital cameras that produce images in high-resolution, they
must be resized down for posting here.
THE CURRENT REQUIREMENTS ARE THAT GRAPHICS ATTACHED TO A
FORUM POST OR INCLUDED IN THE PHOTO GALLERIES BE IN .JPG
FORMAT, NO WIDER THAN 800 PIXELS AND THAT THE TOTAL FILE
SIZE NOT EXCEED 250K. IMAGES USED AS FORUM AVATARS CANNOT BE
ANY LARGER THAN 80 PIXELS X 80 PIXELS.
Therefore, in the spirit of helping, I did a lot of searching
and testing of various graphics editors to find one that was
easy to use, intuitive and most importantly...FREE! I have found
that in a program called PIXresizer from
Bluefive
Software.
PIXresizer is a tool for quickly generating screen-friendly
versions of your images with dramatically reduced file sizes. It
is a photo resizing program that enables you to quickly resize
one file or a selection of image files for use on the web and in
e-mail. The reduced files are saved in a different directory, so
your original pictures are not changed.
The program offers several different resizing methods to choose
from and can automatically recognize image sizes to calculate
the best fit. PIXresizer includes a built-in image viewer and
you can also convert between graphics formats: it opens and
saves in .bmp, .gif, .jpg, .png, and .tif formats.
Since PIXresizer is freeware, it can be freely distributed.
Therefore, I'll be keeping a copy of the software here on the
site for downloading, and it's this software that will be used
in the following photo tutorial. Alternatively, you can go
directly to
Bluefive Software and download the latest version. |
 |
CLICK HERE
TO DOWNLOAD PIXRESIZER
Version 1.0.9 - 2.2MB
You will be prompted to choose a location on your
computer to save the zip file to. You will need
WinZip to
extract the installation program. Once extracted,
just double-click 'setup.exe' to install and follow
the prompts. When installation is complete you
should have a shortcut icon on your desktop to the
installed program. Double-click the icon to open the
program and then follow along below. |
|
NOTE: PIXresizer is simply an image resizing
program, not a full-featured graphics editor. It's
only functions are resizing and/or rotating an image
and saving it in assorted formats. If your
requirements include something more, you'll need a
more robust and full-featured program, like Adobe
Photoshop or Corel PaintShop. PIXresizer (and the
tutorial below) is a just a quick and easy way for
anyone with limited computer experience to edit
photos for inclusion in e-mails or posting online.
It works beautifully and is so simple that anyone
can resize their pictures in seconds. |
|
|
Using PIXresizer
By
now you should have PIXresizer installed and have the program
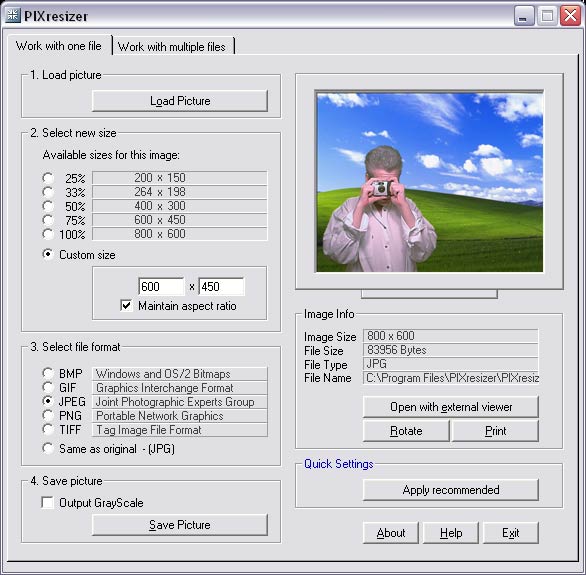
window open and running, where you should see this:
|

Fig. 1 |
|
There are two tabs across the top. Make sure you have the first
tab selected, (labeled 'Work with one file'). In the main
window you'll see that there are four sections along the
left-hand side, numbered 1 through 4. In Section No. 1 you'll
select the picture you want to resize. Click the 'Load
picture' button and navigate to the folder on your computer
where the picture is located to select it. |

Fig. 2 |
|
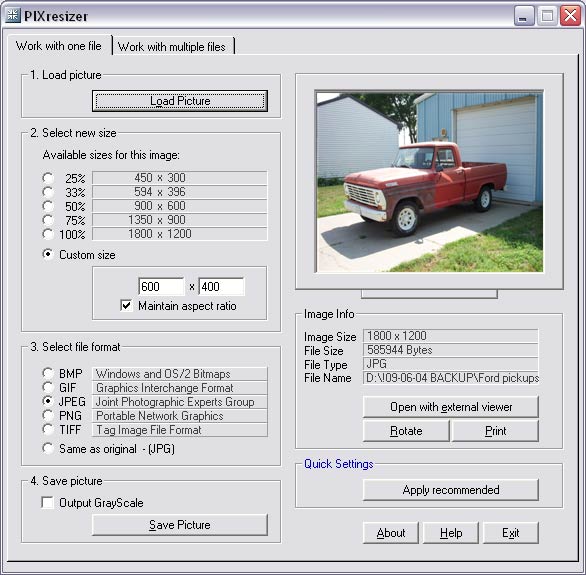
Your picture will then be displayed in the upper-right section
of the program window. (Don't be alarmed if the picture appears
to be distorted...it won't be saved this way. This is just for
visual reference.) You'll see in Fig. 3 that I've loaded
a picture for resizing. Just below it you'll see description of
the photo, including the pixel size. This one measures 1800
pixels by 1200 pixels, and is about 585KB in size. We need to
get this down to a more manageable size, since this will be too
large for posting. |

Fig. 3 |
|
Section 2 of the program window is where you will select
the new image size. You can either select one of the
options in percentages or choose 'Custom size' and enter
in your own dimensions (Width x Length). In wanting to
keep the image no larger than 800 pixels wide, I
could either choose 33% (to make it 594 pixels wide) or
choose 'Custom size' and then manually enter '800' in
the first box, making sure the 'Maintain aspect ratio'
box is ALWAYS selected, to keep the image from being
distorted. So here I'd simply change the '600' to '800'
to change the image width. The new image size for this
example will be 800 x 533. If the image is taller
than it is wide, then it's suggested keeping the width
to no more than about 400 pixels. |

Fig. 4 |
|
Basically what we want to do is ensure that an image is
not so large that a site visitor will have to scroll his
browser to view the entire image....that is, the entire
image should be visible on his monitor. Of course, since
different people have their monitors set to varying
screen resolutions, the above suggestions are simply a
good compromise between those viewing at a lower
resolution vs. those viewing with a higher setting. |
|
|
Section 3 allows you to change the format in which an image is
saved. The only format allowed on the website and forums is
'.jpg', so just be sure that option is selected.
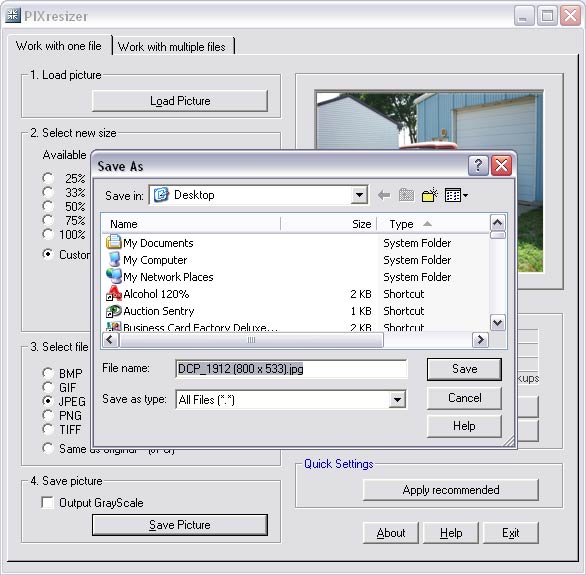
Then
just go down to Section 4 and hit the 'Save Picture'
button, where you be prompted to save the resized image to a
folder on your hard drive. In Fig. 5 you can see that my
original image, which was named 'DCP_1912.jpg', has been
changed to 'DCP_1912 (600 x 800).jpg', to preserve the
original file. In this dialog box you can rename the file to
something else if you want or just leave it and choose the
destination folder, and then click 'Save'. |

Fig. 5 |
|
...and that's it! You're done! See how easy that was? You may
now repeat the process for each of the pictures you want to
resize.
However, if you have a large collection of photos to resize, you
might find it's faster and easier to do a batch resize, by
selecting the second tab along the top of the PIXresizer window
(labeled 'Work with multiple files'). This will resize all
images in a specific folder to dimensions that you choose.
If
the purpose of resizing your pictures was to include them in
your own album in the FORDification Photo Galleries, you can
follow the link below for a basic tutorial on how to get your
pictures posted there. |

|
 |

Want to link to
this site? Please save this banner to your hard drive to place on your
webpage.
The correct link to use is
http://www.fordification.com
|