1968 F250 Project
Moderator: FORDification
- flyboy2610
- 100% FORDified!

- Posts: 4901
- Joined: Sun Oct 03, 2004 6:42 pm
- Location: Nebraska, Lincoln
Re: 1968 F250 Project
"If the women don't find you handsome, they should at least find you handy."
Red Green
If you're going to live like there's no hell...............
you'd better be right.
http://theworldasiseeit-flyboy2610.blog ... ee-it.html
Red Green
If you're going to live like there's no hell...............
you'd better be right.
http://theworldasiseeit-flyboy2610.blog ... ee-it.html
- pedro69ford
- New Member

- Posts: 115
- Joined: Sat Jan 10, 2009 1:02 pm
- Location: tennesse red boiling springs
Re: 1968 F250 Project
great stuff  keep it coming.
- 1968-f250
- New Member

- Posts: 219
- Joined: Tue May 27, 2014 8:33 pm
- Location: Wisconsin
Re: 1968 F250 Project
Last night I managed to get the new rear shocks in, which was quite the task. The new shocks are load adjusting and were about and inch longer than the original ones, so I had to jack up he rear of the truck and use a bottle jack to push the rearend down enough to get the bolts in. I never want to go through that again. 
-Ray
1964 F100 Short box
1968 F250
1972 F100 4x4
1957 Ford Fairlane 500 convertible (x2)
1979 Ford Bronco (x2)
1956 Ford Thunderbird
When the going gets tough, switch to power tools -Red Green
1964 F100 Short box
1968 F250
1972 F100 4x4
1957 Ford Fairlane 500 convertible (x2)
1979 Ford Bronco (x2)
1956 Ford Thunderbird
When the going gets tough, switch to power tools -Red Green
- flyboy2610
- 100% FORDified!

- Posts: 4901
- Joined: Sun Oct 03, 2004 6:42 pm
- Location: Nebraska, Lincoln
Re: 1968 F250 Project
I gave Frodo the shock treatment as well, but there is an easier way than jacking up the rear end: http://www.fordification.com/forum/view ... 50#p622628
A tip to help the next time you need to do this job.
A tip to help the next time you need to do this job.
"If the women don't find you handsome, they should at least find you handy."
Red Green
If you're going to live like there's no hell...............
you'd better be right.
http://theworldasiseeit-flyboy2610.blog ... ee-it.html
Red Green
If you're going to live like there's no hell...............
you'd better be right.
http://theworldasiseeit-flyboy2610.blog ... ee-it.html
- 1968-f250
- New Member

- Posts: 219
- Joined: Tue May 27, 2014 8:33 pm
- Location: Wisconsin
Re: 1968 F250 Project
That would of been way more simple.flyboy2610 wrote:I gave Frodo the shock treatment as well, but there is an easier way than jacking up the rear end: http://www.fordification.com/forum/view ... 50#p622628
A tip to help the next time you need to do this job.
Anyway, I spent around 6 hours patching the bed floor where some idiot thought it was a good idea to take a chisel and punch multiple holes in the floor.
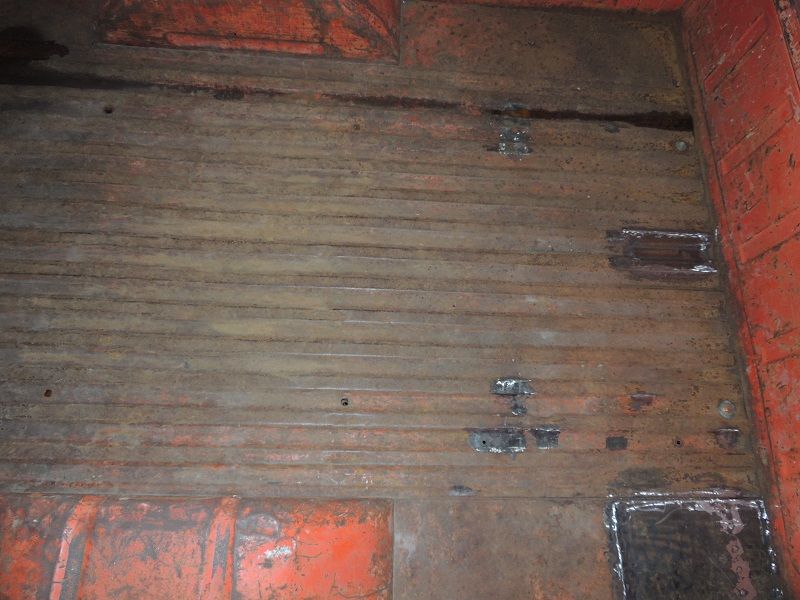
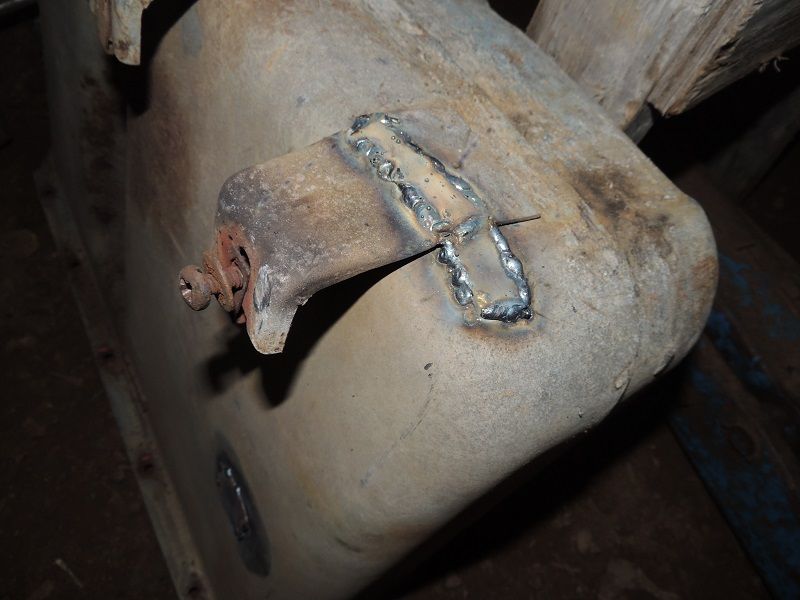
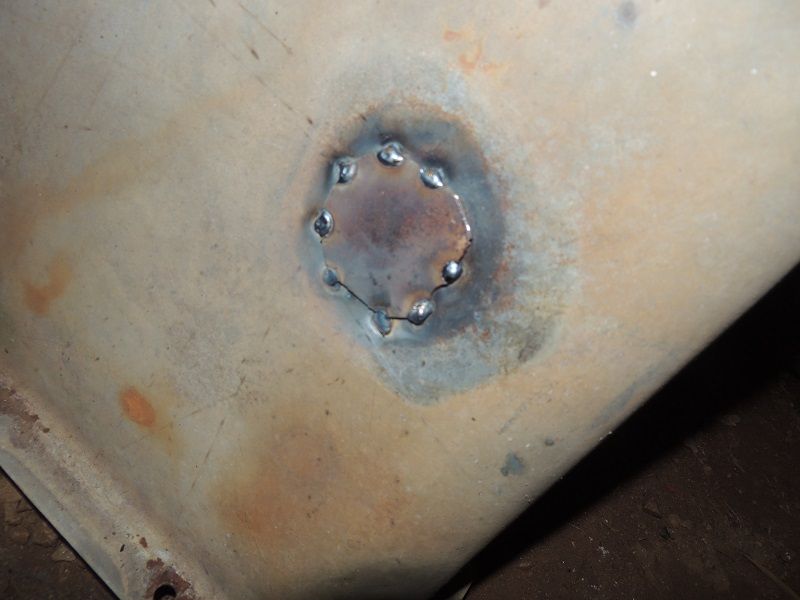
A few more pages and this project might be done! (as if a project vehicle is ever done
-Ray
1964 F100 Short box
1968 F250
1972 F100 4x4
1957 Ford Fairlane 500 convertible (x2)
1979 Ford Bronco (x2)
1956 Ford Thunderbird
When the going gets tough, switch to power tools -Red Green
1964 F100 Short box
1968 F250
1972 F100 4x4
1957 Ford Fairlane 500 convertible (x2)
1979 Ford Bronco (x2)
1956 Ford Thunderbird
When the going gets tough, switch to power tools -Red Green
- 1968-f250
- New Member

- Posts: 219
- Joined: Tue May 27, 2014 8:33 pm
- Location: Wisconsin
Re: 1968 F250 Project
Iv'e been very busy with working on the truck and I'm back with quite a bit of progress to report.  I haven't been able to find much time to post updates, so this is going to be a large one. I'll let the pictures do most of the talking.
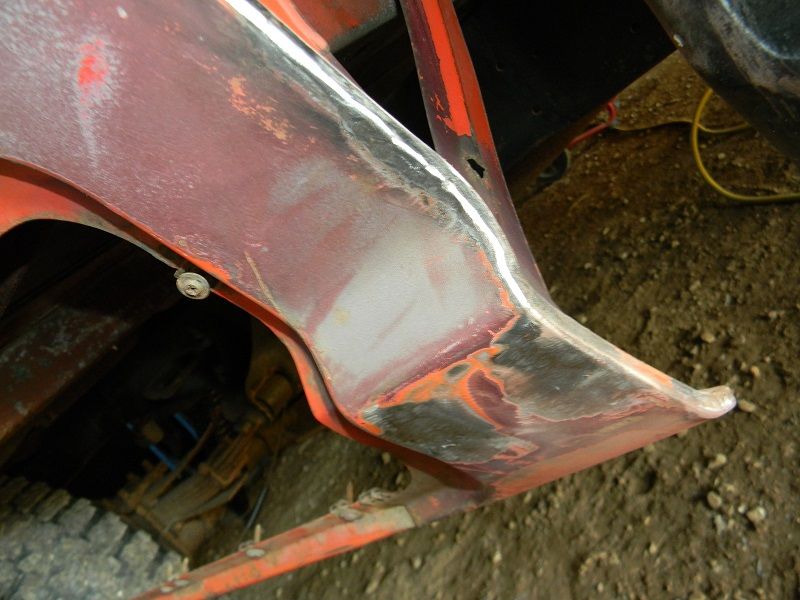
Finished up the metal work on the bed...
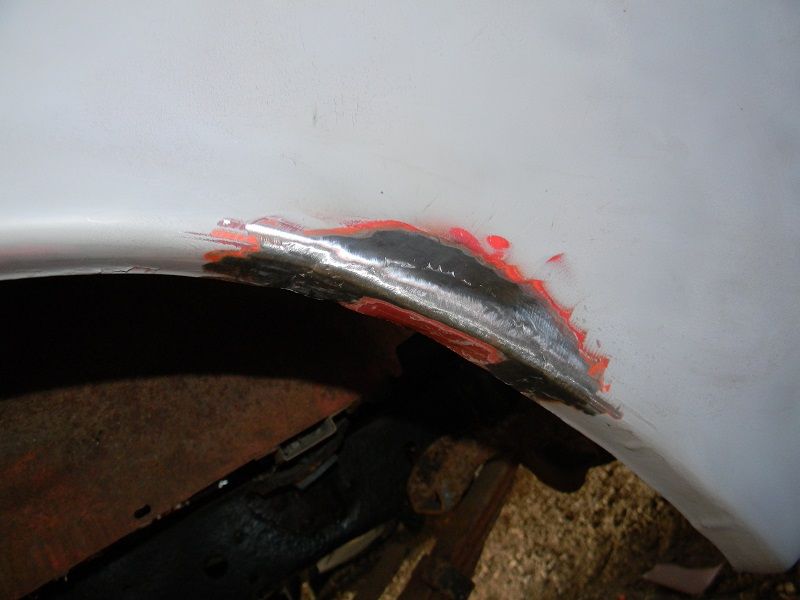
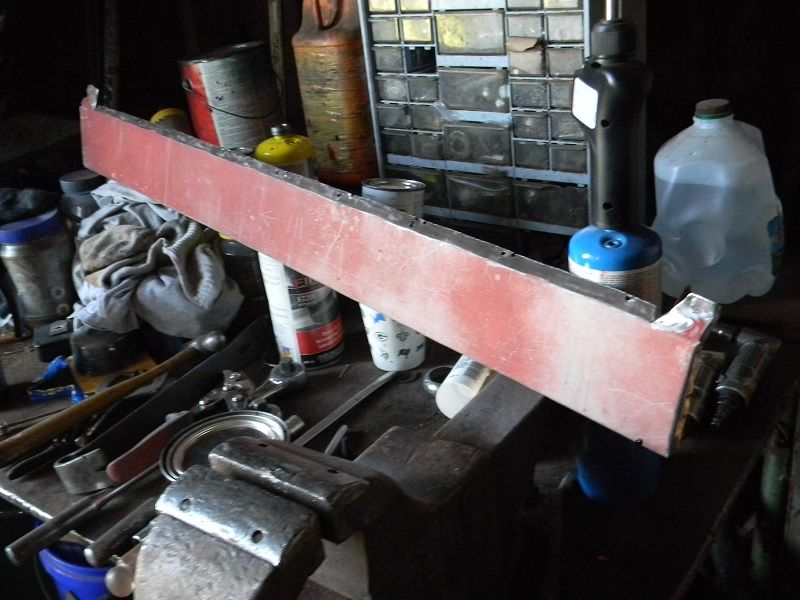
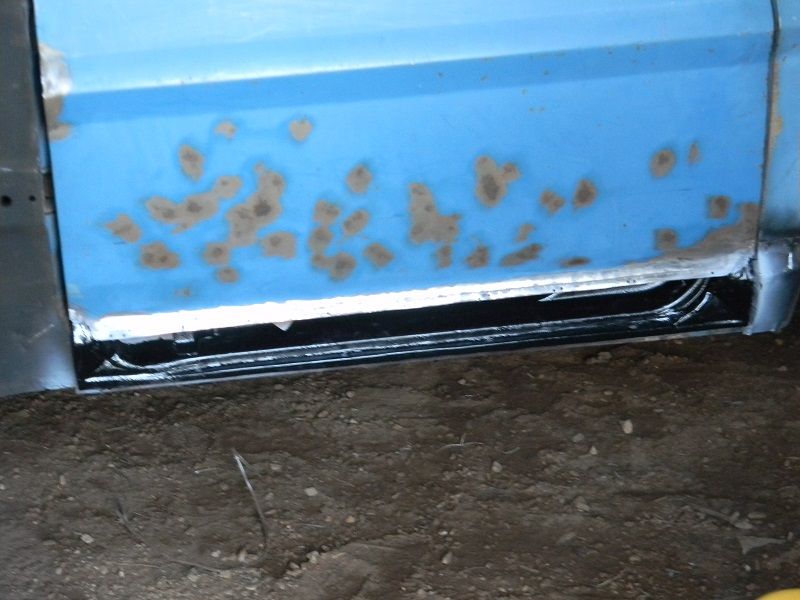
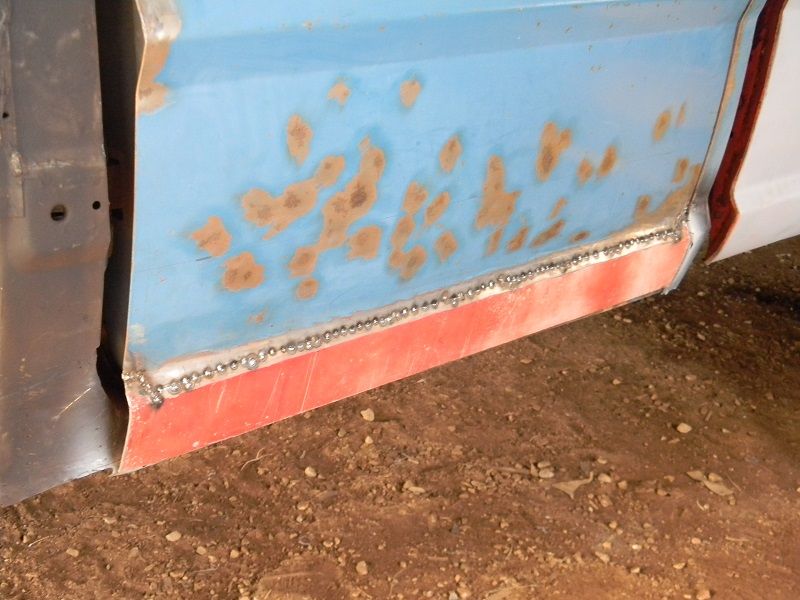
Welded the door skin on the driver's side door. I didn't take a picture of it grinded
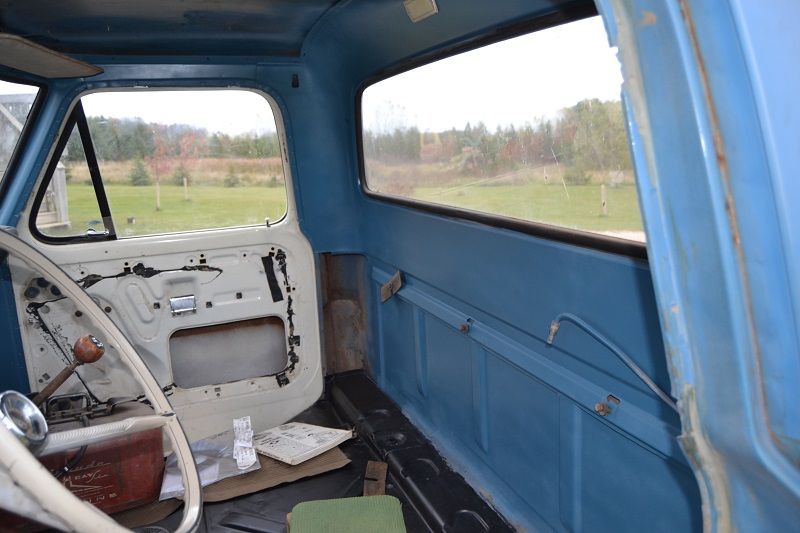
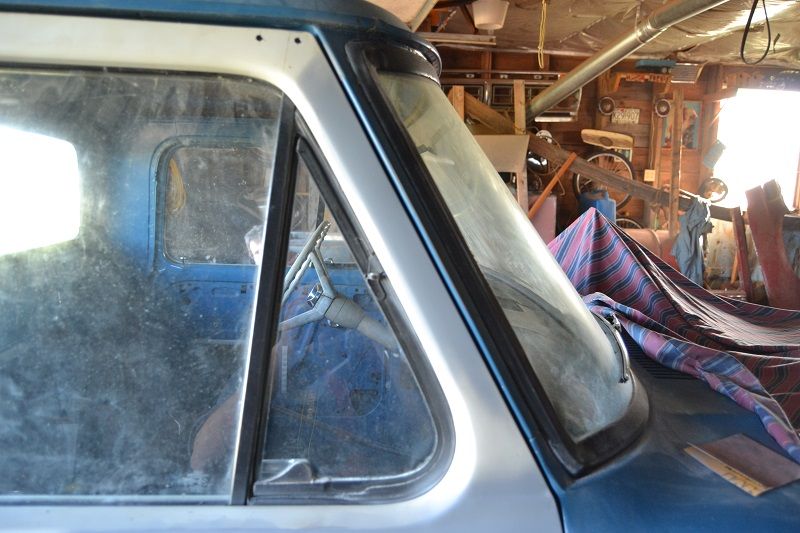
Painted interior, I'm happy with how it turned out. I still need to paint the door jambs and the doors.
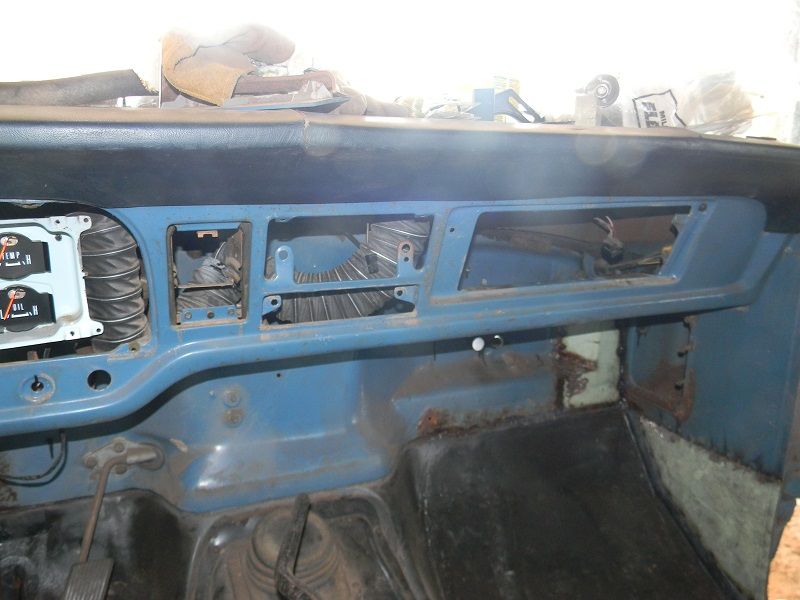
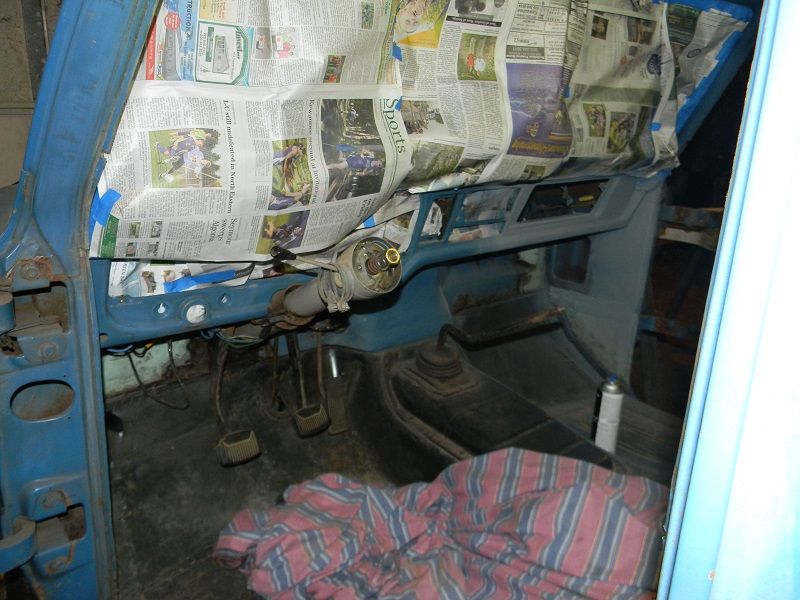
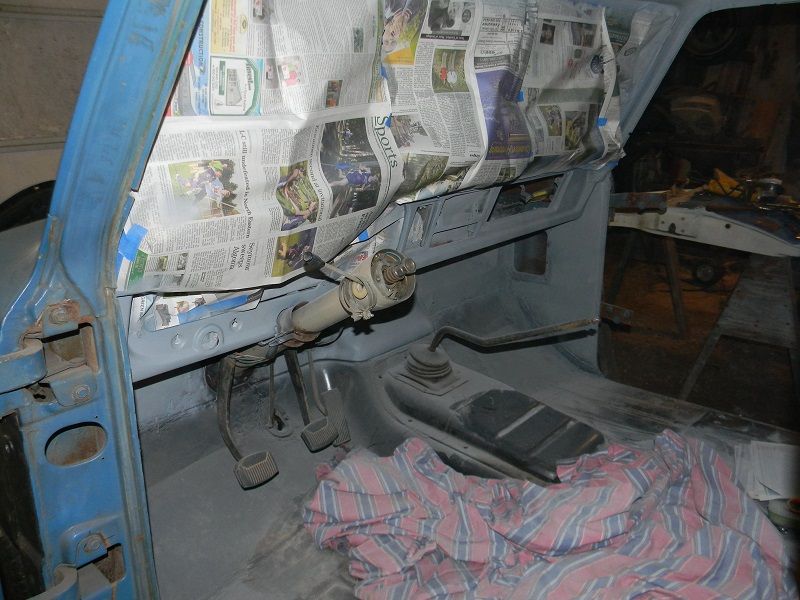
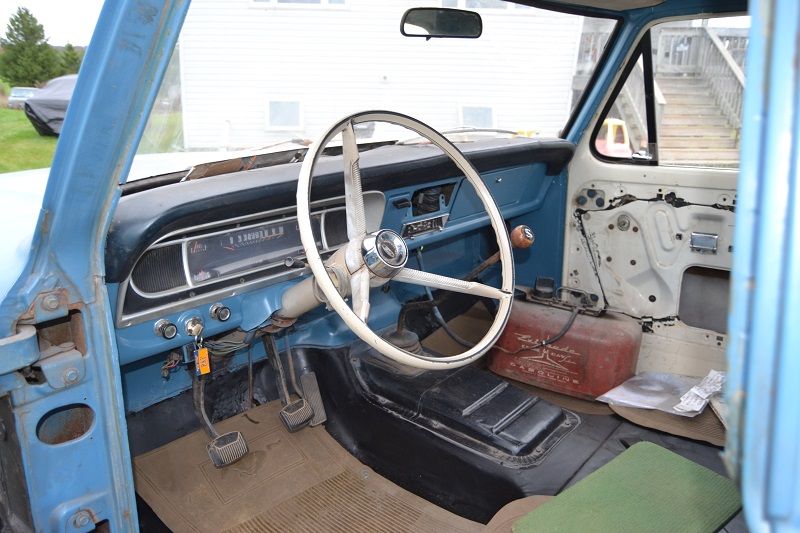
Also had to put a patch in the passenger side door. I didn't get any pictures of it welded in.
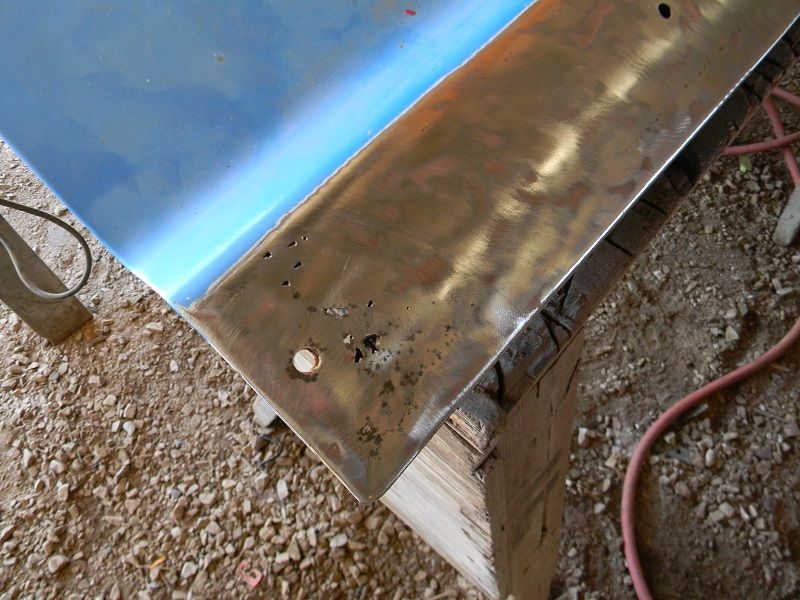
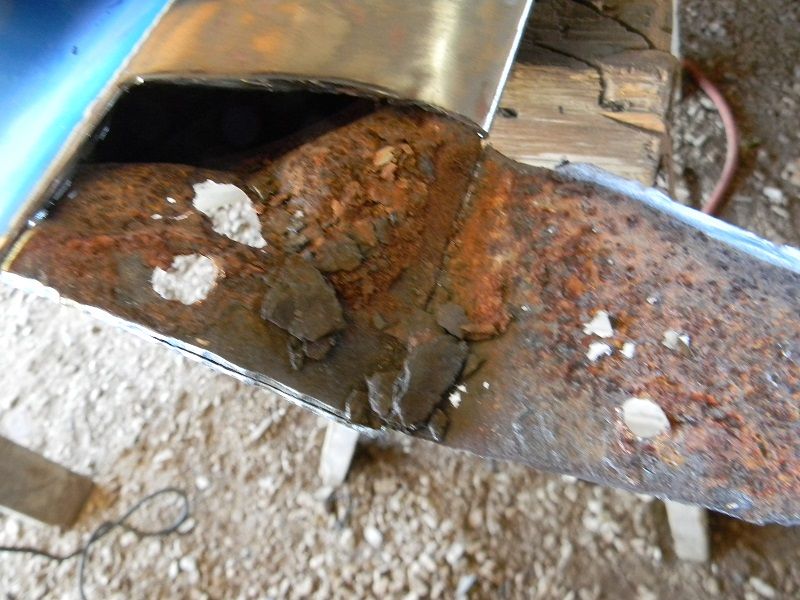

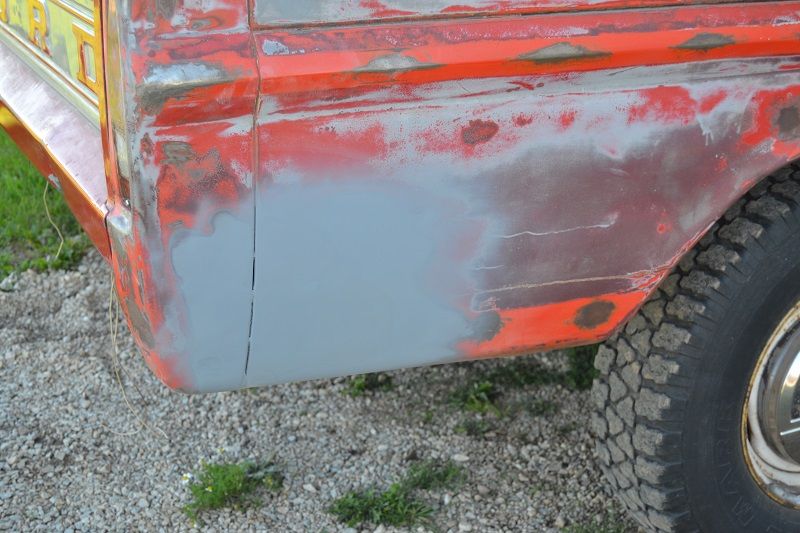
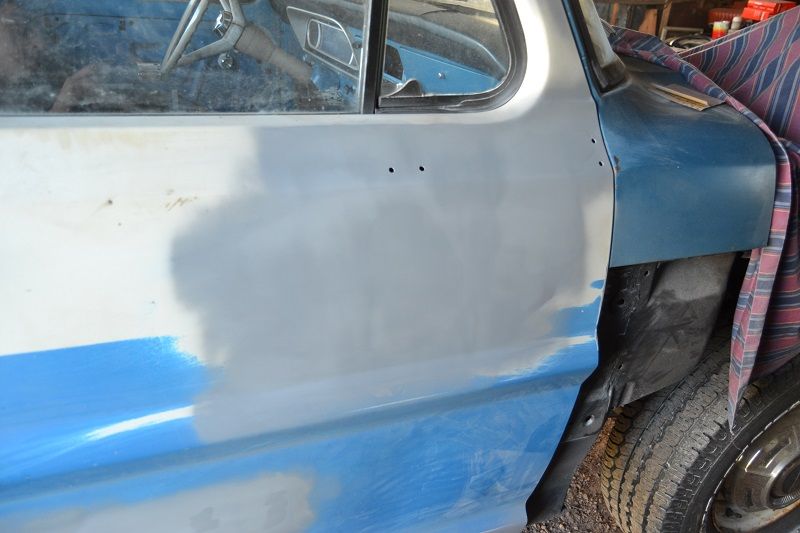
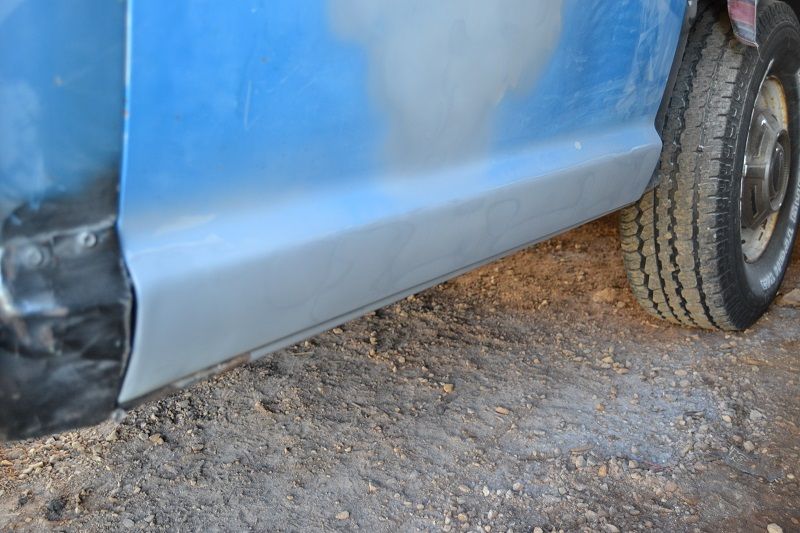
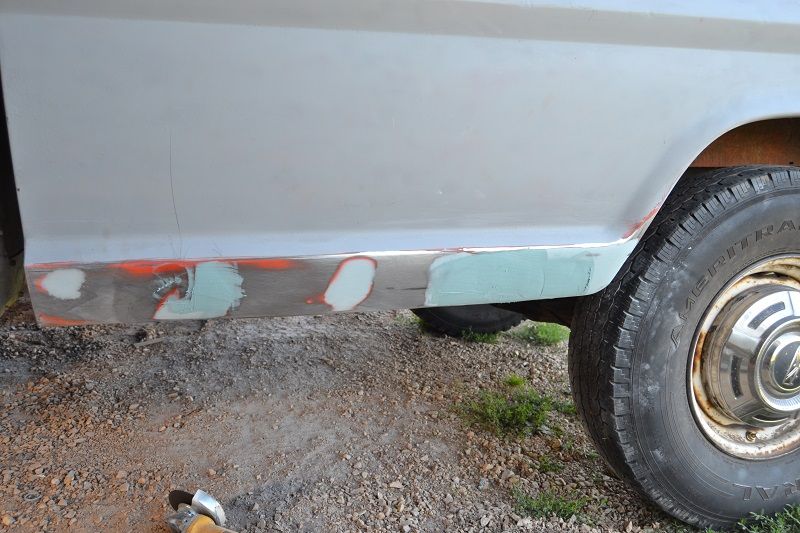
I also started doing some filler work. We figured that we might as well save some money and do it ourselves. I forgot to take pictures before I primed over the spots, but you get the idea. Most of the work on the pass. door was from mirror holes that needed to be welded
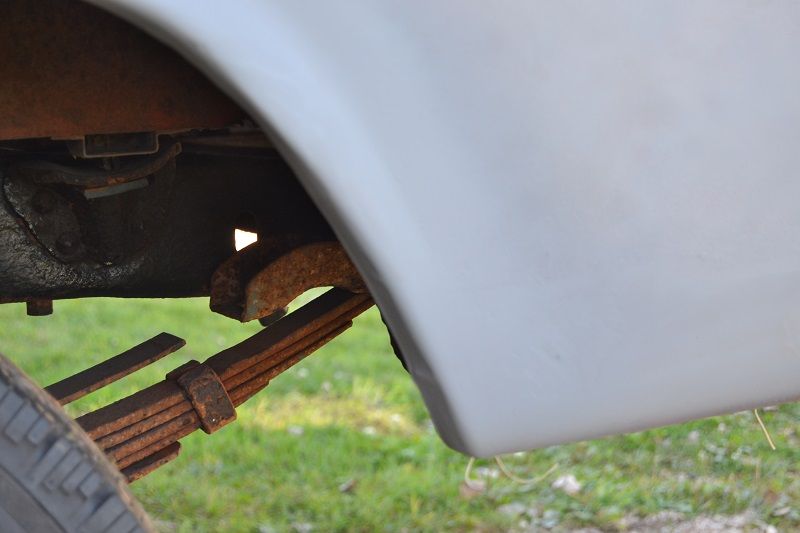
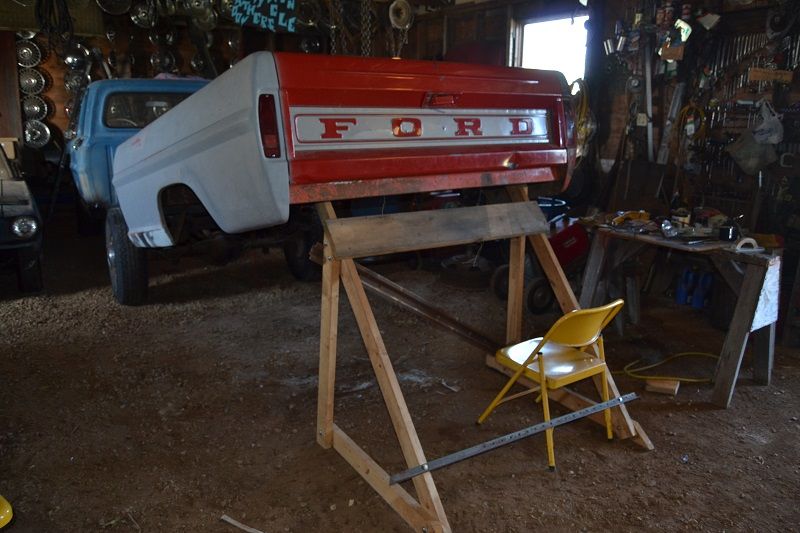
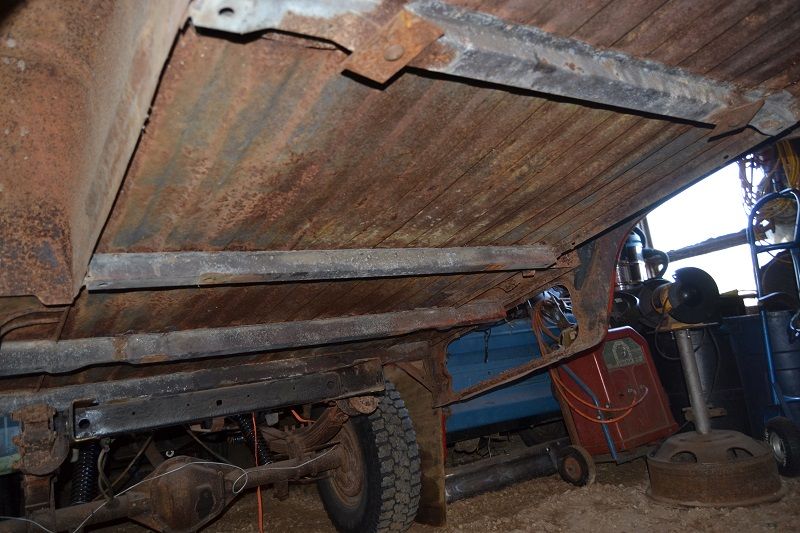
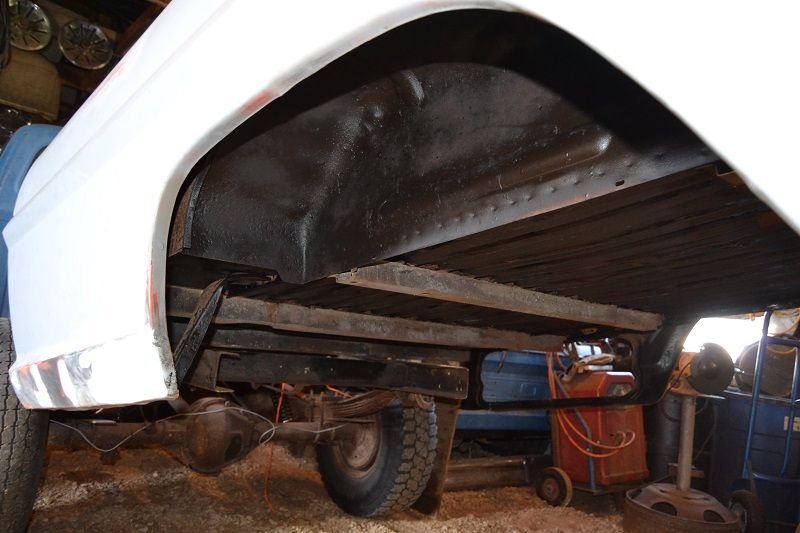
And I'm not done yet... I got the underside of the box cleaned and painted. To do this we lifted the back of the bed with the chain hoist, and drove the truck ahead until the front of the box was resting on the edge of the frame. Then we supported the box with some braces we had hanging up in the rafters. It worked really good and was easy to wire wheel and paint. The wheel wells got undercoated along with the inside of the quarter panels.
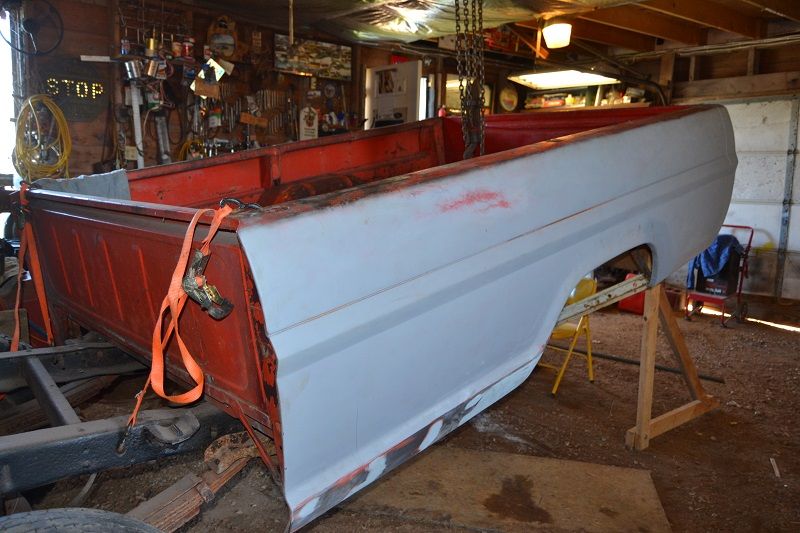
Here's how the truck sits now
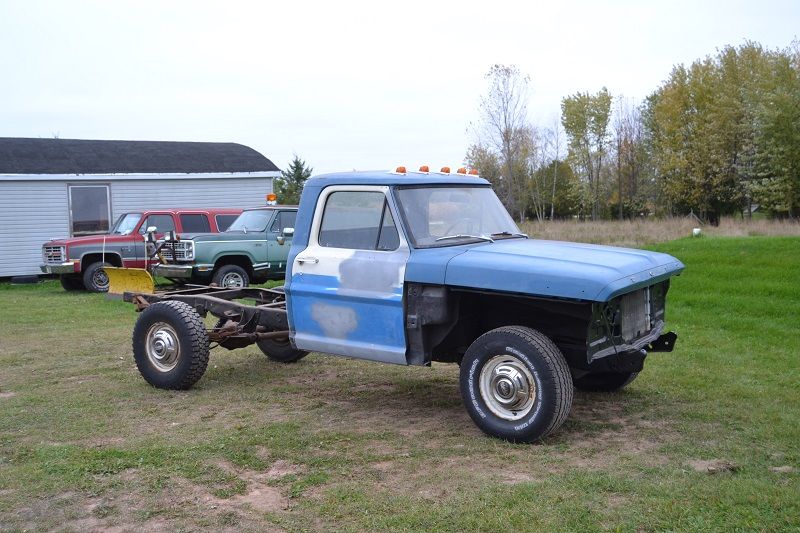
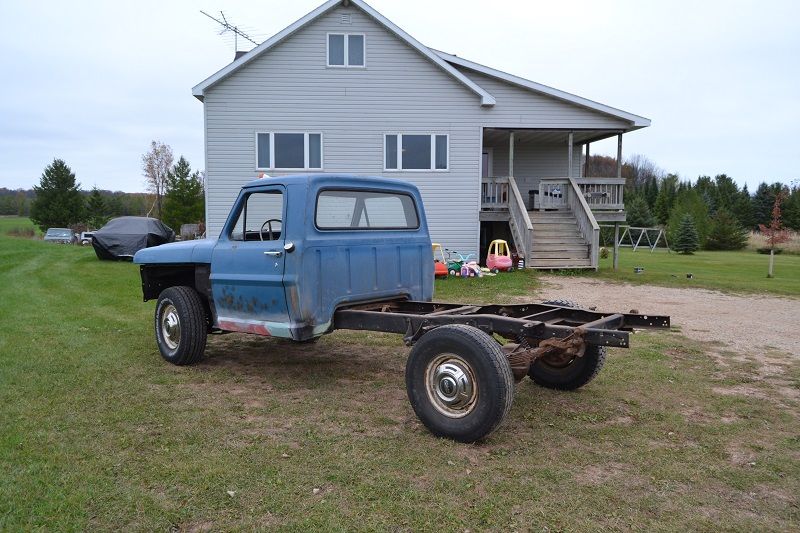
The box is sitting on a trailer now so when we want to do filler work on it we just need to roll it ahead. The cab corners will be welded in shortly and now I'll be going through the brakes and tierods to get it road ready. I know for sure I need a new master cylinder and new line and hoses. The brake shoes looked fine, and I might have to replace the brake cylinders. That's all for now.
Finished up the metal work on the bed...


Welded the door skin on the driver's side door. I didn't take a picture of it grinded


Painted interior, I'm happy with how it turned out. I still need to paint the door jambs and the doors.


Also had to put a patch in the passenger side door. I didn't get any pictures of it welded in.


I also started doing some filler work. We figured that we might as well save some money and do it ourselves. I forgot to take pictures before I primed over the spots, but you get the idea. Most of the work on the pass. door was from mirror holes that needed to be welded


And I'm not done yet... I got the underside of the box cleaned and painted. To do this we lifted the back of the bed with the chain hoist, and drove the truck ahead until the front of the box was resting on the edge of the frame. Then we supported the box with some braces we had hanging up in the rafters. It worked really good and was easy to wire wheel and paint. The wheel wells got undercoated along with the inside of the quarter panels.


Here's how the truck sits now


The box is sitting on a trailer now so when we want to do filler work on it we just need to roll it ahead. The cab corners will be welded in shortly and now I'll be going through the brakes and tierods to get it road ready. I know for sure I need a new master cylinder and new line and hoses. The brake shoes looked fine, and I might have to replace the brake cylinders. That's all for now.
-Ray
1964 F100 Short box
1968 F250
1972 F100 4x4
1957 Ford Fairlane 500 convertible (x2)
1979 Ford Bronco (x2)
1956 Ford Thunderbird
When the going gets tough, switch to power tools -Red Green
1964 F100 Short box
1968 F250
1972 F100 4x4
1957 Ford Fairlane 500 convertible (x2)
1979 Ford Bronco (x2)
1956 Ford Thunderbird
When the going gets tough, switch to power tools -Red Green
- 48prerunner
- Preferred User

- Posts: 495
- Joined: Thu Sep 30, 2010 5:44 pm
Re: 1968 F250 Project
1968-f250 wrote:Earlier today my dad and I started working on the cab mounts, if you can even call them cab mounts anymore. We made up a pattern for the pass. side, and also started working on patterns for the kick board and the parts of the floor pans that need replacing. There is going to be a lot of fabricating and welding, but it its worth it.
Thoselook like the cab mounts JC Whitney used to sell in the 80s I bought a set for my 72 when I was in highschool.
- 1968-f250
- New Member

- Posts: 219
- Joined: Tue May 27, 2014 8:33 pm
- Location: Wisconsin
Re: 1968 F250 Project
I never thought of that, i just assumed that they were home made. I'm just glad the body shop that put them in just bolted the mounts on. That would have been a nightmare to get them off if they were welded in place.Thoselook like the cab mounts JC Whitney used to sell in the 80s I bought a set for my 72 when I was in highschool.
-Ray
1964 F100 Short box
1968 F250
1972 F100 4x4
1957 Ford Fairlane 500 convertible (x2)
1979 Ford Bronco (x2)
1956 Ford Thunderbird
When the going gets tough, switch to power tools -Red Green
1964 F100 Short box
1968 F250
1972 F100 4x4
1957 Ford Fairlane 500 convertible (x2)
1979 Ford Bronco (x2)
1956 Ford Thunderbird
When the going gets tough, switch to power tools -Red Green
- hfdco4
- Blue Oval Guru

- Posts: 1312
- Joined: Mon Apr 01, 2013 1:45 pm
Re: 1968 F250 Project
Great work, the finish line is in sight.
Paul
 FE390PC
1970 F250 4x4
2016 F150 4x4 2.7 ECO
Gone 1997, 1999 & 2003 F150 4x4s
Gone 1988, 1989 & 1991 Broncs
1970 F250 4x4
2016 F150 4x4 2.7 ECO
Gone 1997, 1999 & 2003 F150 4x4s
Gone 1988, 1989 & 1991 Broncs
- 1968-f250
- New Member

- Posts: 219
- Joined: Tue May 27, 2014 8:33 pm
- Location: Wisconsin
Re: 1968 F250 Project
Thank you! I can't wait until I'm crossing that line!hfdco4 wrote:Great work, the finish line is in sight.
I'm currently working on the last of the mechanicals, which is the brakes. Lets just say it's not that fun of a job on an f250 with the way the rear axle is set up. I'll try to find some time to throw in some pictures and give a more thorough update soon.
-Ray
1964 F100 Short box
1968 F250
1972 F100 4x4
1957 Ford Fairlane 500 convertible (x2)
1979 Ford Bronco (x2)
1956 Ford Thunderbird
When the going gets tough, switch to power tools -Red Green
1964 F100 Short box
1968 F250
1972 F100 4x4
1957 Ford Fairlane 500 convertible (x2)
1979 Ford Bronco (x2)
1956 Ford Thunderbird
When the going gets tough, switch to power tools -Red Green
- flyboy2610
- 100% FORDified!

- Posts: 4901
- Joined: Sun Oct 03, 2004 6:42 pm
- Location: Nebraska, Lincoln
Re: 1968 F250 Project
One tool that is quite useful is a thin wall 2-9/16 socket for doing the bearing lock nut. A regular 2-9/16 socket won't fit as the walls are too thick.1968-f250 wrote:Thank you! I can't wait until I'm crossing that line!hfdco4 wrote:Great work, the finish line is in sight.
I'm currently working on the last of the mechanicals, which is the brakes. Lets just say it's not that fun of a job on an f250 with the way the rear axle is set up. I'll try to find some time to throw in some pictures and give a more thorough update soon.
Here is one on eBay:
http://www.ebay.com/itm/KD-2463-2-9-16- ... 70&vxp=mtr
robroy did a good write up of his brake job on a '72 F250. It may have some helpful tips:
http://www.fordification.com/forum/view ... r+adjuster
"If the women don't find you handsome, they should at least find you handy."
Red Green
If you're going to live like there's no hell...............
you'd better be right.
http://theworldasiseeit-flyboy2610.blog ... ee-it.html
Red Green
If you're going to live like there's no hell...............
you'd better be right.
http://theworldasiseeit-flyboy2610.blog ... ee-it.html
- moonhanger007
- New Member

- Posts: 39
- Joined: Thu Jan 27, 2011 9:15 pm
- Location: Idaho Falls, Idaho
Re: 1968 F250 Project
Amazing, I just spent the last hour reading your entire thread!
Keep up the good work, looking forward to more pics.
Keep up the good work, looking forward to more pics.
- 1968-f250
- New Member

- Posts: 219
- Joined: Tue May 27, 2014 8:33 pm
- Location: Wisconsin
Re: 1968 F250 Project
Last summer I had an issue with the drum on the passenger side locking up so I had to pull the drum off to see what the problem was. My dad and I ended up fabbing a socket that would fit the lock nut and it worked real slick. I"ll take a picture of it and post it on here. I also stumbled across robroy's thread and it helped a lot. I'm actually almost finished with the brake rebuild. All I have left to do is put new seals in the front drums/repack bearings, install the new master cylinder, bleed/adjust breaks and adjust the parking brake.flyboy2610 wrote:One tool that is quite useful is a thin wall 2-9/16 socket for doing the bearing lock nut. A regular 2-9/16 socket won't fit as the walls are too thick.1968-f250 wrote:Thank you! I can't wait until I'm crossing that line!hfdco4 wrote:Great work, the finish line is in sight.
I'm currently working on the last of the mechanicals, which is the brakes. Lets just say it's not that fun of a job on an f250 with the way the rear axle is set up. I'll try to find some time to throw in some pictures and give a more thorough update soon.
Here is one on eBay:
http://www.ebay.com/itm/KD-2463-2-9-16- ... 70&vxp=mtr
robroy did a good write up of his brake job on a '72 F250. It may have some helpful tips:
http://www.fordification.com/forum/view ... r+adjuster
Thanks for the support! I'll try to get some pics posted tonight if I have enough time. I can't wait for the truck to be sitting on all fours again. Hopefully this weekend...Amazing, I just spent the last hour reading your entire thread!
Keep up the good work, looking forward to more pics.
-Ray
1964 F100 Short box
1968 F250
1972 F100 4x4
1957 Ford Fairlane 500 convertible (x2)
1979 Ford Bronco (x2)
1956 Ford Thunderbird
When the going gets tough, switch to power tools -Red Green
1964 F100 Short box
1968 F250
1972 F100 4x4
1957 Ford Fairlane 500 convertible (x2)
1979 Ford Bronco (x2)
1956 Ford Thunderbird
When the going gets tough, switch to power tools -Red Green
- 1968-f250
- New Member

- Posts: 219
- Joined: Tue May 27, 2014 8:33 pm
- Location: Wisconsin
Re: 1968 F250 Project
Picture time! 
Here is the box of parts in all of it's glory. I bought the spring kits, star adjust kits, hub seals, front brake hoses, master cylinder. I also splurged and bought two new rear drums. You'll see why in the pictures...
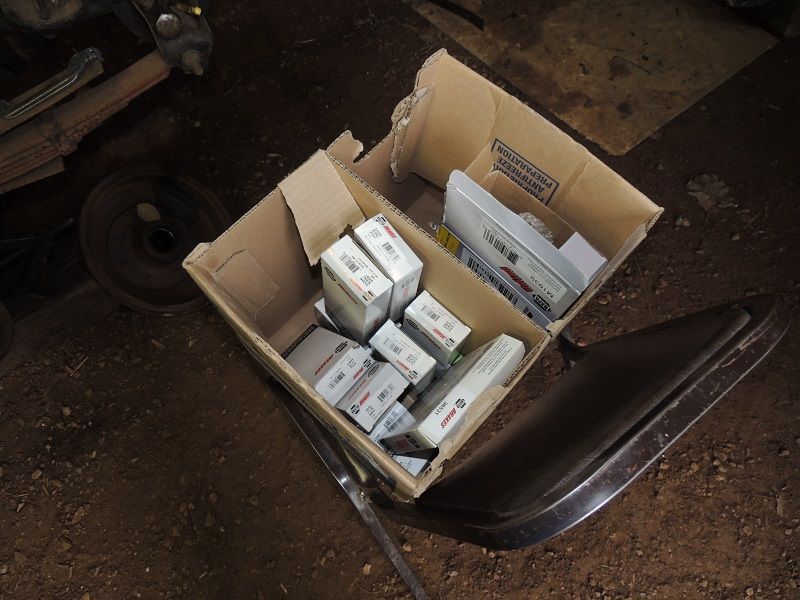
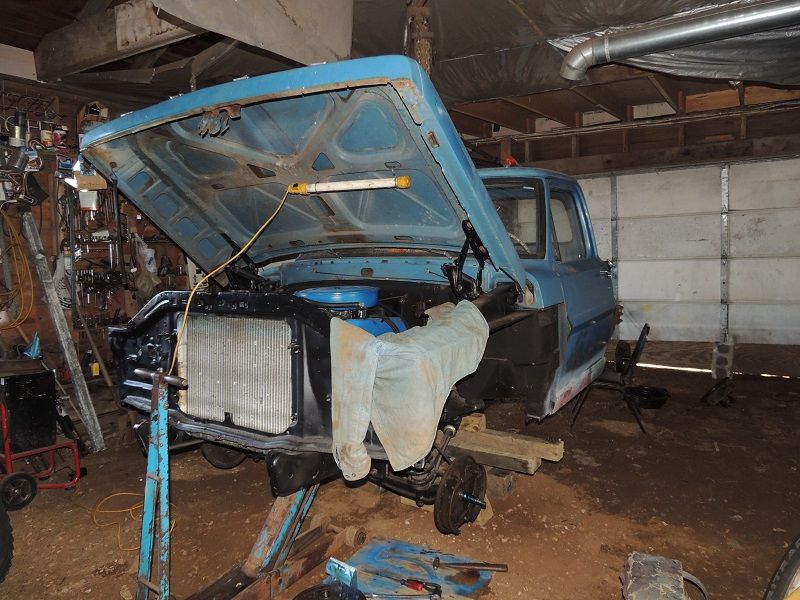
The truck ready for some surgery
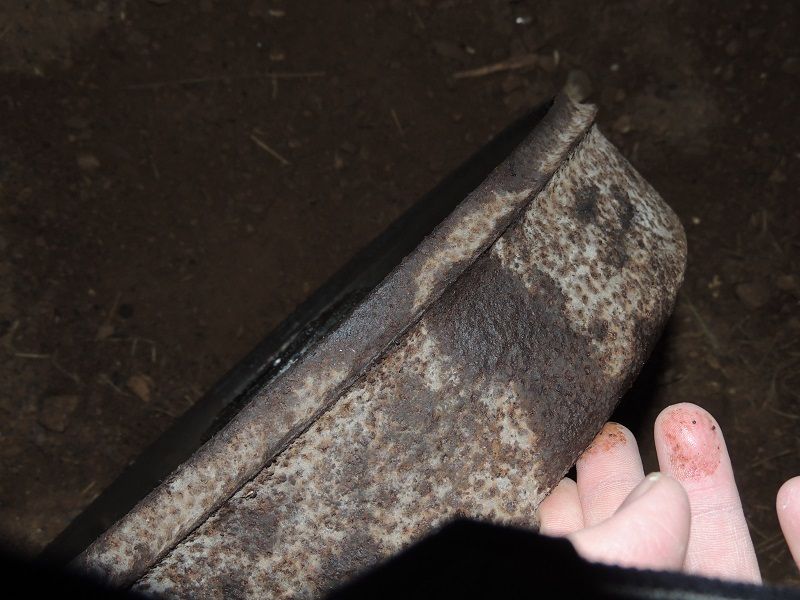
Here's the driver's side drum that rusted away quite a bit. I don't know if you can tell, but there should be another lip on the edge of the drum which rotted away.
Before

They were pretty nasty
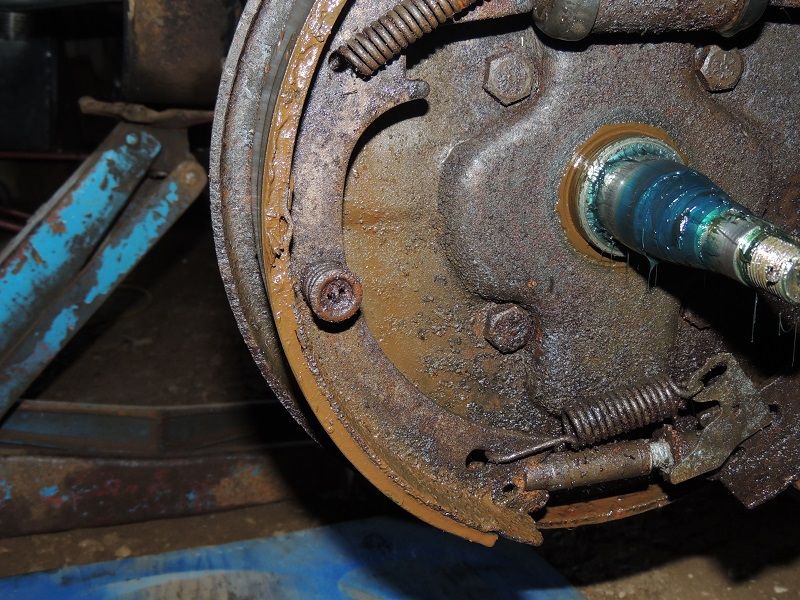
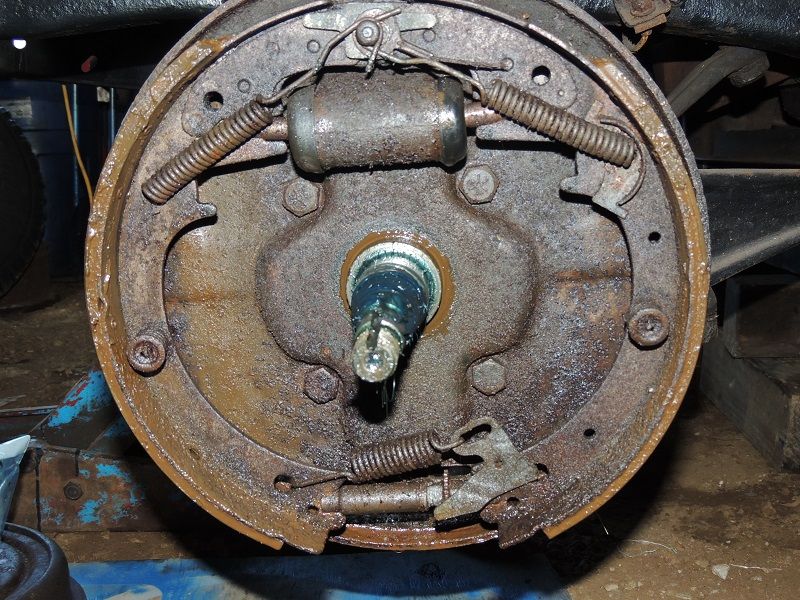
During
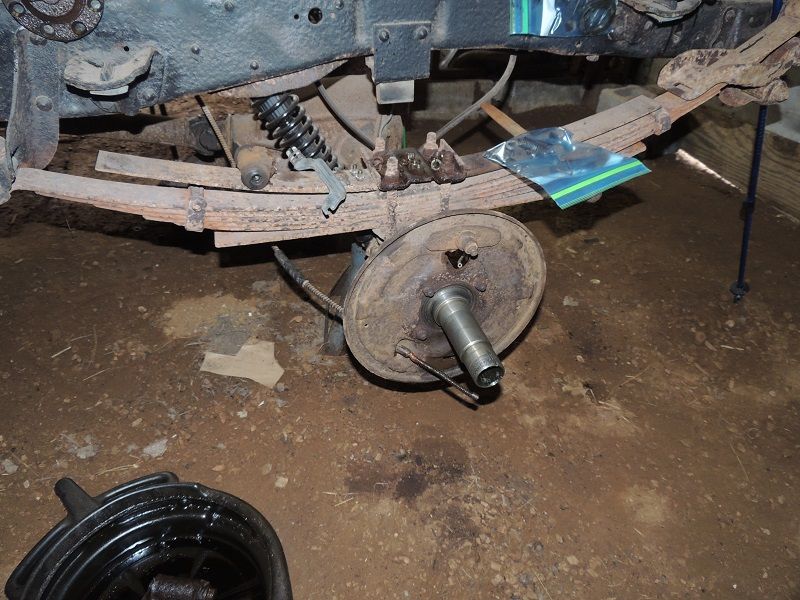
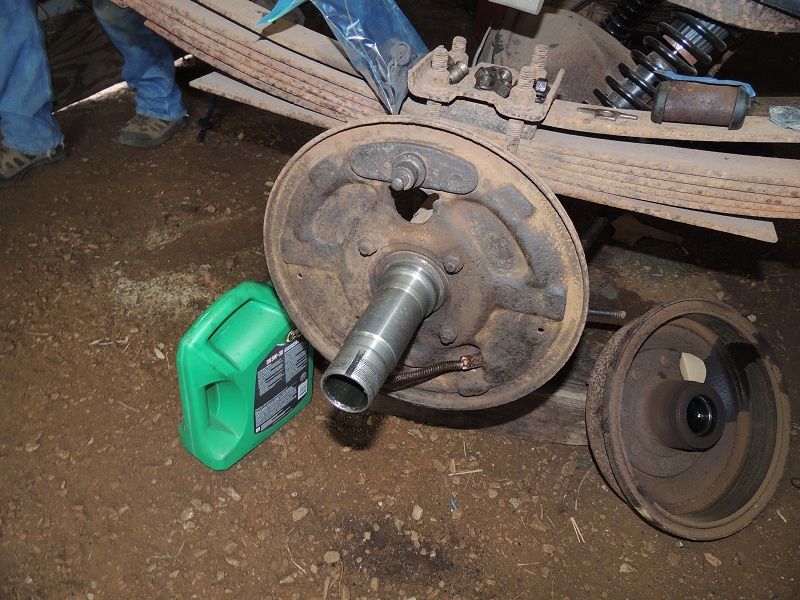
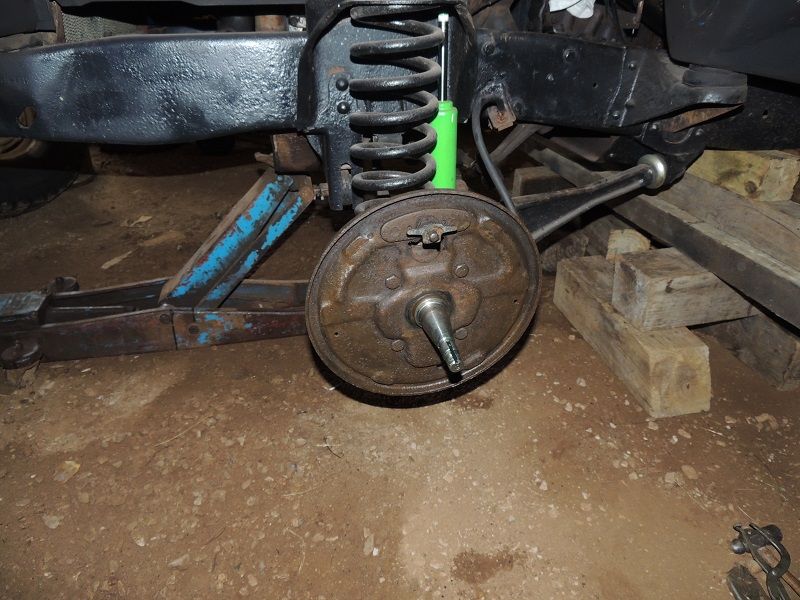
Cleaning brake shoes...
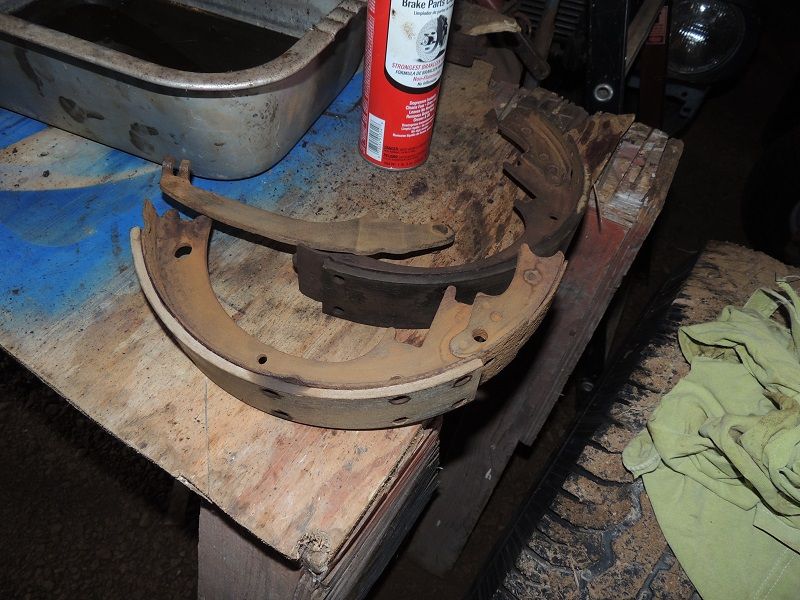
And After
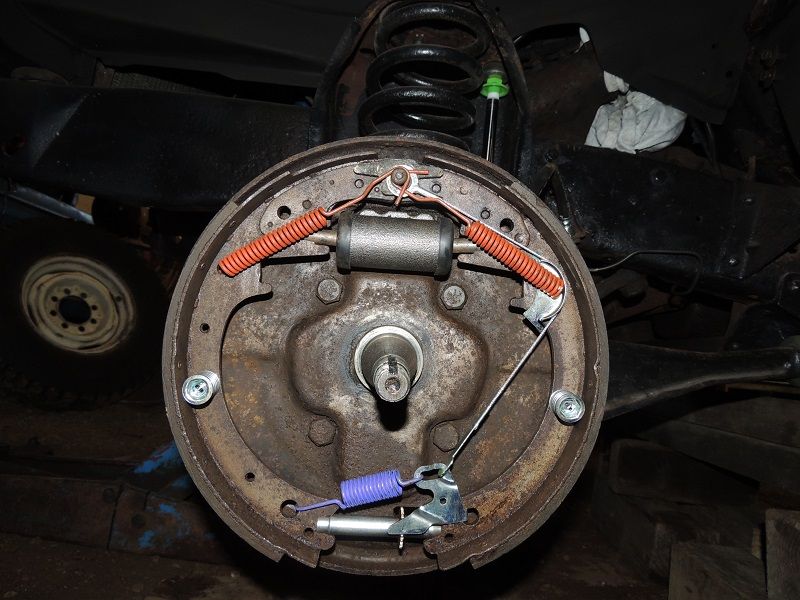
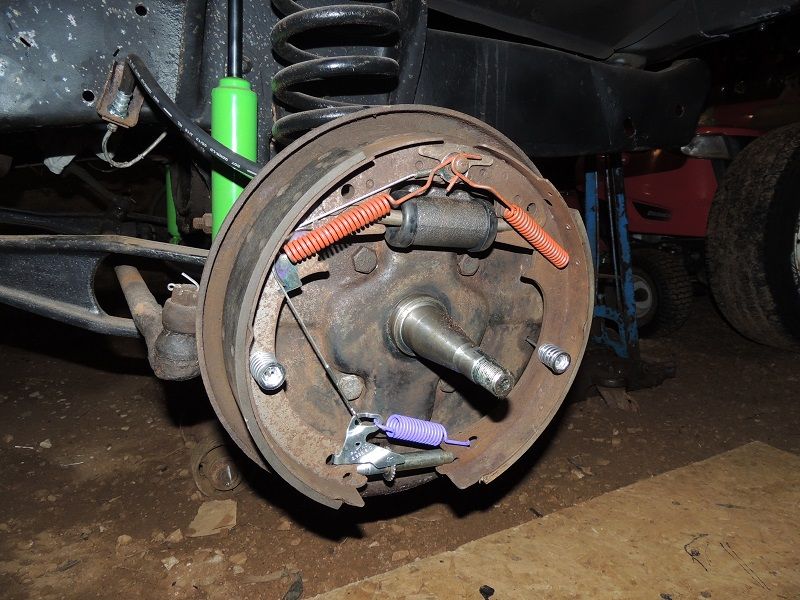
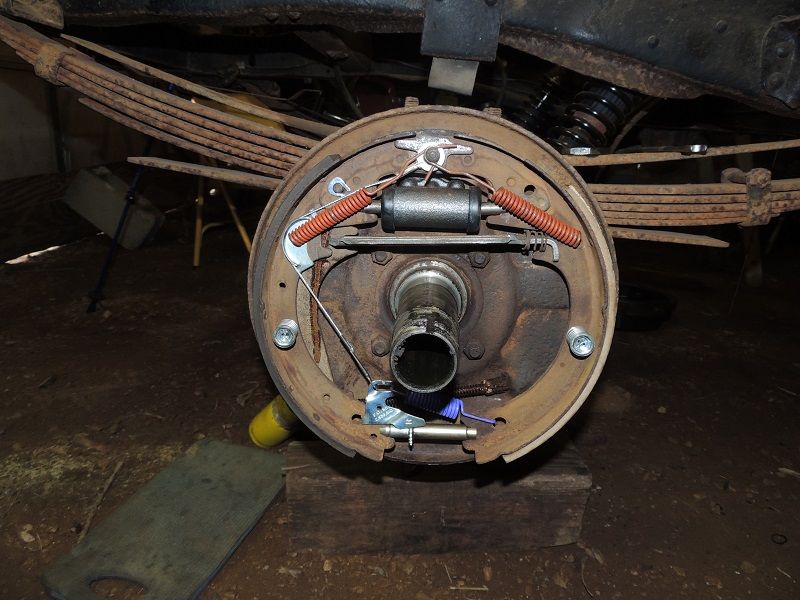
New drum on pass. side
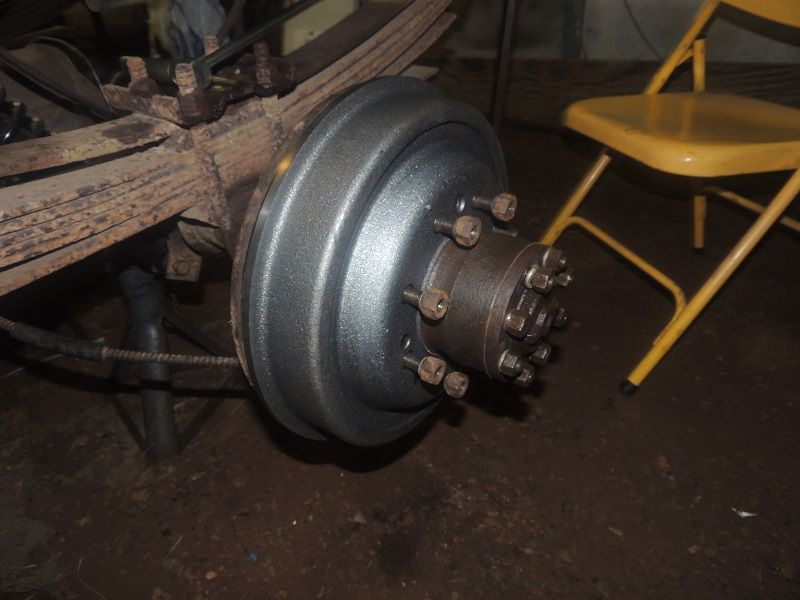
Here is the box of parts in all of it's glory. I bought the spring kits, star adjust kits, hub seals, front brake hoses, master cylinder. I also splurged and bought two new rear drums. You'll see why in the pictures...

The truck ready for some surgery

Here's the driver's side drum that rusted away quite a bit. I don't know if you can tell, but there should be another lip on the edge of the drum which rotted away.

Before

They were pretty nasty


During


Cleaning brake shoes...

And After


New drum on pass. side

-Ray
1964 F100 Short box
1968 F250
1972 F100 4x4
1957 Ford Fairlane 500 convertible (x2)
1979 Ford Bronco (x2)
1956 Ford Thunderbird
When the going gets tough, switch to power tools -Red Green
1964 F100 Short box
1968 F250
1972 F100 4x4
1957 Ford Fairlane 500 convertible (x2)
1979 Ford Bronco (x2)
1956 Ford Thunderbird
When the going gets tough, switch to power tools -Red Green
- popeyes71
- Blue Oval Guru

- Posts: 1176
- Joined: Tue Jan 31, 2012 3:46 pm
- Location: Bay Area, Ca.
Re: 1968 F250 Project
Looking good! It's always comforting to know that you will be able to stop when you need to. Maybe I'm seeing things wrong but the picture you have of the rear brakes finished, it looks like you may have the smaller shoe to the front and the larger shoe to the rear. If so, you are going to want to reverse them, large shoe to the front. Keep up the good work!
-Popeye-
1971 F-250 4x4 Highboy
1966 Chevy Nova, 8 second 10.5 car
1971 F-250 4x4 Highboy
1966 Chevy Nova, 8 second 10.5 car